
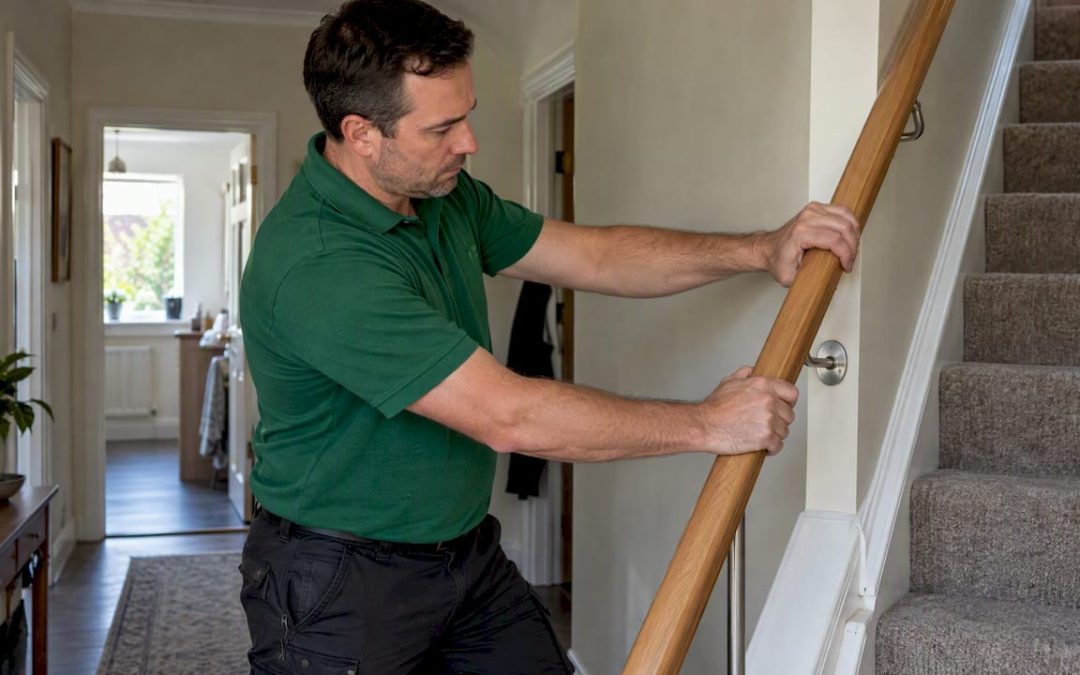
A re-inspection after repairs gives you independent verification, with photos and functional checks, that the work a seller agreed to complete actually happened and actually works. It is not a second full inspection, just a targeted follow-up on the items from your repair list. Book it at least three to five business days before closing whenever your timeline allows.
TL;DR:
- Schedule the visit three to five business days before closing, after contractors finish, and leave a cushion of one or two days for touchups.
- Inspectors verify only listed repairs through visible checks and basic function; sealed work and complex structural, electrical, or plumbing repairs may require specialist signoff.
- If something fails, preserve photos bearing timestamps and report excerpts, then seek a redo, credit, price reduction, or contract termination if your contingency permits.
- Confirm who pays and lender requirements before booking; gather permits, warranties, and an itemized repair list, since invoices alone do not prove the work succeeded.
Table of Contents
- What a re-inspection after repairs covers (scope and limits)
- When to schedule a re-inspection around closing and the walk-through
- Who pays for a re-inspection and what it typically costs
- How a re-inspection differs from the initial inspection
- If repairs are incomplete: your options and how to use the report
- How to prepare for the re-inspection
- How Hunt Home Inspection, LLC approaches re-inspections
- Common issues uncovered during re-inspections
- Best practices for coordinating re-inspections with sellers and contractors
- Seller versus buyer-paid re-inspections: a field perspective
- Schedule your re-inspection with Hunt Home Inspection, LLC
- FAQ
- Sources
What a re-inspection after repairs covers (scope and limits)
A re-inspection is narrow by design. We return only to the items named in your negotiated repair list, confirm the work exists, test basic function where applicable, and photograph the result as a record. We are not re-running the entire original inspection or opening walls to confirm what is behind a new patch of drywall.
That narrow scope has real limits:
- No destructive testing: an inspector checks what is visible and testable, not what is sealed behind finished surfaces.
- No full-system teardown: a furnace that now powers on is confirmed to run, not disassembled to confirm every component.
- Complex repairs (structural, electrical panel work, major plumbing re-routes) often need a licensed specialist’s sign-off rather than a general re-inspection alone.
Contractor receipts alone rarely settle the question. A receipt proves a service was purchased, not that the underlying problem was fixed correctly, which is why independent photographic evidence carries more weight in a dispute than a paper invoice.
A re-inspection typically runs about an hour or so, far shorter than the original visit, because it only touches flagged items rather than the whole property.
When to schedule a re-inspection around closing and the walk-through
Timing is where most buyers lose leverage. The Consumer Financial Protection Bureau advises scheduling inspections as early as possible so you have time to resolve problems, and the same logic applies to a re-inspection: book it before you run out of room to react.
- Aim for three to five business days before closing, which leaves time for a specialist follow-up if something fails.
- Coordinate with the contractor’s finish date first. Scheduling a re-inspection before repairs are actually complete wastes the visit.
- Check whether your lender or appraisal requires proof of specific repairs. Some loan conditions will not clear until that proof exists.
- Treat the final walk-through as a separate, later check, not a substitute for the inspector’s verification.
- If repairs slip past your buffer, consider postponing closing rather than closing on unverified work.
Who pays for a re-inspection and what it typically costs
Pricing follows the same general pattern across the industry: a flat fee for the visit, or a re-inspection bundled into the inspector’s time window when it is scheduled close to the original job.
- Buyers usually pay for the re-inspection unless the seller agreed otherwise during negotiation.
- A typical visit runs about an hour, matching the narrower scope described above.
- Costs rise when a specialist follow-up is needed, when travel distance increases, or when the scope expands beyond the original repair list.
- Asking the seller to cover the fee is a reasonable negotiating point, especially when the original repairs were extensive or contested.
Settling who pays before scheduling avoids a late argument that delays the visit itself.
How a re-inspection differs from the initial inspection
The original inspection is comprehensive: roof to foundation, every major system, documented regardless of condition. A re-inspection is the opposite approach, built entirely around the items your contract specifically required to be fixed.
On a typical re-visit, we check:
- Whether the reported item was actually addressed, not just painted over or covered.
- Operational function: does the outlet work, does the water heater hold temperature, does the door close properly.
- Workmanship quality through visual inspection, including whether the repair matches a reasonable standard.
- Leak checks on any plumbing or roofing item that was part of the original finding.
- Photo documentation of each item, time-stamped as part of the report.
Professional Standards of Practice define the reasonable limits of a visual inspection, which is part of why some repairs, like an electrical panel upgrade or a structural beam replacement, warrant a licensed specialist rather than a general re-inspection alone.
Pro Tip: If a repair involves a licensed trade, like electrical or HVAC, ask for the permit and the trade license number before the re-inspection, not after.
If repairs are incomplete: your options and how to use the report
A failed re-inspection is not the end of the deal, it’s leverage, provided you document it correctly.
- Require the seller to redo the repair before closing, with a new re-inspection to confirm it.
- Negotiate a closing credit equal to the cost of finishing the work yourself.
- Ask for a price reduction that reflects the unresolved issue.
- Terminate the transaction if your contract’s contingency still permits it.
Document everything: keep the annotated report excerpts, the time-stamped photos, and a clear written deadline for remedial action. A buyer inspection contingency spells out your rights here, and knowing those terms before you negotiate changes how hard you can push.
Delaying closing is a legitimate tool when the item affects safety or major system function, but check with your lender first since some loan conditions are tied to a closing date and an appraisal may need to be re-validated if the delay runs long.
How to prepare for the re-inspection
A re-inspection moves faster when you show up organized. Gather these before the inspector arrives:
- The original inspection report excerpt covering each item under negotiation.
- Contractor invoices and receipts for every repair, even though receipts alone don’t prove quality.
- Permits pulled for any work that legally required one.
- Warranty paperwork for new equipment, like a water heater or roof section.
Build a simple itemized list that maps each repair directly to its line item in the original report. That mapping is what NAR’s final walk-through checklist recommends buyers use to confirm paid bills and warranties before closing, and it saves real time during the visit itself.
Before you rely on any contractor, confirm their license is active and ask whether the repair carries a short workmanship guarantee. A guarantee gives you recourse if something fails again shortly after closing.
How Hunt Home Inspection, LLC approaches re-inspections
Re-inspections can be conducted as either video or in-person visits, depending on schedule and repair complexity. Each re-inspection uses a structured workflow to keep the itemized repair list tied directly to the original report so nothing gets lost between agent, seller, and contractor.
Reports, including photo documentation and annotated excerpts for disputed items, are returned promptly. For Illinois and Missouri transactions we work from a documented pre-inspection agreement that sets expectations before the visit. Service discounts are sometimes available for veterans and first-time buyers navigating this process.
Common issues uncovered during re-inspections
Certain problems show up again and again on return visits, and each one changes how you should respond.
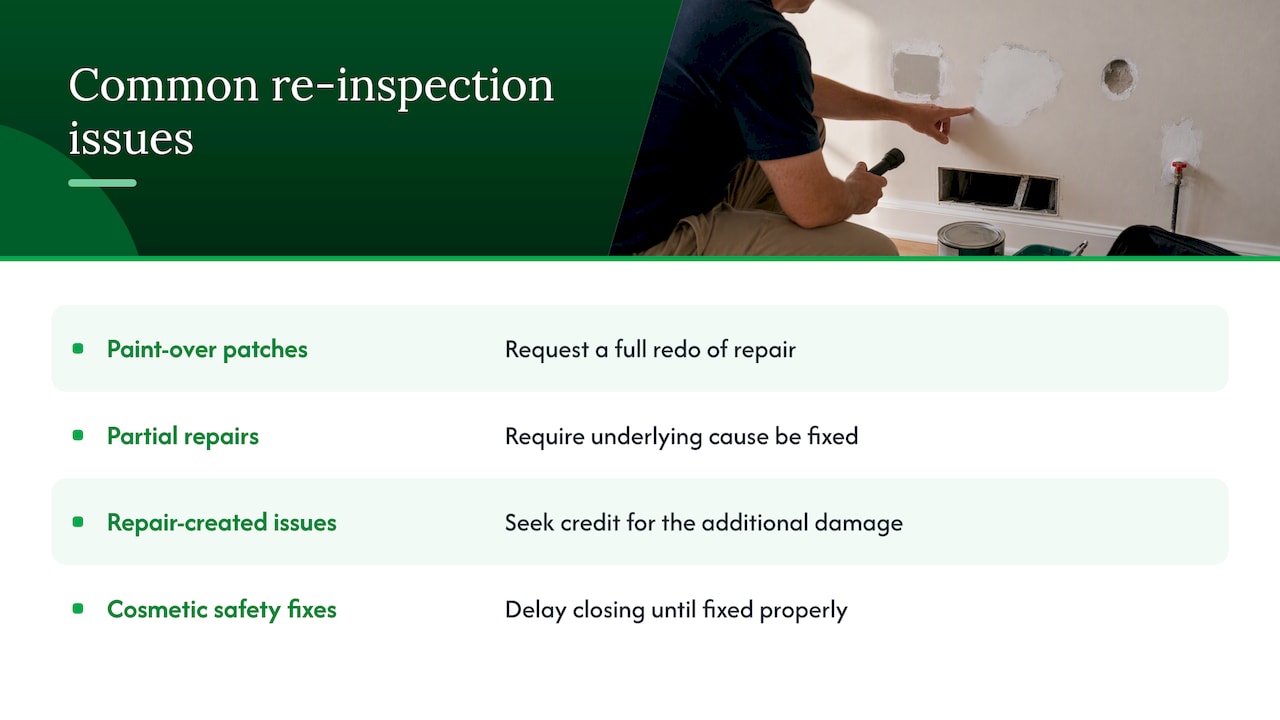
Paint-over patches are the most frequent finding: a water stain or crack gets covered rather than fixed, which a photo comparison against the original report exposes quickly. Partial repairs are a close second, where a contractor fixes the visible symptom (a leaking fixture) but leaves the underlying cause (a failing supply line) untouched, meaning the issue resurfaces within months.
New issues created during the repair process also turn up often: a plumber replacing a fixture nicks a nearby pipe, or an electrician’s panel work leaves an open junction box uncovered. These are arguably more serious than the original finding because they represent damage the seller introduced rather than disclosed.
Cosmetic-only fixes on safety items deserve the most scrutiny. A missing handrail that gets reinstalled loosely, or a smoke detector that’s present but not wired, technically satisfies the letter of a repair request while failing its purpose.
Each of these findings should shift your negotiating posture differently. A paint-over patch is grounds for a firm redo request. A new issue created during repair work often justifies a credit covering the additional damage. A safety item that’s cosmetically but not functionally fixed is the clearest case for delaying closing until it’s corrected properly.
Best practices for coordinating re-inspections with sellers and contractors
Coordination problems, more than the repairs themselves, cause most re-inspection delays. A few habits prevent that.
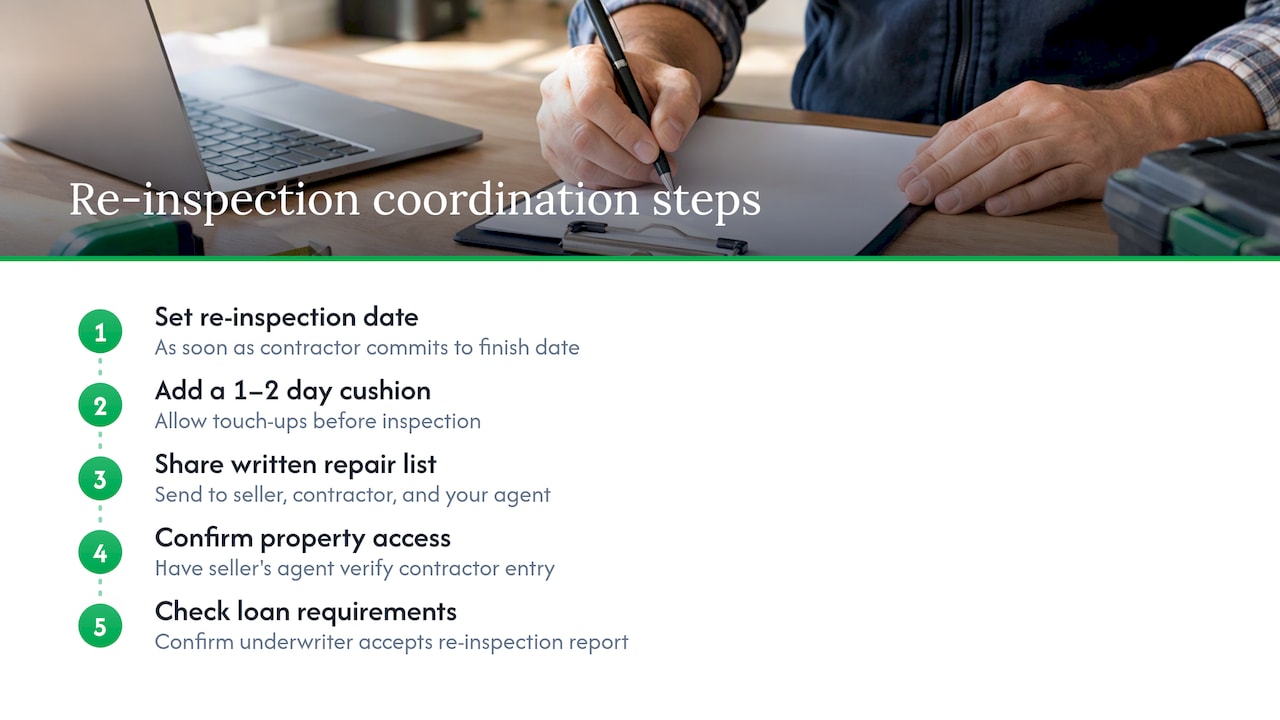
Set the re-inspection date as soon as the contractor commits to a finish date, not after. Build in a one or two day cushion between the contractor’s completion and your inspector’s visit, since minor touch-ups often happen right up to the deadline and you don’t want to inspect unfinished work.
Put the itemized repair list in writing and share it with everyone involved, the seller, the seller’s contractor, and your agent, before the visit. Ambiguity about what counts as “done” is the single biggest source of disputes at this stage.
Ask the seller’s agent to confirm contractor access in advance, especially for occupied properties where scheduling conflicts are common. A re-inspection that gets rescheduled because nobody could get into the house costs you days you may not have.
Finally, loop in your lender early if any repair item is tied to a loan condition. A re-inspection report that clears your contingency doesn’t always automatically satisfy an underwriter, and confirming that in advance avoids a last-minute scramble.
Seller versus buyer-paid re-inspections: a field perspective
Most failed re-inspections trace back to one cause: the repair was scheduled too close to closing, leaving no room for a redo. The fix is simple but underused: push your contractor completion date back by a few days from what feels comfortable. Closings create real emotional pressure to accept “close enough,” which is exactly when a buyer waives something they’ll regret.
— JOHN
Schedule your re-inspection with Hunt Home Inspection, LLC
Coordinating a re-inspection around a closing date is stressful enough without chasing down an inspector’s availability. Video and in-person re-inspection visits are offered, repair lists are organized through a structured workflow, and reports are returned promptly to allow time for action before deadlines.

A few things make scheduling easier on our end:
- Veteran and first-time buyer discounts are available on inspection services.
- Pay-at-close options let you handle payment in line with your transaction timing.
- Our certifications, including HUD 203k and ASHI, back the re-inspection and the original report alike.
Start with our inspection services page to see re-inspections alongside our other offerings, or review our inspection company selection criteria if you’re still comparing inspectors before you commit.
FAQ
What is a re-inspection?
A re-inspection is a targeted follow-up visit that checks whether specific, previously identified repairs were completed and function correctly. Regulatory definitions of the term describe it as a follow-up to confirm that corrective action was taken and was effective, which matches how residential inspectors apply it to a negotiated repair list.
Is the seller responsible for repairs after inspection?
A seller is only responsible for repairs they agreed to in the negotiated contract, not for every issue the original inspection noted. Once those agreed repairs are complete, a re-inspection confirms the seller met that specific obligation.
How long are sellers liable for repairs after selling a house?
Liability depends on your contract terms and any disclosure laws in your state, not on a single fixed timeline. A final walk-through before closing is your main chance to catch unresolved issues while you still have negotiating power, since post-closing disputes are harder to resolve.
What is the biggest red flag in a home inspection?
The biggest red flags are typically safety and structural issues, like electrical hazards, roof damage, or foundation movement, because they’re costly to fix and can indicate deeper problems. During a re-inspection, a safety item that appears only cosmetically addressed deserves the same level of concern as it did the first time.
Sources
- Schedule a home inspection | Consumer Financial Protection Bureau
- Checklist: Your final walk-through | NAR
Recent Comments