
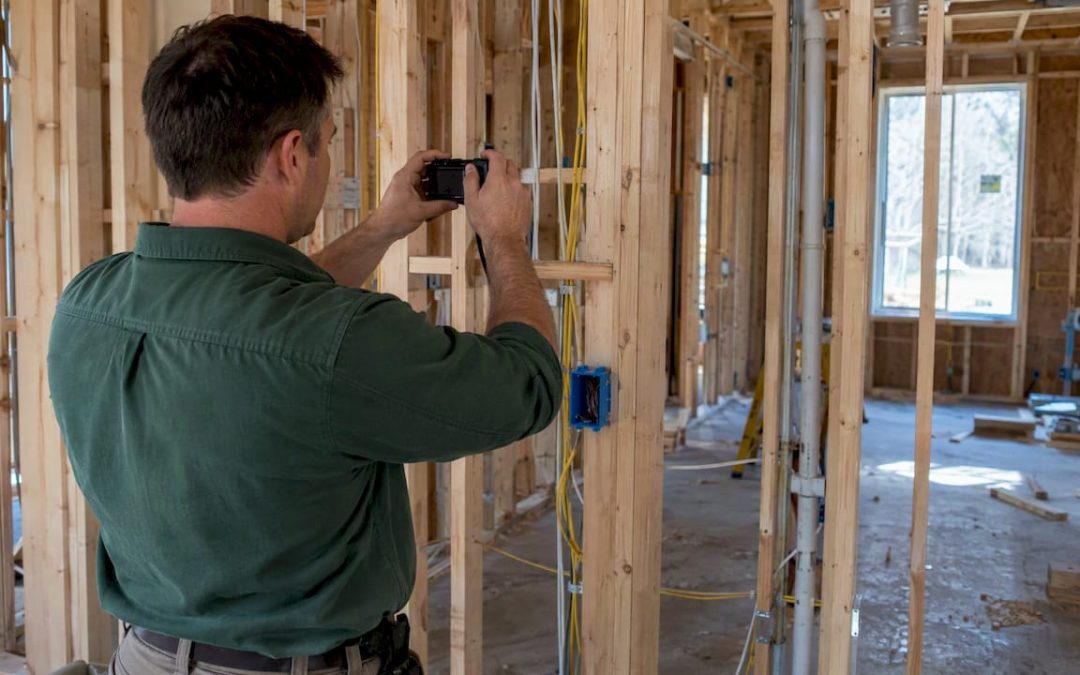
A pre-drywall inspection is usually worth scheduling for new-construction buyers because it lets you see and document framing, plumbing, electrical, and HVAC rough-ins before they disappear behind insulation and drywall. The main limits are practical: you need the builder’s written permission to access the site, the inspection only covers what is visible at that stage, and it never replaces the final walkthrough. InterNACHI’s Standards of Practice and staged-inspection guidance used across the home inspection industry back this approach.
TL;DR:
- Book an inspector as soon as you sign, confirm the superintendent’s drywall date, allow a few days’ buffer, and secure written site access.
- The inspector checks visible framing and mechanical systems, not future performance; request labeled photos tying each defect to its exact location.
- Bring current plans, selections, and change orders; compare appliance, fixture, and data locations with installed lines, and confirm blocking behind planned wall mounts.
- Send the report promptly, request photos or signed confirmation of repairs, and arrange a recheck before drywall covers any serious defects.
- A private inspection documents visible conditions for you, while municipal inspectors check code compliance; schedule a final inspection for finishes and system operation.
Table of Contents
- System-by-system pre-drywall checklist buyers should expect
- When and how to schedule a pre-drywall inspection
- Cost and value: what you pay versus what you might save
- How to prepare for the walkthrough
- Using the inspection report to get fixes before drywall
- What a pre-drywall inspection looks like in practice
- Booking a pre-drywall inspection with us
- FAQ
- Sources
System-by-system pre-drywall checklist buyers should expect
A pre-drywall inspection is a non-invasive visual review performed after foundation, framing, roofing, and mechanical rough-ins go in, but before insulation and drywall cover them up, according to InterNACHI’s Standards of Practice. The inspector documents observed material defects; it is not a guarantee of future performance, and the scope gets agreed on in writing beforehand.
Expect the inspector to move through the home system by system:
- Floor system: joists, trusses, sheathing, and fastener patterns for gaps or missing hardware.
- Wall framing: studs, headers, bracing, fireblocking, and blocking installed for your future cabinets, grab bars, or TV mounts.
- Roof structure: rafters or trusses, sheathing, underlayment, and flashing at valleys and penetrations.
- Rough plumbing: supply and drain-waste-vent lines, proper slope, and any available pressure test results.
- Rough electrical: service equipment, branch circuits, box depth, and nail plates protecting wires from future drywall screws.
- HVAC: equipment setting, duct routing and sealing, and clearances around registers and returns.
- Windows and doors: rough opening sizes, attachment, flashing, and sill pans.
- Envelope and insulation: air sealing at top and bottom plates and around penetrations, plus insulation placement where it has already started.
Pre-drywall checklists from inspection organizations call for photo documentation of every item, Home Stimulus notes, since this stage is the only point where framing, rough wiring, rough plumbing, ductwork, and roof connections are all visible at the same time. A useful report labels each photo to the specific item it shows rather than grouping generic shots, which matters later when you ask the builder to confirm a fix.
When and how to schedule a pre-drywall inspection
Timing is tight. The window opens once foundation, framing, and rough-ins are finished, and closes the moment insulation and drywall crews start work, per InterNACHI’s pre-drywall standard. Miss it, and the systems you most want to verify are sealed behind walls.
- Contact an inspector as soon as your contract is signed, not after framing starts.
- Ask your builder’s superintendent for the expected drywall start date and build in a few days of buffer.
- Get written permission to access the site, since many builders require it as a condition of entry.
- Push for contract language that guarantees notice before drywall begins, when your purchase agreement allows it.
- Confirm site safety rules and whether you, your agent, or only the inspector may attend.
Our step-by-step scheduling guide walks through booking logistics in more detail if your closing timeline is already set.
Cost and value: what you pay versus what you might save
Pricing depends on square footage, custom features, travel distance, and add-ons like a sewer camera or radon test. Rather than quote a single figure, treat the inspection as cheap insurance against repairs that cost far more once walls are closed.
- Buyers who can’t visit the site often gain the most, since the inspector becomes their eyes during a stage they would otherwise miss.
- Custom or complex builds with nonstandard layouts benefit because rough-ins are more likely to drift from the plans.
- Buyers who need documentation for builder negotiation or warranty claims get a dated, photo-backed record.
A pre-drywall inspection is not the same as a municipal code inspection. The jurisdiction’s inspector checks compliance with local building code; your private inspector documents observable conditions for your benefit, separate from any code sign-off, as InterNACHI’s practice standard makes clear.
How to prepare for the walkthrough
Preparation determines how much value you get out of the visit.
- Bring current floor plans, your selections sheet, and any change orders so the inspector can confirm rough-ins match what you actually ordered.
- Decide in advance who attends: you, your agent, a builder representative, or some combination, and confirm photo or video rules with the superintendent.
- Request a photo-labeled report rather than a generic summary, so each defect ties back to a specific location.
- Flag the exact spots where appliances, wall-mounted fixtures, and low-voltage or data runs need to land, and check that blocking exists behind those walls.
Our new construction inspection checklist covers photo tips specific to this stage if you want a reference to bring along. If you’re also prepping the home for a new baby, the newborn home-preparation guide covers child-safety blocking and layout considerations worth raising during this same visit.
Pro Tip: Compare each suspected rough-in location against your selections sheet first; many “defects” turn out to be correctly installed systems placed in the wrong spot for your chosen layout.
Using the inspection report to get fixes before drywall
A useful report includes labeled photo evidence, an itemized list of material defects, suggested corrective action for each one, and a clear recommendation on whether a recheck is needed before drywall goes up.
- Send the report to your builder promptly while the framing and rough-in crews can still act on it.
- Ask for documented correction evidence, photos or a signed form, rather than a verbal confirmation that something was fixed.
- Request a reinspection before concealment for any item serious enough to warrant a second look.
- Keep in mind this stage doesn’t cover finishes or system operation, so schedule a final inspection closer to closing to catch those.
What a pre-drywall inspection looks like in practice
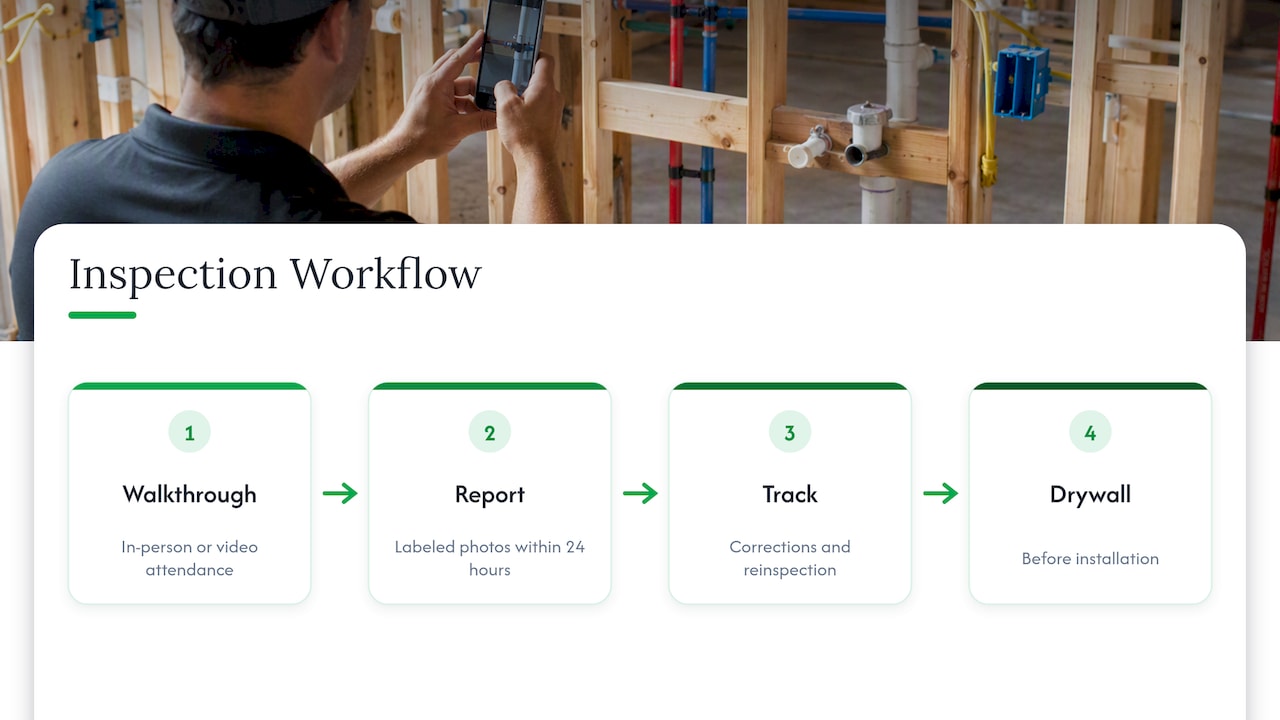
Pre-drywall inspections can include both in-person and video attendance options for buyers who cannot attend on-site during the build. Reports typically come back within 24 hours, with labeled photos tied to each flagged item. A tracking tool can help monitor which corrections the builder has addressed and which still need a reinspection, ensuring nothing is lost between the walkthrough and drywall installation.
Booking a pre-drywall inspection with us
Pre-drywall and buyer inspections are conducted with prompt turnaround times, with photo-rich reports typically within 24 hours and video attendance options for buyers unable to be on-site during the limited window between rough-in completion and drywall installation.
- Pre-drywall and standard buyer inspections, scheduled around your builder’s timeline.
- Common add-ons available alongside the main inspection: radon testing, mold inspection, and sewer camera lateral inspection.
- Reports delivered within 24 hours so you can get corrections to the builder before walls close.
Check our inspection services page to see current offerings and get scheduling started before your drywall date arrives.
FAQ
What happens during a pre-drywall inspection?
An inspector walks the home while framing, roofing, and rough plumbing, electrical, and HVAC systems are all visible, documenting material defects with labeled photos. The visit follows InterNACHI’s pre-drywall standard, covering structure, rough-ins, flashing, and insulation placement where it has already started.
Is a pre-drywall inspection worth it?
For most new-construction buyers, yes, since it catches concealed defects while they’re still cheap and easy to fix. It benefits buyers who can’t visit the site often, custom builds with nonstandard layouts, and anyone who wants documentation for builder negotiations.
How do I get a pre-drywall inspection scheduled?
Contact an inspector right after signing your purchase contract, then ask the builder’s superintendent for the expected drywall start date. You’ll need written permission to access the site, so confirm that early rather than assuming it will be granted on short notice.
How long does a pre-drywall inspection take?
The length depends on the home’s size and complexity, but the visit needs to happen within the specific window after rough-ins finish and before insulation and drywall go in. Our guide to preparing for an inspection walkthrough covers what to expect during the visit itself.
What’s the difference between a pre-drywall inspection and a code inspection?
A municipal code inspection checks compliance with local building code on behalf of the jurisdiction. A private pre-drywall inspection documents observable conditions for your benefit as the buyer, separate from any code sign-off, per InterNACHI’s practice standard.
Sources
- Pre-Drywall Inspection Standards of Practice – InterNACHI®
- Pre-Drywall Walkthrough: What to Check Before Walls Close | Home Stimulus
Recent Comments