
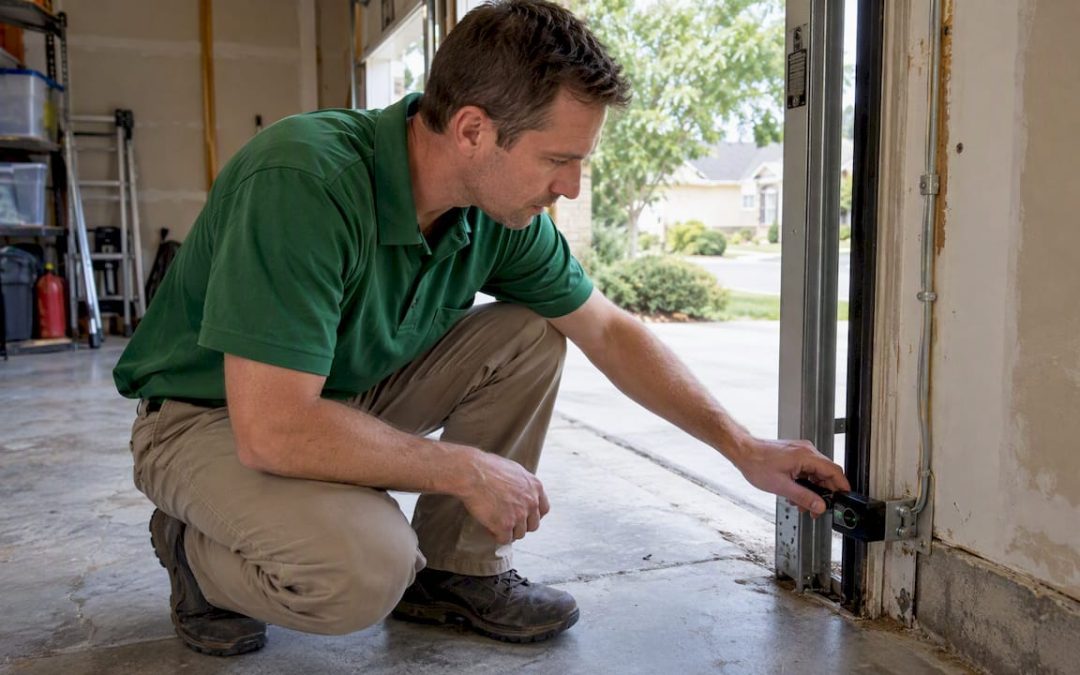
A home inspection garage door inspection is a non-invasive visual and functional check of the door, opener, and safety devices, performed alongside the rest of a full home inspection. It covers visible components like panels, tracks, springs, and rollers, tests the opener’s reversal and entrapment protection, and notes conditions in the written report. We don’t repair anything; we flag problems early and point you toward the right specialist when one is needed.
TL;DR:
- For openers manufactured after 1993, photoelectric sensors should sit 4 to 6 inches above the floor; missing or illegible safety labels are reportable.
- Inspectors assess tracks and brackets before operating the door, and should stop testing when rusted springs, cracked brackets, or loose fasteners create danger.
- A failed reversal system or broken spring calls for disabling the opener and contacting a technician; worn rollers and minor dents are routine maintenance.
- Before negotiating credits, get a written technician quote and cite the report’s specific condition; buyers can tie requests to documented repairs or contingencies.
Table of Contents
- Checklist: Exactly What an Inspector Examines on a Garage Door
- How Inspectors Safely Test Door Operation and Reversal Systems
- What Inspection Findings Mean and Practical Next Steps
- How to Prepare and the Key Questions to Ask Your Inspector
- Why a Focused Garage Door Check Matters in a Home Inspection
- How We Check Garage Doors and How to Schedule an Inspection
- FAQ
- Sources
Checklist: Exactly What an Inspector Examines on a Garage Door
A garage door inspection touches more parts than most buyers expect, and each one tells a different story about age, maintenance, and safety.
- Door panels and surface: dents, rust, delamination, or water damage that signal structural wear.
- Tracks and brackets: alignment, rust, and loose mounting hardware that affect smooth travel.
- Rollers: cracked or worn rollers that cause binding or noise during operation.
- Springs and containment cables: torsion springs (mounted above the door) and extension springs (along the horizontal tracks) carry the door’s full weight, and a missing containment cable on an extension spring is a reportable safety gap.
- Opener and mounting: secure attachment to framing, with no sagging brackets or stripped fasteners.
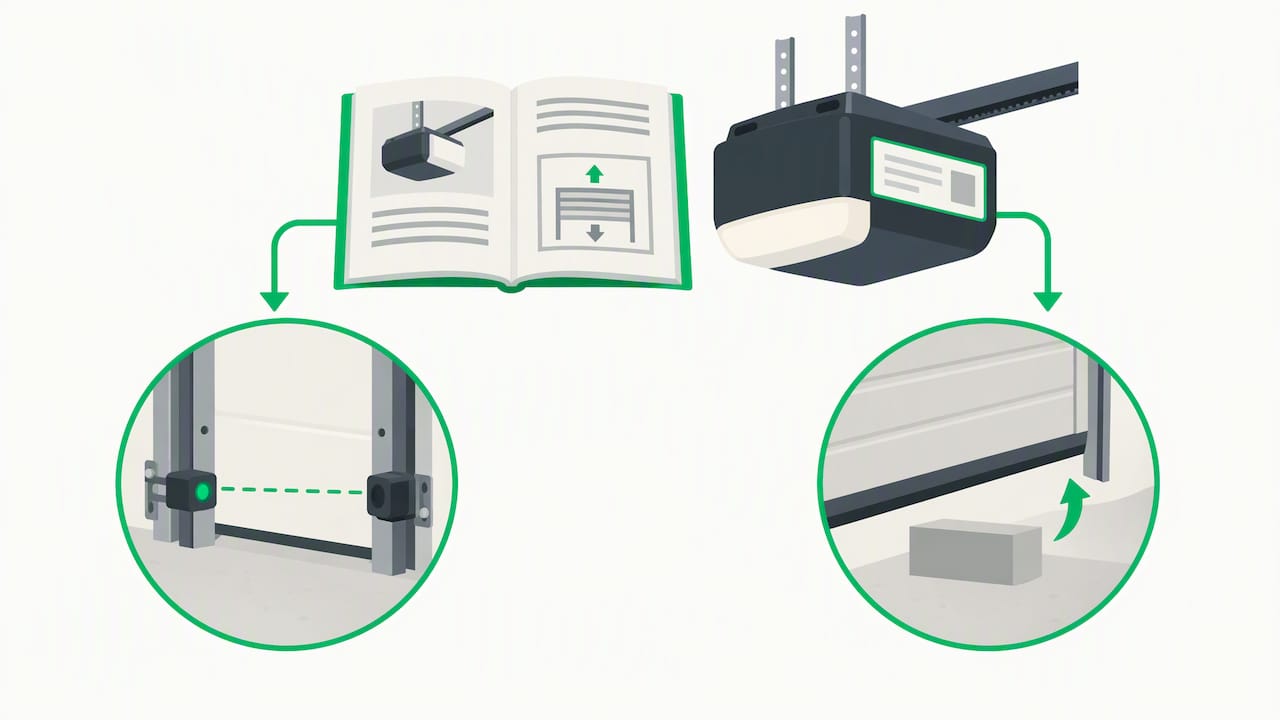
- Photoelectric sensors: correct height and alignment, since federal rules call for sensors installed 4 to 6 inches above the floor on openers manufactured after 1993.
- Wall-mounted switch and emergency release: mounted high enough to be out of reach of small children but still easily operable, and clear of moving parts.
- Warning labels: permanent manufacturer labels that confirm model, pinch-point warnings, and entrapment protection compliance.
Missing labels deserve special attention. According to CPSC’s final rule, labels are often the clearest evidence of whether a system was manufactured and installed to current entrapment-protection standards, so a missing or illegible label is a defensible, reportable condition rather than a cosmetic nitpick. A loose bracket, a broken spring, or sensors mounted well above 6 inches are the kinds of findings that move from “note it” to “recommend further evaluation.”
Pro Tip: Check whether the opener’s manufacture date is visible on the label; it tells you instantly whether the reversal and sensor requirements even apply to that unit.
How Inspectors Safely Test Door Operation and Reversal Systems
Operating a garage door is a functional test, but it starts well before anyone touches a button.
- Visual review first: we look at tracks, mounting brackets, and bracing for rust, looseness, or misalignment before attempting to move the door at all.
- Manual lift check: when it’s safe to do so, we lift the door by hand to judge balance and resistance.
- Opener cycle test: if mounts and hardware look secure, we run the opener through a full open and close cycle, watching for jerky motion, grinding, or uneven travel.
- Photoelectric sensor check: we confirm sensor alignment and test for obstruction response, since misaligned sensors are a common reason reversal systems fail.
- Reversal verification: per InterNACHI and CPSC guidance, a resistance test and a photoeye obstruction test confirm the door reverses rather than continuing to close on an object in its path. When hardware looks compromised, a safer indirect method is preferred over placing a physical object like a 2×4 directly in the door’s path.
We stop testing when the risk outweighs the information gained. Rusted springs, cracked brackets, or loose track fasteners are reasons to halt and recommend a licensed garage door technician rather than force a mechanical test, a judgment call InterNACHI’s guidance on home inspector best judgment backs directly: attempting to operate a visibly failing system can cause sudden, dangerous failure.
Pro Tip: Ask your inspector whether the reversal test was performed; if hardware condition prevented it, that limitation should be stated clearly in the report, not left out.
What Inspection Findings Mean and Practical Next Steps
Not every garage door note carries the same weight, and knowing the difference shapes what you do next.
A failed reversal system or a broken spring is urgent. These create real entrapment or injury risk and typically warrant stopping use of the opener until a qualified technician evaluates it. Worn rollers, minor surface dents, or a slightly noisy opener are routine maintenance items that rarely affect a closing timeline.
- Disable the opener if the reversal system fails or a spring shows visible failure signs.
- Get a written technician quote before negotiating repair credits so the number reflects actual parts and labor, not a guess.
- Use the inspection report’s language in repair requests: ASHI’s Standard of Practice requires inspectors to describe conditions and recommend further evaluation, giving buyers and agents specific wording to cite rather than vague complaints.
- Request credits or contingencies tied to the documented condition rather than an open-ended allowance.
Sellers benefit from running this process earlier. A pre-listing inspection surfaces garage door issues before a buyer’s inspector does, giving time to repair or disclose on your own terms instead of reacting during a tight negotiation window. Our report format spells out exactly how conditions, photos, and recommendations are organized, which makes it easier to decide what needs fixing now versus what can wait.
How to Prepare and the Key Questions to Ask Your Inspector
A few minutes of prep turns a garage door inspection into a clear, usable record instead of a guessing game.
- Clear the area around the door, inside and out, so the inspector has full visual access to tracks, springs, and sensors.
- Confirm power is on to the opener and that remote controls or wall switches are reachable.
- Point out known issues, like a door that’s been sticking or a spring that recently made noise, so the inspector can look closer at that spot.
Three questions are worth asking directly: will the reversal system and sensors actually be tested, will a garage door technician be recommended if something looks off, and how will the condition be worded in the final report? Expect photos, plain-language condition statements, and prioritized recommendations, typically delivered within 24 hours of the inspection. For stakeholders who can’t attend in person, a video inspection option covers the same ground remotely, and our Create Request List™ workflow turns those findings directly into a repair request an agent can send without reformatting anything.
Pro Tip: Keep a copy of the opener’s manual or label photo handy; it speeds up the sensor height and reversal-type verification considerably.
Why a Focused Garage Door Check Matters in a Home Inspection
A garage door inspection works best as an early-warning system, not a repair visit. Staying non-invasive protects you and keeps the findings defensible: we document what’s visible and accessible, then hand off anything mechanical to a specialist. That boundary is part of why our in-person and video inspection options, fast report turnaround, and focus on first-time buyers, veterans, and low-income families matter: clear documentation gives you leverage in a negotiation that guesswork never will. Use the specific findings, not general impressions, when you talk to the other side of the transaction.
— JOHN
How We Check Garage Doors and How to Schedule an Inspection
Every full home inspection we perform includes a garage door check alongside the rest of the property, with both in-person and video inspection options and timely reports. Our tools can turn findings straight into a repair request your agent can send without rewriting it, and discounts for veterans and first-time buyers are available. Additional inspection services like radon, mold, and sewer camera inspections are also available.

If you’re weighing property managers or HOA notices tied to a garage or shared structure, HOA Letter AI helps generate state-aware compliance letters for that side of the process. For the inspection itself, start with our inspection services page to see the full list and schedule online.
FAQ
Is the garage door included in a standard home inspection?
Yes, a standard home inspection includes a visual and functional check of the garage door, opener, and safety sensors as part of the overall scope. Inspectors follow guidance like ASHI’s Standard of Practice, which requires describing visible and accessible garage components in the written report.
Will the inspector fix a broken garage door spring or sensor?
No, home inspectors identify and document defects but don’t perform repairs. If a spring is broken or a sensor fails testing, the report will recommend evaluation by a qualified garage door technician rather than attempting the fix on site.
Where should garage door sensors be positioned to pass inspection?
Photoelectric sensors should sit 4 to 6 inches above the floor on each side of the door, per federal entrapment-protection rules. Sensors mounted higher or misaligned are flagged as a reportable condition because they can prevent the reversal system from working correctly.
What happens if my garage door’s safety label is missing?
A missing or illegible warning label is noted as a reportable item because it often indicates an older installation or one that doesn’t meet current entrapment-protection standards. The inspector can’t confirm compliance without it, so the report will recommend further evaluation.
How quickly do I get the inspection report after a garage door check?
Full inspection reports, including garage door findings, are generally delivered in a timely manner after the appointment. Reports include photos, condition statements, and prioritized recommendations you can use directly in negotiations.
Recent Comments