
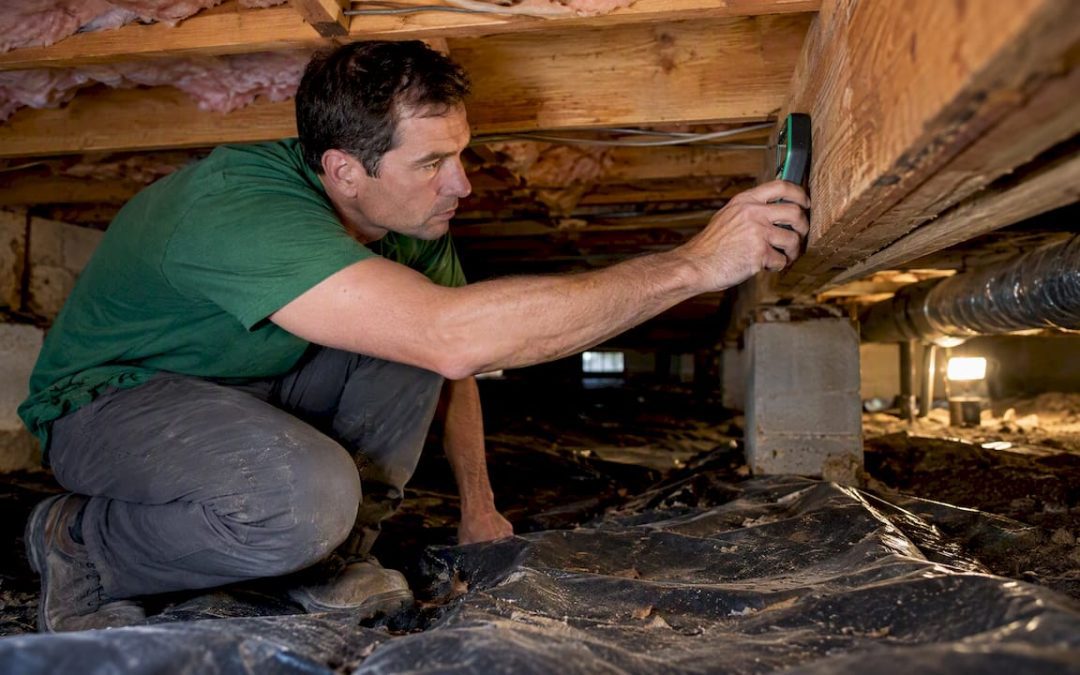
A crawl space inspection examines access and structure, moisture conditions, mechanical and electrical safety, insulation, and signs of pests or mold, then documents everything in a written report with photos. Inspectors follow the ASHI Standard of Practice for what to examine and record, and they use measurable thresholds like wood moisture content and relative humidity to judge whether conditions need attention. The report will note any area the inspector could not reach and why.
TL;DR:
- Inspectors document inaccessible areas and stop entry for unsafe clearance, sewage, or exposed wiring, then refer hazards to appropriate specialists.
- Wood moisture readings above roughly 17% to 18% indicate elevated decay risk, while visible mold or high humidity can warrant dedicated testing.
- Vented designs require 1 square foot of net free vent area per 150 square feet of floor; unvented designs need a continuous ground vapor retarder.
- Fix exterior drainage first, remove wet insulation, and repair the vapor barrier only after the water source is under control.
Table of Contents
- What Inspectors Look For in a Crawl Space
- How Inspectors Actually Get Through a Crawl Space
- The Numbers Inspectors Use to Judge Crawl Space Conditions
- The Most Common Problems and What to Do First
- How We Approach Crawl Space Inspections
- Why Crawl Space Problems Affect the Air You Breathe Upstairs
- Local Building Rules That Affect Crawl Space Work
- Spotting Trouble Without Climbing Under the House
- What Happens After the Inspection Report Comes Back
- Book a Crawl Space Inspection That Comes With a Clear Report
- FAQ
- Sources
- A Final Word on What Matters Most Underneath Your House
What Inspectors Look For in a Crawl Space
A crawl space inspection moves through a predictable sequence: can the inspector get in, is the structure sound, is moisture under control, and are there mechanical or pest problems waiting underneath the floor.
Access comes first. Inspectors note the size and location of the entry point, whether it meets a workable clearance, and the method used to view or enter the space. When headroom or openings are too tight for safe entry, the ASHI Standard of Practice calls for documenting that limitation rather than skipping the area entirely.
From there, the checklist typically covers:
- Foundation walls, support piers, rim joists, and floor joists for rot, cracking, or settlement.
- Standing water, vapor barrier condition, sump pump presence, and exterior grading that feeds moisture into the space.
- Vented versus unvented crawl space design and whether the current setup matches how it is being used.
- Exposed wiring, plumbing leaks, and any fuel-fired appliances located in the crawl space.
- Insulation condition, including wet or sagging batts and vapor retarder integrity.
- Evidence of rodents, insects, or wood-destroying organisms along framing and sill plates.
Inspectors also note what they could not assess. Low clearance, ductwork blocking a path, or unsafe conditions all count as limitations that belong in the final report rather than guesses filled in later.
Pro Tip: Clear stored items away from the crawl space access point before your inspection so the inspector can reach the full area without delay.
How Inspectors Actually Get Through a Crawl Space
Crawl space inspections follow a set process built around documentation and safety, not just a quick look with a flashlight.
- The inspector photographs the access point and any visible conditions before entering, then photographs representative areas once inside.
- A flashlight and headlamp handle general visibility, while a moisture meter checks wood framing and a humidity gauge reads conditions in the air.
- A borescope or camera lets the inspector see into tight spots, such as behind ductwork or along sill plates, without full-body entry.
- The inspector checks that clearance and air quality meet basic safety thresholds before committing to a full crawl, and stops if headroom, standing sewage, or exposed wiring makes entry unsafe.
When a hazard shows up, inspectors pause and recommend the right specialist rather than working around it. That might mean an electrician for exposed wiring, a mold remediation contractor for suspected microbial growth, or a structural engineer for serious framing damage. Industry guidance on safe crawl space entry treats this as a firm operational rule: document the hazard, note it in the report, and move on rather than taking an avoidable risk.
The Numbers Inspectors Use to Judge Crawl Space Conditions
Crawl space findings get measured against specific thresholds, not just a visual impression.
Wood moisture content above roughly 17% to 18% signals an elevated risk of decay, according to moisture inspection guidance from the Building America Solution Center. Readings below that range generally indicate framing is drying properly; readings above it often point to a drainage or vapor barrier problem that needs correcting before it spreads.
Relative humidity readings follow a general pattern where low to moderate levels indicate good control, and higher levels tend to support mold growth, often requiring remediation steps such as dehumidification or vapor barrier repair.
Ventilation sizing matters just as much for vented designs. Code-based guidance calls for 1 square foot of net free vent area per 150 square feet of crawl space floor, per the InterNACHI commentary on crawl space requirements drawn from the IRC R408 family of rules. Unvented, conditioned crawl spaces take the opposite approach: a continuous Class I vapor retarder across the ground, taped seams, and attachment to the perimeter walls, as detailed in the Building America ventilated crawlspace guide.
When readings run high or visible mold appears, that is usually the point where an inspector recommends dedicated radon or mold sampling rather than relying on a visual check alone.
The Most Common Problems and What to Do First
Standing water, a torn or missing vapor barrier, wet insulation, rodent droppings, wood rot, and efflorescence on foundation walls show up again and again in crawl space inspections. Efflorescence looks alarming but is usually a salt deposit left behind by moisture moving through concrete or soil, not mold itself, though it still points to a drainage issue worth fixing.
Priority order matters here. Exterior drainage and gutters come first, since they are often the actual source of the water showing up below the house. From there:
- Repair or reroute gutters and grading so water moves away from the foundation.
- Fix or seal the sump pit lid if one is present.
- Remove wet or compressed insulation rather than leaving it in place.
- Install or repair the vapor barrier once the water source is controlled.
- Schedule mold testing if active growth is visible or suspected.
Pro Tip: Fixing exterior drainage before sealing or insulating a crawl space keeps new materials from trapping moisture underneath the house.
How We Approach Crawl Space Inspections
We built our crawl space process around the same documentation standards covered above: clear notes on access method, measured moisture and humidity readings, and photos of conditions rather than a one-line summary. Our inspection services cover the Buyer’s Home Inspection as a starting point, with add-ons like mold inspection, radon testing, and sewer camera inspection available when a crawl space raises a specific concern.
We offer inspection options that can accommodate different client preferences. Reports are returned promptly, and we use tools to help buyers and agents turn findings into clear negotiation points. We offer service support tailored to clients with various needs throughout the process.
Why Crawl Space Problems Affect the Air You Breathe Upstairs
A damp or moldy crawl space does not stay contained below the floor. Air moves between the crawl space and the living area above through gaps, ductwork, and the general stack effect of a house, carrying whatever is in that air along with it.
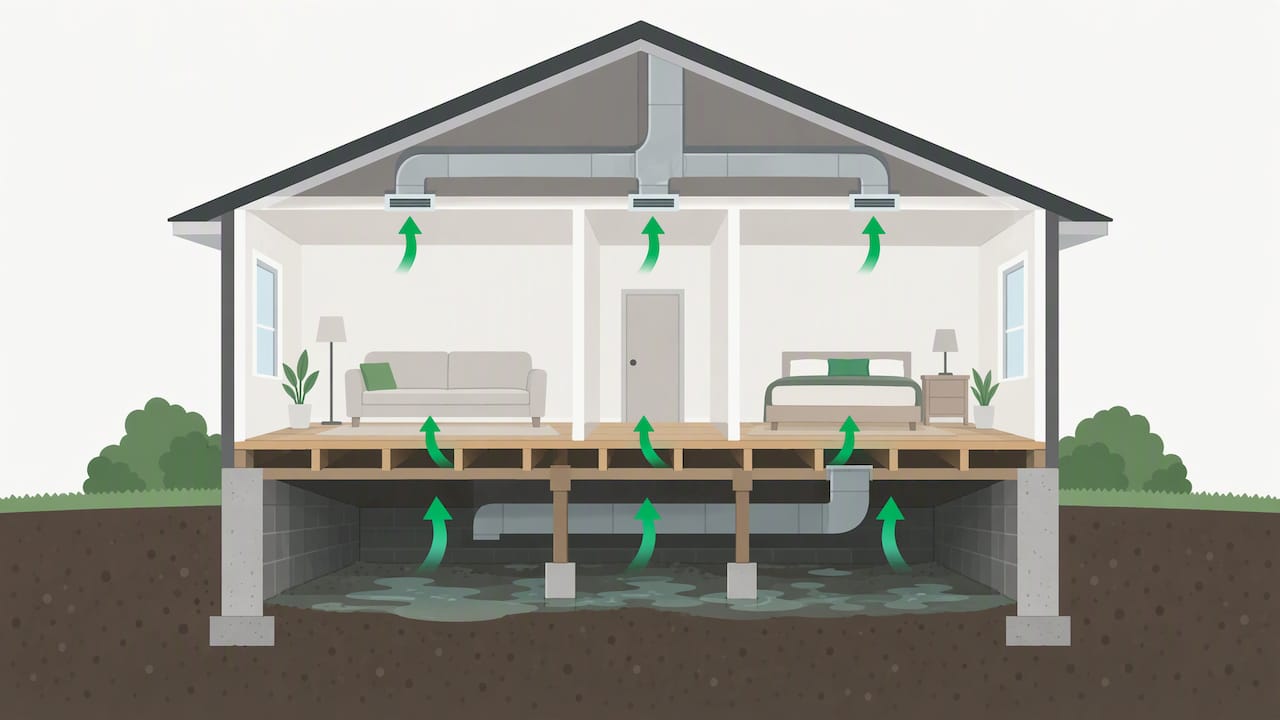
Mold spores are the main concern. Once mold establishes itself on wood framing or insulation, spores can migrate upward and affect indoor air quality throughout the home, which matters most for people with asthma, allergies, or other respiratory sensitivities. EPA mold guidance notes that visual cues like efflorescence or rust on fasteners often appear before mold becomes visible, which is why inspectors flag these signs early rather than waiting for obvious growth.
Combustion appliances located in a crawl space add a separate risk. If a furnace or water heater sits down there, inspectors check that venting works correctly and that there is no spillage of combustion gases, since a poorly vented appliance can introduce carbon monoxide risk on top of any moisture problem. That check becomes especially important before a crawl space gets sealed or converted to a conditioned, unvented design, since sealing changes how air moves through the space entirely.
None of this requires alarm, but it does explain why inspectors treat crawl space moisture and appliance venting as safety issues rather than cosmetic ones. A musty smell noticed upstairs often traces back to conditions found during a crawl space inspection.
Local Building Rules That Affect Crawl Space Work
Crawl space requirements generally trace back to the International Residential Code’s R408 provisions, which set the baseline rules for ventilation sizing, vapor barrier use, and access in most US jurisdictions, including the building departments across the St. Louis Metro area and Southern Illinois. Local permitting offices apply these provisions when reviewing crawl space conversions, vapor barrier installations, or structural repairs, so a homeowner planning work beyond a simple repair should check with the relevant local building department before starting.
Permit requirements can vary by municipality even within the same metro area, particularly for converting a vented crawl space to an unvented, conditioned design, since that conversion changes how moisture and combustion safety get handled. A building department may also require inspection sign-off for structural repairs to piers or joists found during a home inspection.
This is one area where a professional inspection report helps directly: it gives a homeowner or contractor a documented starting point, including measured conditions and photos, before applying for any permit tied to crawl space repairs.
Spotting Trouble Without Climbing Under the House
Several warning signs show up well before anyone opens the crawl space access panel. A musty or earthy smell inside the house, especially near the ground floor, often traces back to moisture or early mold growth below.
Other signs worth watching for:
- Uneven or bouncy floors, which can point to joist damage or settling piers underneath.
- Visible gaps or cracks in interior flooring where it meets exterior walls.
- Peeling paint or bubbling drywall near baseboards on the ground floor.
- Persistent high indoor humidity that does not respond to normal ventilation.
- Visible pest activity, such as droppings or chewed baseboards, near floor level.
None of these signs confirm a specific crawl space problem on their own, but together they are usually enough reason to schedule an inspection rather than wait. A home inspection report documents these observable signs alongside what the inspector finds once inside, giving a fuller picture than either source alone.
What Happens After the Inspection Report Comes Back
A crawl space inspection report typically separates findings into immediate safety concerns, moisture and structural issues, and lower-priority maintenance items, which helps homeowners decide what to tackle first.
Immediate hazards, like exposed wiring or a disconnected combustion vent, usually call for a licensed electrician or HVAC technician before anything else. Moisture and structural findings come next: resolving exterior drainage, repairing or installing a vapor barrier, and addressing any damaged framing identified during the inspection. Building science guidance from the Building America program is consistent on sequencing here: fix the water source before insulating or sealing, since sealing over an active leak just traps the problem.
If the report notes visible mold or elevated humidity readings, scheduling dedicated mold testing confirms the extent of the issue before remediation begins. Homeowners carrying active mold concerns sometimes also look into mold liability coverage through their insurance agency to understand what remediation costs their policy might offset.
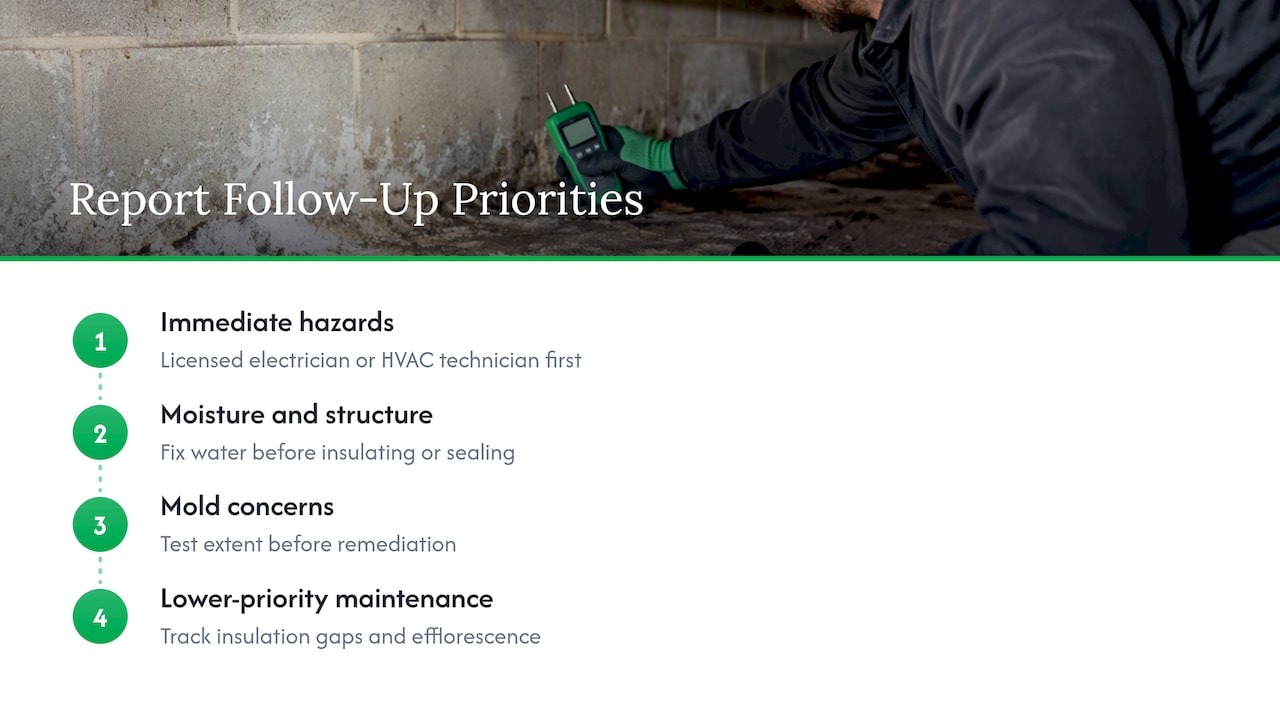
Lower-priority items, like minor insulation gaps or cosmetic efflorescence, can usually wait, but they are worth tracking so they do not turn into bigger repairs later.
Book a Crawl Space Inspection That Comes With a Clear Report

If a crawl space inspection is on your list before closing or listing a property, start with our Buyer’s Home Inspection and add mold or radon testing if the property has a history of moisture or an older crawl space. Have the access panel clear and any prior repair records ready for the inspector. Our inspection services page covers booking, add-on options, and scheduling for both in-person and video inspections, with reports delivered within 24 hours.
FAQ
How much does a crawl space inspection cost?
Pricing for crawl space inspections depends on the property, the region, and whether it’s bundled with a full home inspection or booked as a standalone service. Pricing for our crawl space and related add-on services is available on request through our inspection services page.
What do inspectors look for in a crawl space?
Inspectors check access and clearance, structural elements like piers and joists, moisture conditions including standing water and vapor barrier condition, mechanical and electrical safety, insulation, and signs of pests or wood-destroying organisms. Findings get measured against thresholds like wood moisture content and relative humidity, then documented with photos in the final report.
How often should a crawl space be inspected?
Most building science guidance suggests a yearly check of accessible crawl space conditions, with a professional inspection anytime a home changes ownership or shows warning signs like musty odors or uneven floors. Homes in consistently humid climates or with a history of moisture problems often benefit from more frequent checks.
How long does a crawl space inspection take?
A standalone crawl space inspection usually takes well under an hour for most residential properties, though time varies with the size of the space and how much documentation the inspector needs to capture. When bundled into a full home inspection, the crawl space portion adds to the overall visit without significantly extending it.
Sources
- ASHI’s HOME INSPECTION STANDARD OF PRACTICE FOR THE HOME INSPECTION PROFESSION (2026)
- Guide to Closing and Conditioning Ventilated Crawlspaces (Building America / DOE)
- Look for crawlspace moisture issues (BASC / PNNL)
- Mold Course Chapter 3 (EPA)
A Final Word on What Matters Most Underneath Your House
Prioritize safety hazards first, then moisture root causes. Everything else, cosmetic cracks, minor insulation gaps, can wait once those two are handled. A good inspection report tells you plainly what was checked, what wasn’t, and why, and it points you to the right specialist when a finding goes beyond what a general inspection covers.
— JOHN
Recent Comments