
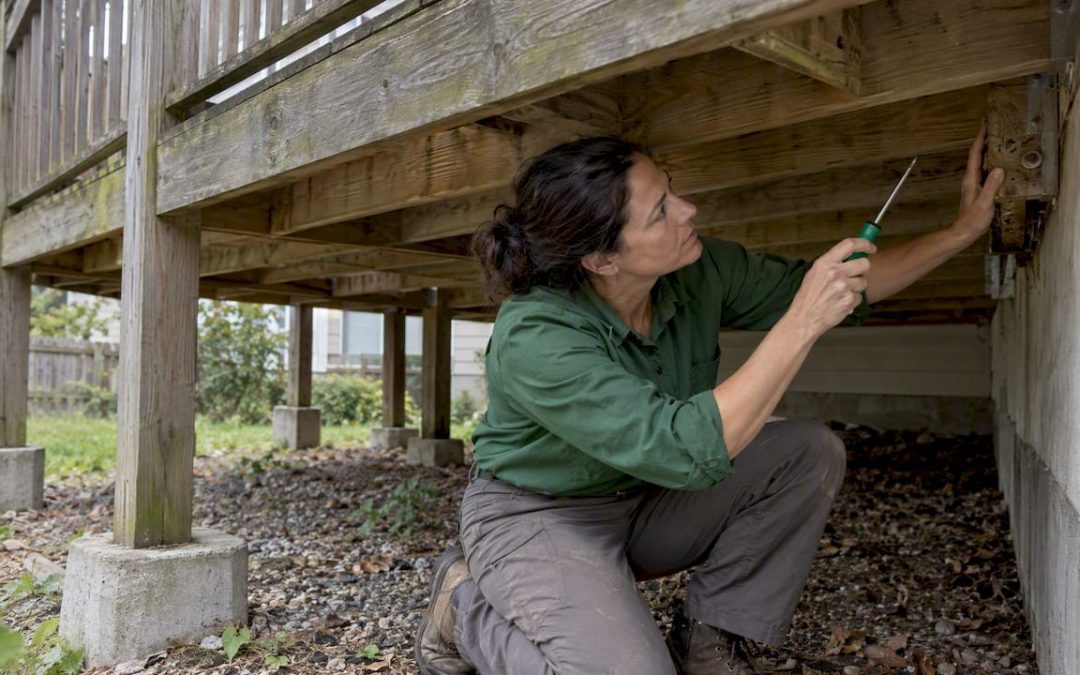
A proper deck safety inspection verifies the ledger, substructure, fasteners, guardrails, stairs, and signs of rot or corrosion. Stop using the deck and call a professional if you find movement, large-area rot, a failing rail, or ledger separation. Most decks need a full inspection regularly, with more frequent checks in coastal or freeze-thaw climates where moisture and corrosion move faster.
TL;DR:
- Most decks require an annual professional inspection, especially in coastal or freeze-thaw climates where moisture and corrosion accelerate deterioration.
- Checking structural components such as footings, ledger separation, and rusted connectors is critical, with failure often starting at hidden ledger and joist connections.
- Visible surface issues like rotting boards, loose fasteners, or wobbly railings should be addressed immediately, prioritizing load-bearing and fall protection elements.
- DIY repairs are limited to tightening fasteners, replacing damaged boards, and basic sealing, while structural fixes like footing replacement require a professional.
- Inspection costs typically stay under a few hundred dollars, with detailed reports and photo documentation helping prioritize repairs and ensure safety compliance.
Table of Contents
- Tools and prep for a safe, effective deck inspection
- Substructure inspection: footings, posts, beams, joists, ledger and connectors
- Deck surface, boards, fasteners and railing inspection
- Stairs, landings, lighting and electrical safety around decks
- Tests, signs, and measurements: how to probe for rot and structural weakness
- Maintenance fixes homeowners can safely do and what requires a professional
- When to hire a professional deck inspector or contractor and expected costs
- Codes, permits, and key IRC R507 requirements homeowners should know
- Why professional inspections matter: publisher proof points and what we offer
- What the checklist approach gets right, and where it falls short
- How we can help: booking a deck safety inspection
- FAQ
- Sources
Tools and prep for a safe, effective deck inspection
You do not need specialty equipment to do a meaningful first-pass inspection, but a few tools make the difference between guessing and actually knowing what you’re looking at. Gather everything before you start so you are not climbing under the deck twice.
- A flashlight for the shaded underside and corners where boards meet posts.
- A long screwdriver or ice pick to probe wood for soft, decayed spots.
- A moisture meter to check for elevated water content in boards and framing.
- A 4-foot level and tape measure to check for sagging and spacing.
- A sturdy ladder, a hammer, and pliers for testing fasteners and connectors.
Wear closed-toe shoes, safety glasses, and gloves, since rusted nails and splintered wood are common under older decks. Set the ladder on firm, level ground and never lean it against a railing you have not already tested. Clear furniture, grills, and planters off the deck surface so you can see every board, and take photos as you go. A simple folder of dated photos and notes becomes invaluable later, whether you are tracking your own repairs or handing the findings to a contractor.
Pro Tip: Photograph each problem area twice, once wide for context and once close up with a tape measure or coin in frame for scale.
Substructure inspection: footings, posts, beams, joists, ledger and connectors
The substructure carries the deck’s entire load, and it’s also the part most homeowners never look at closely. This is where a failure actually starts, long before anything visible shows up on the surface.
- Check footings and posts. Look for concrete that has cracked, heaved, or settled unevenly, and check wood posts at the base for soft spots, discoloration, or insect tunnels where they meet the soil or concrete.
- Inspect beams and joists from underneath. Sight down the beam line for sagging, and look for split or cracked members, especially near joist hanger connections where load concentrates.
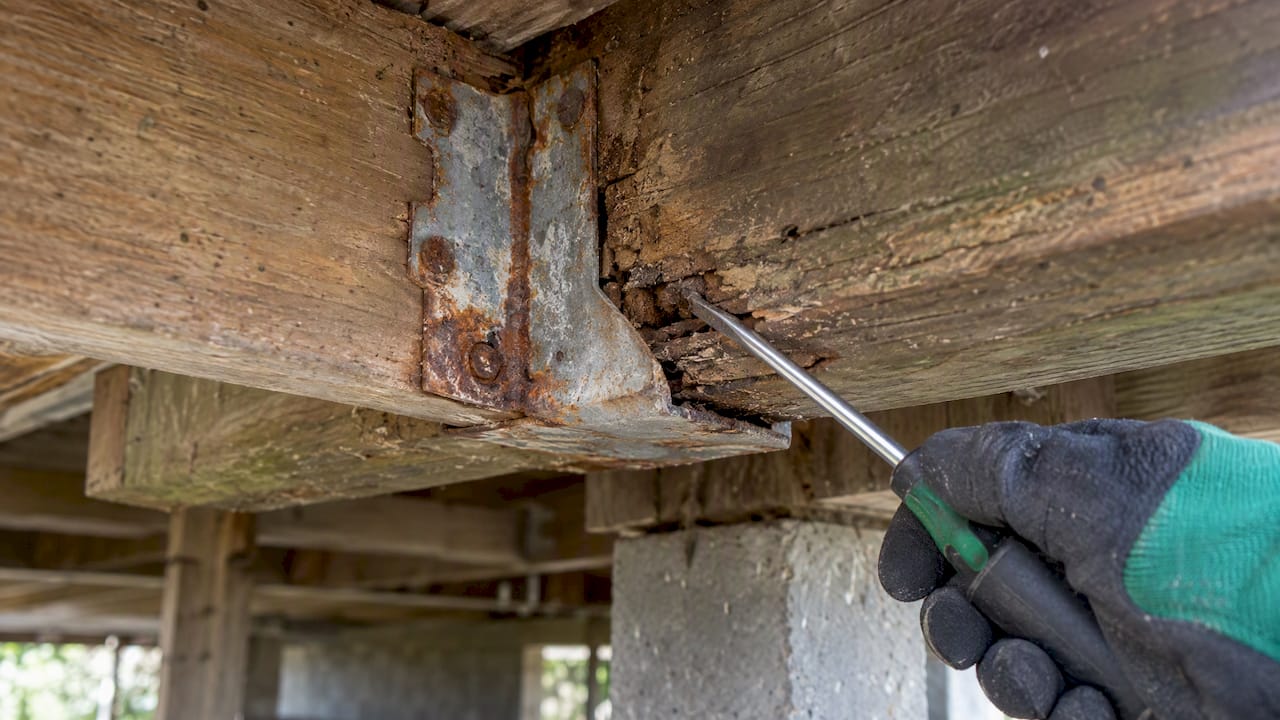
- Check every joist hanger. Hangers should be fully nailed with the correct hanger nails, not standard framing nails, and should show no rust-through or bent flanges.
- Examine the ledger board where the deck meets the house. This connection is widely cited as the single most critical failure point on a residential deck, since it carries a large share of the structure’s load and is hidden behind siding or flashing where problems go unnoticed for years, according to This Old House’s safety checklist.
- Look for ledger separation. Any visible gap between the ledger and the house wall, water staining below the ledger, or missing through-bolts (lag screws alone are not considered adequate on most modern decks) is a red flag that warrants an immediate professional look.
- Check flashing above the ledger. Flashing should divert water away from the house-to-deck joint; its absence or failure is one of the most common causes of hidden ledger rot.
Decks don’t give much warning before something gives way. Unlike a roof leak or a cracked foundation wall, a weakening ledger or a rotting joist can look completely normal from the top of the deck right up until it isn’t, which is why This Old House and other inspection guides stress periodic professional assessment even on decks that seem fine.
Corroded or missing connectors are not cosmetic issues. A joist hanger nail that has rusted through has lost its holding strength, and a post base that has corroded away is no longer transferring load the way it was designed to. If you find more than one or two compromised connectors, or any combination of a compromised connector with a soft or cracked structural member nearby, stop using that section of the deck until a professional evaluates it. The Consumer Reports deck safety guide notes that collapses and flooring failures on decks, porches, and balconies caused about 8,700 injuries and two fatalities between 2020 and 2024, a reminder that these are not theoretical risks.
Deck surface, boards, fasteners and railing inspection
Once the substructure checks out, move to what you can see and walk on. Surface problems are easier to spot, but not every visible defect is purely cosmetic.
- Wood decking: Look for splits running with the grain, cupping (boards curling at the edges), and soft spots that give under the screwdriver probe test.
- Composite decking: Check for swelling, flaking, or delamination at board edges, which can signal moisture intrusion even though composite doesn’t rot the way wood does.
- Popped or raised nails: Replace these with coated deck screws rather than hammering them back down, since a popped fastener often means the board beneath it has already started to shrink or shift.
- Deeper decay signals: If several fasteners in the same area have failed, probe the surrounding wood before assuming it’s just a nail problem.
- Railing posts: Check where the post bolts to the deck framing, not just where the rail meets the post, since post-to-beam connections fail more often than the rail itself.
- Infill spacing: Balusters and other infill should not allow a 4-inch sphere to pass through, a standard spacing limit meant to prevent small children from slipping through or getting stuck.
- Handrail height and grip: A graspable handrail on stairs should be mounted at a height and profile that an adult hand can close around, not a flat 2×6 cap rail.
Defective materials are a documented issue, not a hypothetical one. The CPSC’s recall of Louisiana-Pacific composite decking shows how deteriorating decking and railing components have led to real structural failures and injuries, which is why checking for known recalls on your specific decking and railing products belongs in any serious inspection.
Prioritize anything that affects load-bearing capacity or fall protection over anything that only affects appearance. A faded board is a weekend project; a wobbly rail post is a safety issue that gets fixed first.
Stairs, landings, lighting and electrical safety around decks
Stairs are where falls actually happen, and they deserve the same scrutiny as the deck frame itself.
- Check stringers for cracks, rot at the base where they contact the ground, and secure attachment to the deck framing above.
- Measure tread depth and riser height at the top, middle, and bottom of the run. Uneven dimensions are a common and underrated trip hazard.
- Test stair handrails by pushing and pulling firmly. They should not flex or shift at any attachment point.
- Confirm stair guards meet the same graspability and height standards as deck-level railings.
- Check outdoor light fixtures for a wet-location rating (listed as UL or ETL rated for damp or wet locations), since indoor fixtures installed outdoors degrade quickly and can become shock hazards.
- Confirm outdoor outlets near the deck are GFCI-protected, which cuts power fast enough to prevent a serious shock if a cord or fixture shorts out.
If stair dimensions are uneven or a handrail has any play in it, treat the stairs as off-limits until repaired, especially at night or for guests unfamiliar with the layout. Swapping a non-rated fixture for a wet-location model and confirming GFCI protection are both inexpensive fixes worth doing the same weekend you find them.
Tests, signs, and measurements: how to probe for rot and structural weakness
A visual check only catches the obvious problems. These simple tests sort components into safe, worth monitoring, or needing a professional.
- Run the screwdriver test at multiple points. Press a long screwdriver or ice pick into the wood at an angle. Easy penetration of a quarter inch to a half inch, or wood that crumbles rather than splinters, indicates active decay, a benchmark used in NADRA’s deck inspection checklist. Test the ledger, posts, and joist ends separately, since one clean spot doesn’t clear the whole structure.
- Test rail stability with lateral pressure. Push firmly at the top of each rail section in both directions. A rail that moves more than a small amount, or that you can rock visibly, needs tightening or replacement before anyone leans on it again.
- Use a moisture meter on suspect boards. Readings that run noticeably higher than nearby dry lumber point to trapped water and a higher risk of hidden decay, even where the surface looks fine.
- Log every test result with a photo and a note of the exact location. A contractor working from your documentation can triage faster and often quote more accurately than one starting from scratch.
Pro Tip: Test the same spot at least twice before concluding it’s sound. A single clean probe next to a rotted one can give false confidence.
Maintenance fixes homeowners can safely do and what requires a professional
Plenty of deck problems are well within a homeowner’s reach. Others are not, and treating them the same way is how small issues become dangerous ones.
- Safe to DIY: Tightening or replacing loose fasteners, swapping out individual damaged deck boards, cleaning mildew and reapplying sealant or stain, and patching or adding flashing where you can access it easily.
- Call a professional for: Ledger reattachment or re-flashing, footing replacement, beam or joist replacement, and engineered bracing for tall or free-standing decks, since each of these affects the structure’s load path.
- Interim safety steps: Rope off or block access to any damaged section, remove grills, furniture, and planters from compromised areas, and post a visible warning until the repair is complete.
If you’re unsure which category a problem falls into, treat it as a professional job. The cost of a wrong guess on a structural component is a lot higher than the cost of a consultation.
When to hire a professional deck inspector or contractor and expected costs
A trained inspector checks things most homeowners can’t easily verify on their own: through-bolt condition at the ledger, the actual connection between the ledger and the house’s floor framing (not just what’s visible from outside), and whether engineered connectors were used correctly in the first place.
Professional deck inspections typically run in the low hundreds of dollars, with the final cost driven by deck height, square footage, accessibility, and whether you add tests like moisture scanning or a detailed written report.
- Look for certifications relevant to structural and general home inspection work, not just a general contractor’s license.
- Ask for a sample report so you know what level of photo documentation and detail to expect.
- Confirm turnaround time, since a fast written report makes it easier to get repair quotes moving quickly.
- A documented report gives you a prioritized list, which helps you budget repairs in order of safety impact rather than guessing where to start.
Codes, permits, and key IRC R507 requirements homeowners should know
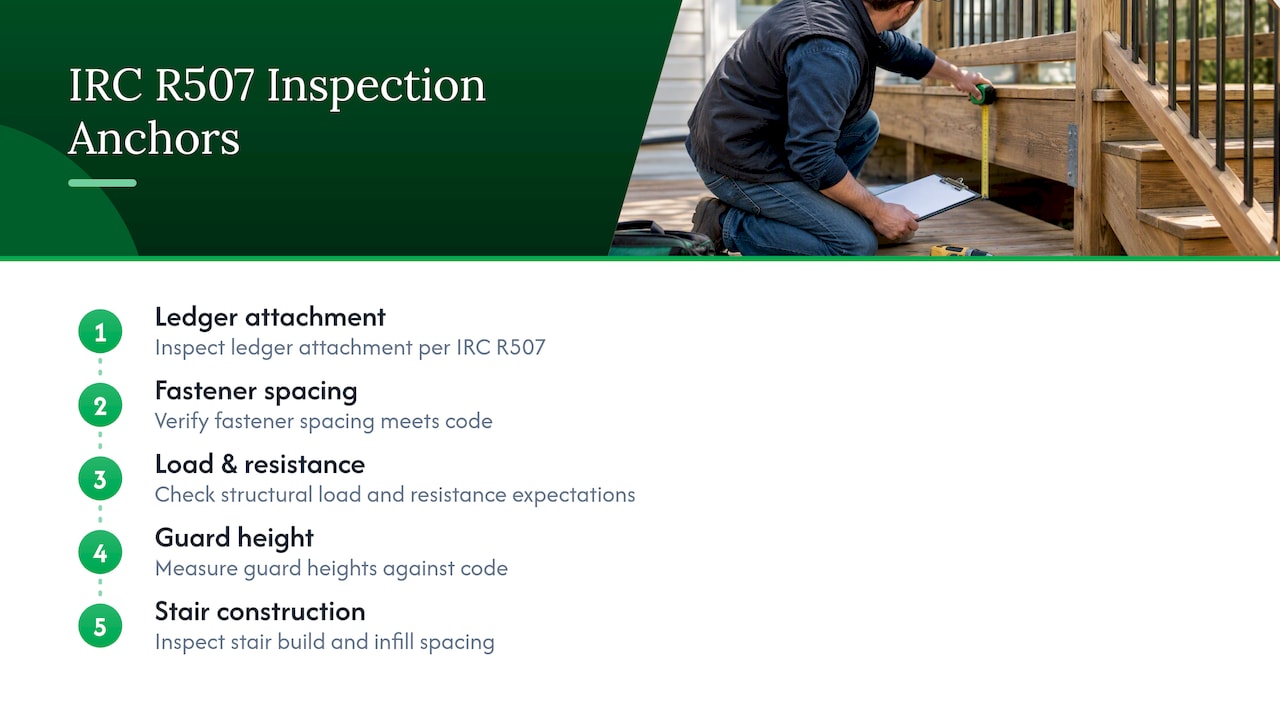
The IRC R507 deck provisions set prescriptive rules for ledger attachment, fastener spacing, load and resistance expectations, guard heights, and stair construction. These are the baseline most inspectors check a deck against.
Local building departments adopt and amend these provisions differently, so treat the code as a decision aid rather than a final answer. A deck that technically met code when it was built may not meet current standards, since building codes are typically updated every three years and older guardrails or stair infill spacing often fall short of newer requirements, according to NADRA. Any structural repair involving the ledger, footings, or framing, and most additions or rail replacements, typically require a permit. Check with your local building department before starting work rather than assuming a repair is minor enough to skip it.
Why professional inspections matter: publisher proof points and what we offer
Catching a hidden ledger problem or a corroded hanger before it fails is the entire point of this guide, and it’s also the core of what a trained inspector does for a living. Professional home inspection services offer both in-person and video-enabled inspections, allowing for deck reviews even when scheduling on-site visits is challenging. Inspection reports are typically returned within 24 hours, providing a prioritized list of needed repairs.
For buyers and sellers in real estate transactions, some inspection services provide tools that convert findings into clear, shareable lists for agents and buyers, helping to keep deck repairs prioritized in negotiations. Additional services such as radon, mold, and termite inspections often complement a deck review when moisture or pest damage is a concern.
What the checklist approach gets right, and where it falls short
The checklist model works because it forces you to look at specific points instead of just walking the deck and eyeballing it. But a checklist has a limit: it tells you where to look, not how much experience it takes to judge what you’re seeing. A homeowner running the screwdriver test for the first time can easily mistake naturally dense old growth lumber for sound wood, or miss early-stage rot that hasn’t softened the surface yet.
The most overrated step in most online deck guides is the visual walk-through. Decks rarely show obvious warning signs before a real problem, which is exactly why the ledger, the single most failure-prone connection, is also the one most homeowners never actually examine closely. If you take one thing from this guide, let it be this: do the probe tests, document what you find, and treat any ambiguous result as a reason to call a professional rather than a reason to wait until next season.
— JOHN
How we can help: booking a deck safety inspection
If your checklist uncovers uncertainties, a professional deck inspection can address these concerns. Such inspections typically examine the ledger, substructure, fasteners, and railings using probe tests and photo documentation, delivering a written report within 24 hours.

- In-person or video-enabled scheduling, so you’re not stuck waiting for a single available time slot.
- Photo-documented findings you can hand directly to a contractor or keep for your own records.
- Add-on testing available for related concerns like moisture, mold, or wood-destroying insects near the deck structure.
If a collapse or major damage has already occurred, it’s also worth a quick call to your home insurance provider, such as American Integrity Insurance or Stapp Insurance, to understand what your policy covers before repairs begin. When you’re ready for a documented professional look at your deck, visit the inspection services page to see what’s included and book a time that works for you.
FAQ
How often should I inspect my deck for safety issues?
Most decks need a full inspection once a year, ideally in early spring before heavy seasonal use begins. Decks in coastal areas or climates with repeated freeze-thaw cycles benefit from a second check in fall, since moisture and temperature swings accelerate wear on fasteners and wood.
What is the screwdriver test and how do I use it?
The screwdriver test involves pressing a long screwdriver or ice pick into wood at an angle to check for hidden decay. Easy penetration of a quarter inch to a half inch, or wood that crumbles instead of splintering, signals active rot according to NADRA’s inspection checklist, and the test should be repeated at several points rather than relied on at just one spot.
How much does a professional deck inspection cost?
Professional deck inspections generally run in the low hundreds of dollars, with the final price shaped by the deck’s height, size, accessibility, and any additional testing requested. Hunt Home Inspection, LLC publishes service details for its inspection offerings on its inspection services page rather than a flat rate, since scope varies by property.
What are the most common deck safety hazards?
The most common hazards are a failing ledger connection, corroded or missing joist hanger nails, rotted posts or beams, and loose or unstable guardrails. Collapses and flooring failures on decks, porches, and balconies caused about 8,700 injuries and two fatalities between 2020 and 2024, according to Consumer Reports’ analysis of CPSC data, which makes the ledger and connectors the highest-priority checks.
Do I need a permit to repair or replace deck structural components?
Most jurisdictions require a permit for structural deck repairs involving the ledger, footings, framing, or guardrail replacement, since these fall under code provisions like IRC R507. Local rules vary, so check with your building department before starting any structural repair.
Sources
The checks and thresholds in this guide draw on established deck safety resources, including recall data, industry probe-test standards, and prescriptive code provisions, so homeowners can verify any claim independently before acting on it.
- Guide to deck maintenance and safety – Consumer Reports
- Deck safety checklist – This Old House
- Composite decks recalled by Louisiana-Pacific
Recent Comments