
If your radon test came back at or above 4.0 pCi/L, the EPA recommends mitigation; results between 2.0 and 4.0 pCi/L are still worth addressing. Your immediate move is to confirm the result with a follow-up test, contact your state radon office or a certified mitigator, and schedule a system to get verified with an independent post-installation test within 30 days.
TL;DR:
- Confirmatory testing with a short-term test (2 to 7 days) is recommended when radon levels are between 2.0 and 4.0 pCi/L, especially before mitigation decisions.
- Installing a sub-slab depressurization system is the most common and effective radon mitigation method for most foundation types, significantly lowering indoor radon levels.
- System testing should be verified within 30 days of installation using a short-term test, with results below 4.0 pCi/L indicating proper system performance; above that requires system adjustments.
- Independent radon testing from a third-party provider offers a conflict-free, timely result, especially crucial during real estate transactions or after system installation.
- Regular maintenance, including checking pressure gauges and replacing fans every 5 to 10 years, is essential for long-term mitigation effectiveness.
Table of Contents
- First steps after a high radon test this week
- How radon mitigation systems actually work
- How to vet and hire a qualified radon mitigator
- When and how to verify the system worked
- Costs and a realistic mitigation timeline
- Keeping the system running for the long haul
- What mitigation buys you beyond the EPA number
- Red flags that signal a poor mitigation installation
- Reading your post-mitigation results correctly
- Reducing radon while you wait for full mitigation
- Why documentation matters as much as the fix
- Another path: independent verification through Hunt Home Inspection
- Sources
- FAQ
First steps after a high radon test this week
A high radon number is not an emergency you have to fix tonight, but it does need a plan within days, not months. Start by pulling the original lab report and saving it: the test dates, device type, placement location, and closed-house conditions all matter if you end up negotiating a repair credit or comparing results later.
Next, decide whether to run a confirmatory test before committing to mitigation. A short-term test (2 to 7 days) gives you a fast answer and works well when you need results quickly, such as during a home sale. A long-term test (more than 90 days) gives a more accurate year-round average but is not practical when a closing date is approaching.
While you wait on results, check with your state radon office to learn whether your state requires mitigators to hold a specific license or certification. Requirements vary widely, and some states publish lists of approved professionals.
If you are mid-transaction, put your requirements in writing. A repair addendum should specify:
- The radon level that triggers a seller-funded mitigation system.
- A requirement for post-mitigation testing performed by a party other than the installer.
- A deadline for system installation relative to closing.
- Language stating that final test results below the action level are a condition of the sale proceeding as negotiated.
How radon mitigation systems actually work
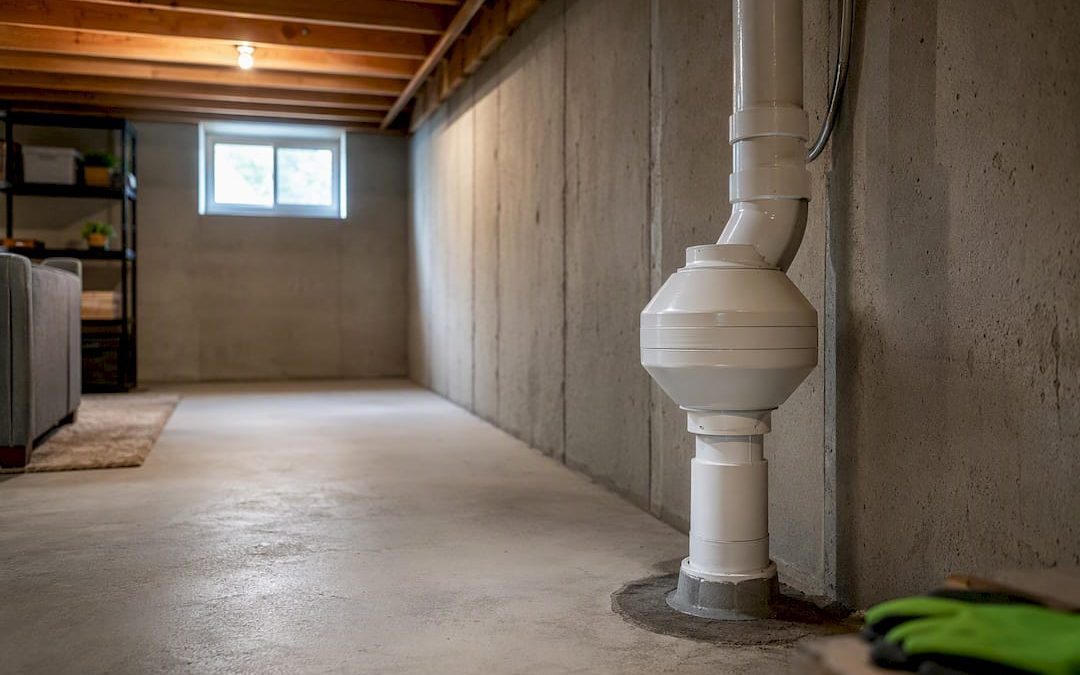
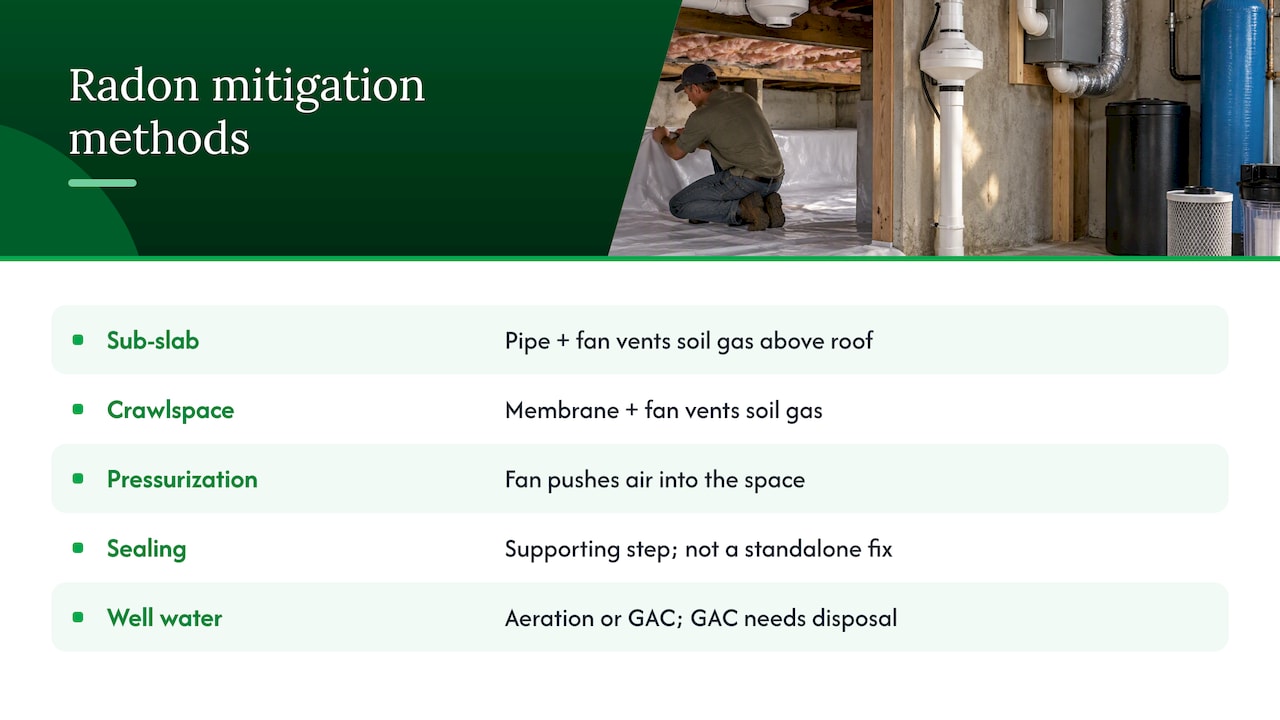
Most mitigation systems rely on sub-slab depressurization: a pipe run through the foundation slab connects to a fan that pulls radon-laden soil gas from beneath the house and vents it above the roofline before it can enter living space. It is the most common approach because it works on the widest range of foundation types and tends to deliver the largest reduction.
Homes with crawlspaces often need a different approach. Installers lay a heavy plastic membrane over the exposed soil and connect it to a similar fan and vent system, which is sometimes called sub-membrane depressurization. In some cases, house or crawlspace pressurization, which uses a fan to push air in rather than pull soil gas out, is used instead.
Sealing cracks and openings in the foundation is a supporting step, not a stand-alone fix. Radon moves through soil gas pressure differences that sealing alone rarely overcomes, though it does improve the efficiency of a depressurization system. Ventilation approaches, including heat recovery ventilators, sometimes supplement a primary system in tightly sealed homes.
Radon mitigation systems can cut indoor levels by a very large percentage in many cases, according to EPA guidance on the action level, which is why a properly designed system usually brings even high readings well under the 4.0 pCi/L threshold.
Private well water with elevated radon is handled differently, typically with aeration systems or granular activated carbon (GAC) filtration, and any GAC media used for radon removal needs proper disposal since it can accumulate radioactivity over time.
How to vet and hire a qualified radon mitigator
Choosing the right installer matters as much as the system design itself. Start with your state radon office to confirm licensing status and check for any complaint history before you sign anything.
- Ask for a written proposal that includes the proposed system type, diagnostic testing results used to design it, and an itemized cost.
- Request references from at least two recent jobs with similar foundation types to yours.
- Confirm the warranty terms, including what happens if post-installation testing does not meet the target level.
- Get a installation timeline in writing, including who performs the post-mitigation test.
- Ask to see before-and-after test logs from prior jobs so you know what a successful outcome looks like.
Be cautious about conflicts of interest. If the same company installs and tests the system, independent follow-up testing from a separate party removes any incentive to report a favorable number. Your contract should also specify an operation, maintenance, and monitoring (OM&M) plan, a manometer or visual warning device that shows the system is running, and clear labeling on pipes and the fan unit.
Pro Tip: Photograph sealed penetrations and fan wiring before drywall or finishing work covers them, in case you need proof of installation quality later.
When and how to verify the system worked
Timing matters more than most homeowners expect. According to EPA guidance, you should wait at least 24 hours after the fan starts running before testing, and complete the verification test within 30 days of installation.
- Use a short-term test of 2 to 7 days for standard post-installation verification.
- Choose a long-term test only if you specifically need a year-round average rather than a quick confirmation.
- Keep the house closed, meaning windows and doors stay shut except for normal entry and exit, for at least 12 hours before and during the test.
- Place the test device away from drafts, exterior walls, and the mitigation system’s exhaust point.
Independent testing after mitigation reduces the risk of a conflict-of-interest result, a point EPA’s homebuyer guidance emphasizes for anyone relying on the installer’s own numbers to close a sale or clear a family’s home. Hiring a separate tester, whether a home inspection company or an independent radon measurement professional, gives you a result nobody involved in the installation has a stake in.
Costs and a realistic mitigation timeline
Costs vary by foundation type, whether diagnostic testing is needed before design, and how complex the piping route is. EPA notes that most homes can be fixed for roughly the same cost as other common home repairs, and running diagnostics up front tends to lower the odds of a rework.
| Step | What happens | Typical timing |
|---|---|---|
| Diagnostic testing | Contractor assesses soil and foundation to design the system | 1 to 2 days |
| System design and quoting | Written proposal with pipe routing and fan specification | A few days to 1 week |
| Installation | Sub-slab or sub-membrane system installed and sealed | 1 day in most homes |
| Stabilization | System runs continuously before testing | At least 24 hours |
| Independent verification | Short-term test confirms reduced levels | Within 30 days of installation |
Expect the system to run continuously going forward. A working system typically brings levels toward the EPA’s commonly cited post-mitigation target of 2 pCi/L or below.
Keeping the system running for the long haul
A mitigation system is not a one-time fix and forget. Check the manometer or warning device weekly; a U-tube manometer showing no pressure difference, or an alarm sounding, usually means the fan has failed or a pipe joint has come loose.
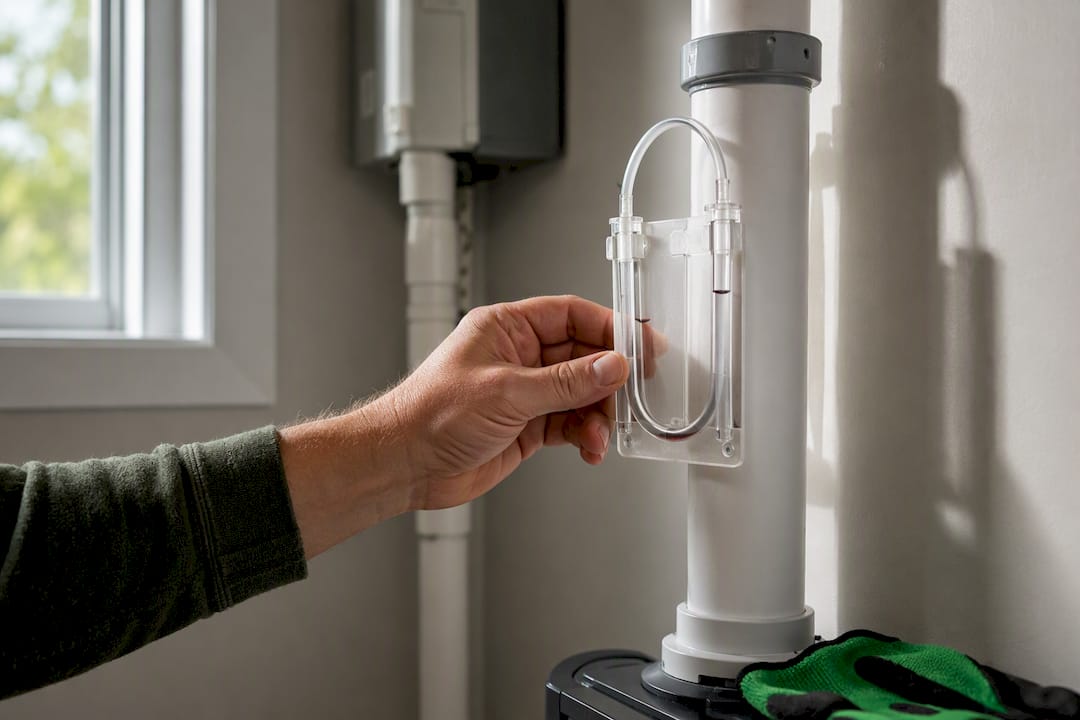
Radon fans typically need replacement every 5 to 10 years, and a failed fan should be swapped promptly rather than left off, since radon levels rise again quickly once suction stops.
Pro Tip: Retest every two years even if the system seems to be running fine, and always retest after any renovation that disturbs the foundation, adds finished living space, or changes the HVAC layout.
What mitigation buys you beyond the EPA number
The EPA action level is a policy threshold, not a bright line between safe and dangerous. Radon exposure risk scales with concentration and time, so a home at 3.5 pCi/L still carries some measure of long-term lung cancer risk even though it falls under the 4.0 pCi/L action level, which is why EPA guidance frames 2.0 to 4.0 pCi/L as a range worth considering for mitigation rather than ignoring.
For most households, the benefit of mitigating even a moderate reading is straightforward: lower ongoing exposure, and a documented result you can point to if health questions come up later. There is no dose of radon that is proven harmless, only lower and higher probabilities over years of exposure, which is part of why CDC’s radon guidance echoes the EPA’s recommendation to test, mitigate, and retest rather than treating a single passing number as the end of the conversation.
The tradeoff households weigh is modest ongoing cost (electricity for the fan, occasional maintenance) against a real reduction in a known lung cancer risk factor. For buyers evaluating a home with an existing mitigation system, that same logic applies to verifying the system still works rather than assuming the original installation still holds years later.
Red flags that signal a poor mitigation installation
Not every installation delivers what it promises, and a few warning signs show up often enough to watch for. A proposal that skips diagnostic testing and jumps straight to a generic system design is one; foundation types differ enough that a one-size approach often under-performs.
Watch for these common problems:
- No manometer or warning device installed, which means you have no simple way to know if the fan has failed.
- Unlabeled pipes or fan wiring, making future troubleshooting harder for any technician who did not do the original install.
- Exhaust vent terminating too close to a window, door, or roof edge, which can pull mitigated air back into the home or a neighboring space.
- No written OM&M instructions, leaving you guessing about maintenance intervals or what a failure looks like.
- Same-company installer-and-tester setup with no offer of independent verification, which raises the conflict-of-interest concern EPA’s homebuyer guidance flags directly.
Sealed penetrations that were never actually sealed, or a system that shows a working fan but no measurable pressure change on the manometer, are two failure signs worth calling the installer about immediately rather than waiting for the next scheduled retest.
Reading your post-mitigation results correctly
A post-mitigation test result below 4.0 pCi/L, and ideally closer to the EPA’s commonly cited 2 pCi/L target, tells you the system is doing its job. Compare the new number to your original test, not just to the action level, since a drop from 8.0 to 3.8 pCi/L is a real improvement but still leaves room for system tuning.
If the verification test comes back above 4.0 pCi/L, the system needs adjustment before you treat the job as finished. Common fixes include increasing fan capacity, adding a second suction point if the slab has multiple sections, or resealing penetrations that were missed the first time. Call the original installer under warranty first; if they cannot resolve it, get a second opinion from another certified mitigator.
Results between 2.0 and 4.0 pCi/L after mitigation are a gray area similar to the original action-level guidance: many households accept that range, though further sealing or fan upgrades can often push it lower. Whatever the number, keep the report. It becomes part of your home’s documentation for future sale disclosures or family health conversations.
Reducing radon while you wait for full mitigation
Full mitigation takes days to schedule and install, but you do not have to wait that long to bring levels down somewhat. Increasing ventilation by opening windows and running exhaust fans temporarily lowers indoor radon concentration, though the effect disappears once the house is closed up again.
Sealing obvious cracks in the foundation floor and walls, and around pipe or wire penetrations, can modestly reduce entry points in the meantime. Running a basement or crawlspace dehumidifier will not reduce radon directly, but keeping mechanical ventilation running in occupied lower levels helps dilute concentrations somewhat until a permanent system is in place.
None of these steps substitute for a properly designed mitigation system, and none should delay scheduling one. Treat them as a bridge, not a solution, especially if your original reading was well above the action level.
Why documentation matters as much as the fix
Inspections that pair radon testing with clear reporting give buyers and sellers a paper trail they can act on, not just a number. Fast turnaround and flexible video or in-person scheduling keep real estate timelines from stalling on test results.
— JOHN
Another path: independent verification through Hunt Home Inspection
Contractors who install your system can also test it, but a second set of eyes from someone with no stake in the installation gives you a cleaner answer. Hunt Home Inspection, LLC offers standalone radon testing as part of its broader environmental testing services, with reports typically returned within 24 hours.
That turnaround matters most for buyers and sellers working against a closing deadline who need defensible documentation, not just a passing number on paper.
- Independent radon testing separate from your mitigation installer.
- Reports delivered promptly to keep transactions moving.
- Video and in-person scheduling options for convenience.
| What you get | Why it matters |
|---|---|
| Independent test result | No conflict of interest with the installer |
| 24-hour report turnaround | Keeps closing timelines on track |
| Combined environmental testing | Covers radon, lead, and other concerns in one visit |
If you need a documented, independent radon result before or after mitigation, schedule an inspection with Hunt Home Inspection, LLC.
This article is general information, not a substitute for advice from a qualified doctor. Consult a qualified healthcare professional about your own circumstances before acting on anything here.
FAQ
Which states are the worst for radon?
Radon potential varies by geology and construction, and EPA’s radon zone maps show that risk differs by region rather than being uniform across any single state. Because radon potential can vary house to house even within the same neighborhood, every home needs its own test rather than relying on area-wide assumptions.
How long does it take for radon levels to drop after mitigation?
A properly running system starts reducing radon almost immediately, but EPA guidance recommends waiting at least 24 hours after the fan starts before testing, and completing verification testing within 30 days. Most homes see levels drop well below the action level once the system stabilizes.
In what month is radon highest?
Radon levels tend to run higher in colder months due to seasonal pressure differences between indoor and outdoor air, sometimes called the stack effect. Because of this, a short-term test done in a warmer month can understate what a home experiences in winter, which is one reason a long-term test gives a more reliable year-round picture.
How often do homes fail radon tests?
There is no single published national failure rate, since results depend heavily on local geology and individual home construction. What is consistent is the guidance itself: EPA recommends mitigation at or above 4.0 pCi/L and suggests homeowners consider it between 2.0 and 4.0 pCi/L, regardless of how common a high result is in any given area.
Recent Comments