
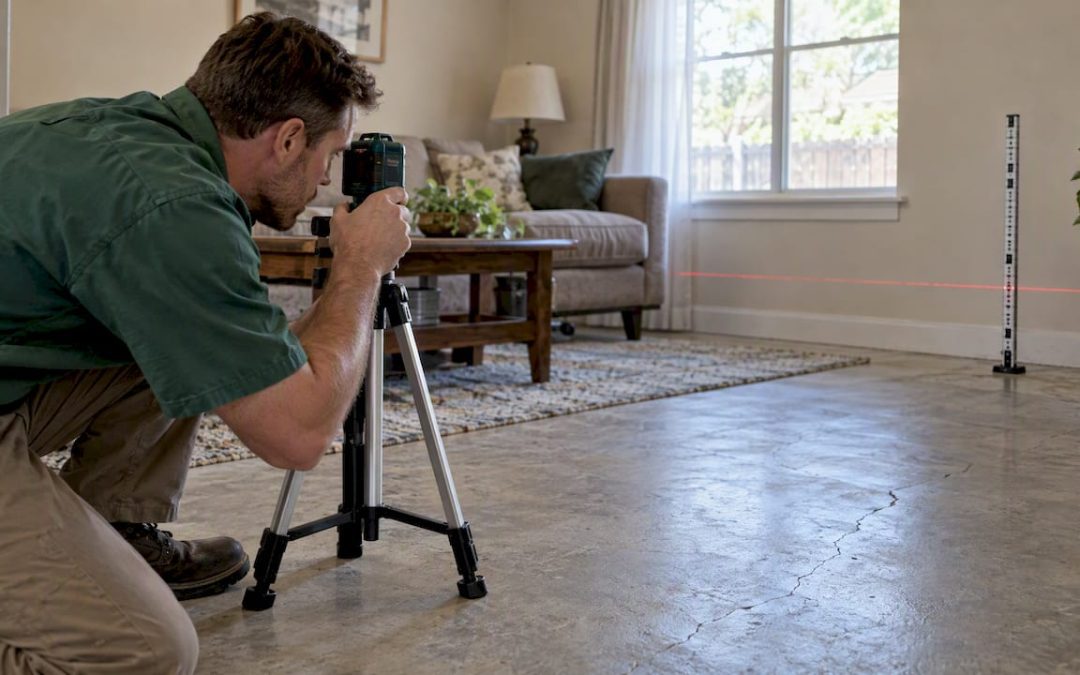
A slab foundation inspection is a focused visual and measurement check of a slab-on-grade for cracks, settlement, moisture, and distress level. For routine signs, book a licensed home inspector. For widening cracks, visible tilt, or lender and permit needs, hire a structural engineer, whose stamped report typically costs around $600.
TL;DR:
- A dedicated evaluation maps and photographs cracks, checks drainage and moisture, and may include elevation measurements; invasive tests follow only when noninvasive findings leave questions.
- Track crack changes with dated photos and width measurements; check severe cracks weekly and hairline cracks monthly, using the same angle and lighting.
- Active cracks wider than 1/4 inch, horizontal cracks, visible tilt or bowing, water intrusion, and stamped report requirements warrant prompt review by a structural engineer.
- General visual checks and added tests cost roughly $300 to $1,000, while structural engineer reports typically cost $500 to $1,500; complex jobs can reach $3,000.
Table of Contents
- What does a slab foundation inspection cover?
- Which signs of foundation problems should you watch for?
- Who can inspect a slab foundation, and when do you need a structural engineer?
- What happens during the inspection, and what does it cost?
- How are slab movement and distress measured?
- What should you do after the inspection?
- How do slab issues affect homes in the St. Louis Metro and Southern Illinois?
- A practitioner’s view on documenting slab concerns
- How we help with slab foundation inspections in the St. Louis Metro and Southern Illinois
- FAQ
- Sources
What does a slab foundation inspection cover?
A dedicated slab foundation evaluation goes further than the quick foundation glance in a standard home inspection. The inspector looks at the slab itself, the ground around it, and every spot where the slab meets something else.
Here is what typically gets checked:
- The exterior slab perimeter and expansion or control joints
- The interior slab surface and floor finishes, looking for cracking, lifting, or dips
- Visible spalling or exposed rebar. HUD’s NSPIRE foundation standard flags spalling at 12 by 12 inches and 3/4 inch deep
- Perimeter drainage, gutters, downspouts, and grading that slopes toward or away from the house
- Gaps around door thresholds, wall bases, and trim
- Attached elements such as the garage slab, porch slabs, and entry steps
The methods matter as much as the list. Most inspections start with visual mapping: the inspector sketches the floor plan, marks every crack, and photographs each one with a scale reference. Many add floor-elevation or level checks, which show whether the slab is flat, tilted, or dished. Moisture readings at the slab edge or at suspect interior spots help separate drainage problems from structural ones.
Non-invasive testing comes first. Invasive steps such as coring, or digging beside the slab to see the footing, come only when the visual findings and measurements leave real questions.
How is this different from a general home inspection? A general inspection follows a visual, non-invasive standard and covers the whole house, so the foundation gets a share of one visit. A dedicated slab evaluation gives the slab the full visit. You get deeper mapping, actual measurements, optional specialized tests, and attention to patterns that belong to slab-on-grade construction, such as corner cracks, edge heave, and differential settlement across a room. Standard inspections can’t provide stamped structural opinions, which is often the exact document a lender or permit office wants.
Which signs of foundation problems should you watch for?
Slabs rarely fail without warning. They give hints, and most are visible from a walk through the house with a flashlight and a tape measure.
Watch for these:
- Interior cracks in drywall, tile, or the slab itself. Note the width and whether they run vertical, diagonal, or horizontal.
- Exterior cracks in brick, stucco, or the slab edge, especially stair-step patterns in masonry joints.
- Doors and windows that stick, rub, or won’t latch the way they used to.
- Floors that slope, bounce, or feel uneven underfoot.
- Gaps between baseboards, trim, or cabinets and the wall.
- A leaning chimney or masonry veneer pulling away from the house.
- Standing water or soggy soil near the slab after rain.
- Spalling concrete or exposed rebar at the slab edge.
Not every sign carries the same weight. Horizontal cracks, cracks that keep widening, visible tilt or bowing, and separation at structural connections need prompt expert evaluation. Hairline map cracking, the fine web pattern that shows up as concrete cures and dries, can often be watched rather than fixed. Our home inspection red flags list for buyers adds more context for shoppers walking through a house they might buy.
Measuring is easy. Lay a ruler or a printed crack gauge across the crack, photograph it with a coin or tape measure beside it, and write the date on the photo or in your phone’s notes. Then repeat the same shot from the same spot.
Pro Tip: Check severe cracks weekly and hairline ones monthly, using the same angle and lighting each time. A crack that grows over 30 to 60 days tells you far more than any single photo.
If you are buying, our DIY pre-inspection checklist helps you document concerns before the professional arrives, which makes the on-site visit faster and more focused.
Who can inspect a slab foundation, and when do you need a structural engineer?
Three kinds of professionals look at foundations, and they are not interchangeable.
- General home inspector: Visual and non-invasive, done as one part of a full-house inspection. Good for spotting trouble and flagging it, not for diagnosing it or stamping a structural opinion.
- Foundation specialist: Goes deeper visually, often adds moisture testing, and can refer or perform repairs. Keep in mind that a repair company has a stake in the repair scope.
- Structural engineer: Analyzes, measures, and writes a stamped report that carries weight with permit offices, lenders, and courts. Engineers are generally the most qualified for foundation work and provide unbiased reports with recommended repairs.
When should you skip straight to an engineer? Industry guidance points to active or widening cracks wider than 1/4 inch, horizontal cracks, visible tilt or wall bowing, water intrusion, and any lender or permit demand for a stamped opinion. If a purchase contract or insurance claim depends on a precise structural answer, an engineer is the right call.
A few tips for hiring well:
- Verify the engineer’s license with your state licensing board before you sign anything.
- Ask about experience with residential slab foundations specifically, not just commercial structures.
- Request a sample report so you know what you will receive.
- Confirm turnaround time up front, especially if you are working against a closing date.
Not sure which professional fits your situation? Our guide on home inspector vs. structural engineer walks through the decision for homebuyers.
What happens during the inspection, and what does it cost?
Knowing the sequence takes the mystery out of the appointment. Most slab evaluations follow the same steps:
- Interview and history: The inspector asks about past cracks, repairs, flooding, plumbing leaks, and when you first noticed changes.
- Exterior walk: Grading, drainage, gutters, and the slab perimeter get checked first.
- Interior survey: Floors, walls, door frames, and finishes are examined room by room.
- Mapped photo documentation: Cracks and distress are photographed and marked on a floor plan.
- Crack measurement: Widths and lengths are recorded for comparison over time.
- Optional elevation survey: A level or manometer check shows how the slab surface varies from corner to corner.
- Follow-up recommendations: The inspector suggests more testing, monitoring, or engineering if the findings call for it.
The written report should include photos tied to the floor plan, crack widths with a severity rating, and a classification of cosmetic, functional, or structural. An engineer adds a stamp and, usually, repair recommendations. Our overview of what a home inspection report contains shows how to read one without getting lost.
On cost, national guidance varies by scope and provider. General visual checks and add-ons run roughly $300 to $1,000, while structural engineer reports typically run $500 to $1,500. A typical engineer visit takes about 90 minutes. Price climbs with home size, complexity, added testing, and whether you need permit-ready stamping. Complex jobs can run well above the average, and that same engineer guidance gives a range of $300 to $3,000.
Treat those numbers as a budgeting range, not a quote. A larger home with several suspect areas will cost more than a small slab with one crack, and an engineer who must return for a second elevation survey will bill for it.

How are slab movement and distress measured?
Inspectors don’t just say “that crack looks bad.” They measure movement and sort what they see into categories.
Inspectors measure movement in terms of curvature, how much a slab bends, and tilt, how much the whole slab leans in one direction. Both are expressed as ratios, because the same drop means something very different over a short distance than over a long one.
PTI slab-on-ground guidance limits curvature to about 1/360 (0.28%) over a minimum 25 ft length and tilt to about 1/100 (1.0%). Those are the numbers worth looking for in your report.
Movement numbers don’t stand alone. The same guidance judges performance by three kinds of distress alongside estimated movement:
- Cosmetic: Hairline cracks, minor drywall cracking, small finish blemishes. Unsightly but not affecting use.
- Functional: Sticking doors, jammed windows, cracked tile, plumbing strain. The house still works, but poorly.
- Structural: Compromised load paths, major separation, or damage threatening safety or stability.
Marginal results call for more evidence, not guesses. The PTI guidance notes that additional testing or further observation may be needed in those cases. Typical options include repeated floor-elevation surveys over time to show whether the slab is still moving, geotechnical testing to understand the soil, coring to check slab thickness and reinforcement, and moisture monitoring to track water behavior beneath and around the slab.
What should you do after the inspection?
A report is only useful if you act on it. Start by reading the findings, photos, severity classification, and recommended follow-up. Confirm whether a permit office will require a stamped report or a repair design before any work begins.
- Get repair quotes: Collect multiple bids, and give each contractor the same inspector or engineer documentation so the quotes compare fairly.
- Ask the right questions: What caused the movement, how will the repair address that cause, what warranty applies, and who handles permits?
- In a purchase: Use the report to negotiate a repair credit, seller repairs, or a contingency that lets you walk away. Lenders and permit offices may request the same documentation.
Don’t sign off on a repair plan that fixes symptoms without explaining the cause.
How do slab issues affect homes in the St. Louis Metro and Southern Illinois?
Homes in this region span several eras and construction types, and each reacts to slab trouble differently.
Older houses in the St. Louis Metro area often sit on basements or crawl spaces with slab additions, garages, or porches attached. The older slab and the newer addition may settle at different rates, so cracks tend to show at the seam between them. Mid-century ranches and many newer subdivision homes on true slab-on-grade can show floor-level dips and tilt more clearly, since there is no basement wall or crawl space to absorb or reveal movement.
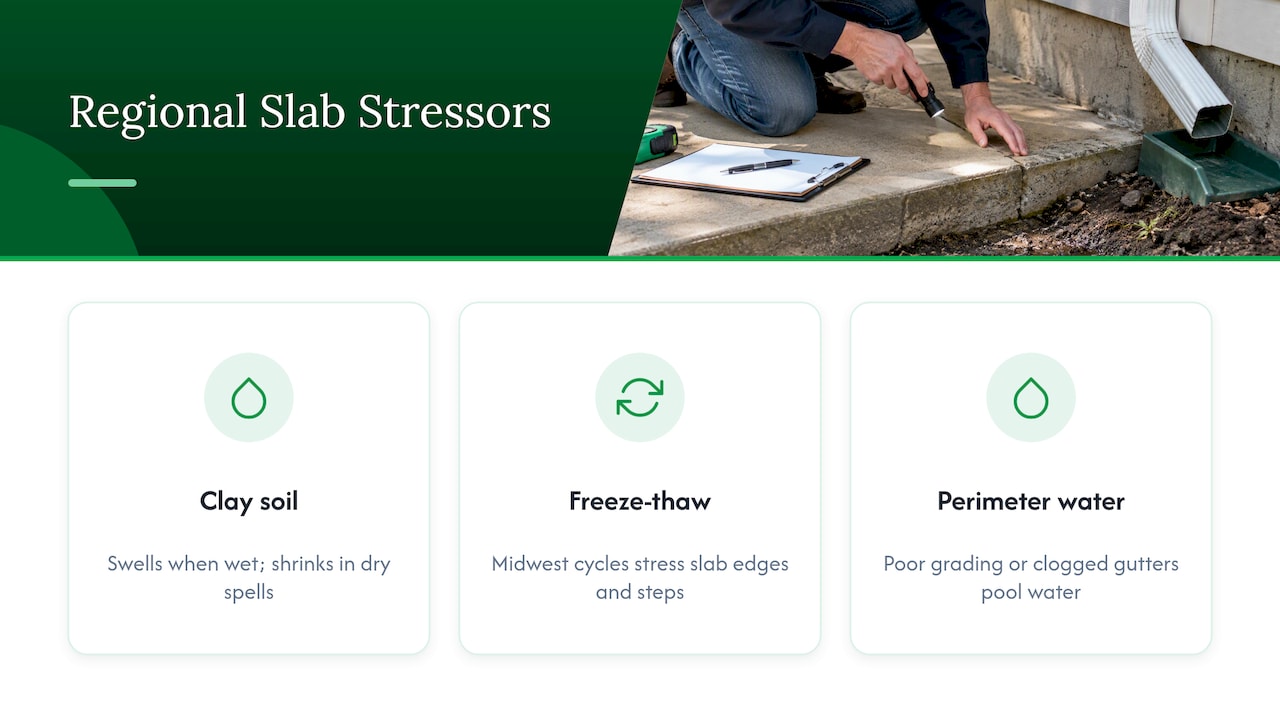
Soil and weather play a part here. Clay-rich soils swell when wet and shrink in dry spells, and Midwest freeze-thaw cycles add stress at slab edges and exterior steps. Poor grading or clogged gutters let water pool at the perimeter, which makes every one of those effects worse.
Pay extra attention to garage slabs, patios, and any room added after the original build. They are the first places differential movement tends to appear.
A practitioner’s view on documenting slab concerns
Most slab surprises I see come down to missing records rather than missing cracks. A homeowner remembers a crack “getting bigger” but has no photo, no date, and no measurement, so nobody can tell whether it moved or whether memory did. Measure the width, take dated photos with a ruler in frame, and sketch the locations on a simple floor plan. That small habit turns a vague worry into evidence.
The mistakes repeat. People assume a hairline crack is harmless and never look again. They wait while a crack widens. They also hire an unlicensed handyman to “diagnose” a problem that needs a licensed professional. A fast, clear report, delivered with a video or in-person walkthrough, makes negotiation and repair coordination far easier for everyone.
— JOHN
How we help with slab foundation inspections in the St. Louis Metro and Southern Illinois
If a slab concern is on your mind, we can get a trained set of eyes on it quickly. Hunt Home Inspection, LLC serves the St. Louis Metro area and Southern Illinois with timely reports and the flexibility to inspect in person or by video.

Here is what we offer that applies to slab concerns:
- Buyer’s home inspections that include a visual foundation check, plus the full house around it
- Pre-listing and seller’s inspections so you can learn about slab issues before a buyer does
- Home maintenance inspections for owners who want a baseline or are monitoring a crack
- In-person or video inspection options, with evening and weekend scheduling
- Reports returned promptly
- Our Create Request List™, which turns findings into a clear repair request between buyers and agents
- Support for veterans and first-time buyers
Before the appointment, gather any previous reports, repair records, and your dated crack photos, and make sure the inspector can reach the garage, exterior perimeter, and any areas with known cracking. If our visual check points toward an engineering question, we will tell you plainly so you can bring in the right professional. Browse our inspection services and book the visit that fits your situation.
FAQ
Who can inspect a foundation?
Home inspectors, foundation specialists, and licensed structural engineers can all inspect foundations. Inspectors give a visual, non-invasive check, while an engineer provides measurements and a stamped report. Engineers are generally considered the most qualified for foundation inspections.
Is a slab foundation good or bad?
Neither. A slab foundation performs well when soil, drainage, and construction quality are sound. Its trouble spots are movement from soil changes and water, which is why cracks, tilt, and moisture are the things inspectors check.
How much does it cost to fix the foundation of a slab house?
Repair cost depends on the cause, the extent of movement, and the method, so no honest single figure applies to every house. A written assessment from an engineer or inspector, plus several repair bids, is the reliable way to price your specific case. Inspection itself usually costs a fraction of any repair.
What is the biggest red flag in a home inspection?
For foundations, the biggest red flags are horizontal cracks, cracks wider than 1/4 inch, visible wall bowing, and settlement of an inch or more, which warrant upgrading to a specialist or engineer. Active water intrusion near the slab is another serious one.
Sources
- PTI DC10.8-18 A Better Understanding
- Structural Engineer Foundation Inspection Guide
- Home Foundation Inspection Cost in 2026
Recent Comments