
Open your report to the summary page first. That single move separates buyers who use the inspection strategically from those who spiral into anxiety over a 60-page PDF. The summary tells you whether you have a deal-killer, a negotiation lever, or a house worth buying with eyes open. Everything else in the report provides context for what the summary flags.
Reports run from about 15 to 70 pages depending on home size and how thoroughly the inspector documents findings. A long report does not mean a bad house. Inspectors document minor cosmetic items alongside serious defects because that is their job. Your job is to sort by severity, not count pages.
Start with this three-item triage the moment you open the report:
- Safety: Exposed wiring, missing smoke or carbon monoxide detectors, gas leaks, structural collapse risk
- Structural: Foundation movement, roof failure, major framing damage
- Water/intrusion: Active leaks, moisture in the basement or crawlspace, failed flashing
Pro Tip: Don’t treat the report as a punch list to demand every minor repair. Buyers who send 30-item repair requests over caulking and light switches lose credibility with sellers and often lose the negotiation entirely. Save your leverage for what actually matters.
Key Takeaways
Reading a home inspection report well comes down to one discipline: sort by severity first, then act on what actually matters before your contingency window closes.
| Point | Details |
|---|---|
| Start with the summary | Open the summary page first to triage safety, structural, and water issues before reading the full report. |
| Decode the comment key | Learn codes like NI, R, and D before reading; “further evaluation recommended” means call a specialist, not panic. |
| Red flags need specialist bids | Foundation movement, active leaks, and electrical panel concerns require a licensed specialist’s written estimate before negotiating. |
| Keep repair requests focused | Limit requests to safety, structural, water, and high-cost mechanical items; long lists lose credibility with sellers. |
| Jhunthomeinspections delivers in 24 hours | Buyers in St. Louis Metro and Southern Illinois get annotated reports with the Create Request List™ tool to speed up repair requests. |
Table of Contents
- How to read a home inspection report: start with the summary page
- How to decode the comment key, symbols, and report codes
- How to spot red flags and urgent safety or structural issues
- What each report section actually covers and what to look for
- How to read photos, measurements, and attachments in the report
- What a general home inspection usually does NOT cover
- How to use the report to negotiate, request repairs, or walk away
- How inspectors triage findings and 12 questions to ask yours
- Typical timelines, report delivery, and ballpark repair costs
- A 7-step checklist for after you receive the report
- A buyer-first approach to reading inspection reports
- Jhunthomeinspections makes acting on your report straightforward
- Sources
How to read a home inspection report: start with the summary page
The summary or “primary recommendations” page is where professional inspectors concentrate the findings that need your attention before anything else. Inspector guides consistently recommend reading the summary first, then reviewing areas of concern, and reading the full body sections for context. Think of it as the map; the body of the report is the turn-by-turn directions.
Most summaries organize findings into severity categories. You will typically see labels like Safety, Major Defect, Repair Recommended, Monitor, and Maintenance. Safety items are urgent regardless of cost. Major Defect items usually involve systems that are failing or near end of life. Repair Recommended items need attention but are not necessarily deal-breakers. Monitor items are things to watch over time.
Professional inspectors use a triage format precisely so buyers can identify critical issues quickly without reading every paragraph. Skipping the body entirely, though, risks missing nuance. A summary item labeled “Repair Recommended” for the electrical panel means something very different if the body section shows double-tapped breakers throughout versus a single loose connection.
Here is a quick action checklist for summary items:
- Safety items: Call the inspector the same day for verbal clarification; these rarely wait.
- Major defects: Get a specialist quote before negotiating; you need a real number.
- Repair recommended: Decide whether to request seller repair, a credit, or accept as-is.
- Monitor: Note these for your own maintenance calendar; they rarely belong in a repair request.
Pro Tip: Screenshot the summary page and forward it to your real estate agent and lender within an hour of receiving the report. Your agent needs it to draft a repair request; your lender may need it if a safety item affects loan approval.
How to decode the comment key, symbols, and report codes
Every inspector uses a comment key or legend, usually on the first page or in a sidebar. Learning it takes five minutes and prevents costly misreads. The most common codes you will encounter:
| Code | Full Term | What It Means for You |
|---|---|---|
| I | Inspected | Observed and found no significant defect at time of inspection |
| NI | Not Inspected | Inspector could not access or evaluate; treat as unknown |
| NP | Not Present | System or component does not exist at this property |
| S | Satisfactory | Functioning as intended with no noted defects |
| R | Repair | Defect found; correction recommended before or after closing |
| D | Deficient | Does not meet accepted standards; action required |
Beyond the letter codes, watch for these phrases in the body text:
- “Monitor” means the condition is not yet a defect but could become one. Note it; do not demand a repair.
- “Further evaluation recommended” means the inspector saw something outside their generalist scope and wants a licensed specialist to assess it. This is not a diagnosis of disaster; it is a referral.
- “Repair by a qualified contractor” is a standard phrase. The word “qualified” matters: it usually means licensed, not just handy.
- “At time of inspection” limits the finding to the day of the visit. Conditions can change.
Severity labels vary slightly between inspectors and software platforms, but the functional meaning stays consistent. A “Safety” label from one inspector and a “Hazard” label from another both mean the same thing: act now. InterNACHI’s sample report library shows how different inspectors structure comment keys and severity ratings, which is worth reviewing before your inspection so the language feels familiar. Spectora’s visual report examples and ISN’s guidance are also useful references for understanding how these codes appear in modern digital reports.
How to spot red flags and urgent safety or structural issues
Most findings in a home inspection report are routine. A handful are not. Red flags are the findings that should either stop the purchase, require specialist confirmation before you proceed, or anchor your negotiation.
The clearest red flags:
- Active water intrusion: Staining on ceilings or walls, moisture readings above normal in the basement or crawlspace, efflorescence on foundation walls. Water is the most destructive force in a house over time.
- Major foundation movement: Horizontal cracks in block foundations, stair-step cracks in brick, floors that slope more than an inch over 10 feet, doors that will not close due to frame distortion.
- Exposed live wiring or unsafe electrical: Open junction boxes, double-tapped breakers on a 15-amp circuit, Federal Pacific or Zinsco panels (both have documented failure histories), aluminum branch wiring in homes built before 1972.
- Roof failures with active leaks: Missing or lifted flashing at chimneys and valleys, visible daylight through the roof deck, active staining on the attic sheathing directly below a penetration.
- Missing or non-working fire and carbon monoxide detectors: These are safety code items in virtually every U.S. jurisdiction and cheap to fix, but their absence signals deferred maintenance throughout.
Buyer-focused breakdowns consistently list foundation, roof, HVAC, electrical, and plumbing as the top-priority systems in terms of negotiation leverage. That tracks with repair costs: a foundation repair can run from a few thousand dollars for crack injection to $30,000 or more for underpinning. A full roof replacement on a 2,000-square-foot home typically runs $8,000–$20,000 depending on material and region.
Use photos and inspector notes together. A photo of a crack without context is ambiguous. The same photo paired with a note that reads “horizontal crack with displacement, evidence of ongoing movement” is a red flag. The combination of severity label, photo, and written description is what tells you whether to call a structural engineer.
Pro Tip: When a red flag appears in the report, call the inspector before you call the seller’s agent. A five-minute conversation often clarifies whether the finding is historical or active, which changes your negotiation position completely. Get specialist bids in writing before asking the seller for a credit; a vague “the inspector found foundation issues” request is easy to dismiss.
What each report section actually covers and what to look for
A standard home inspection report follows a system-by-system structure. Here is what matters in each section.
Roof
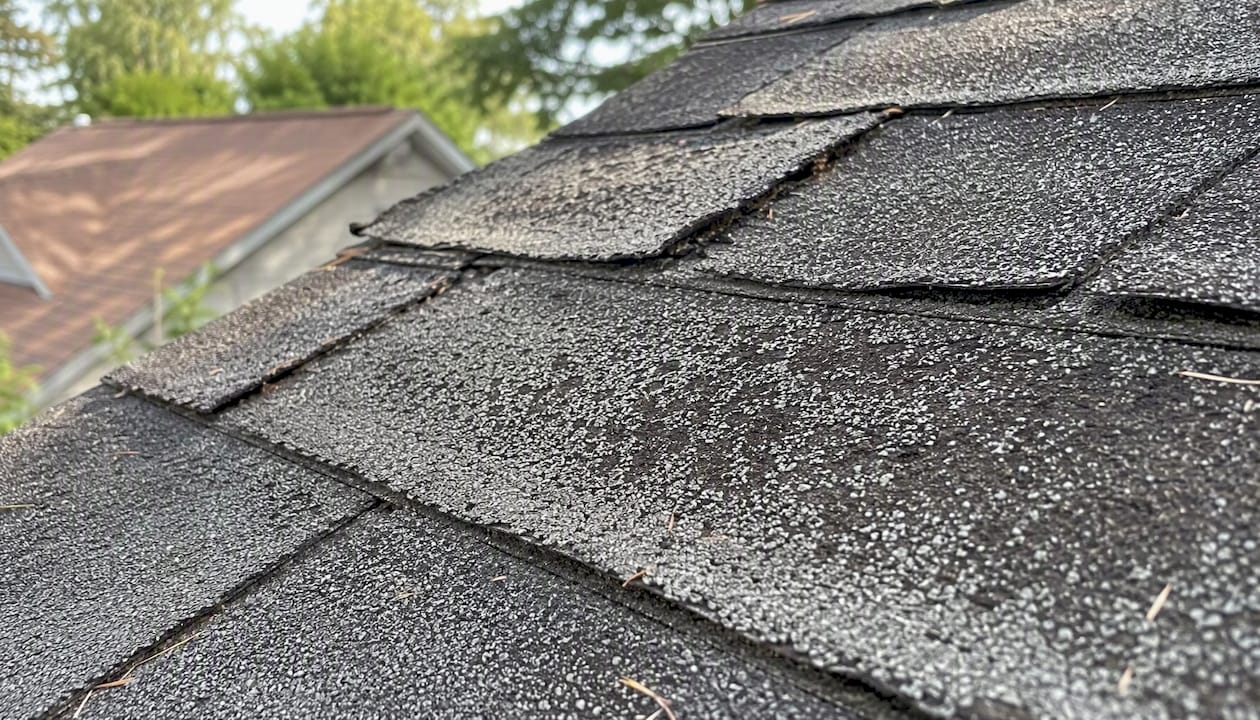
Inspectors check shingle condition, flashing at all penetrations, gutters, fascia, and visible decking. Findings that matter: missing or lifted flashing, granule loss indicating shingle age, active staining on the attic sheathing below, sagging ridgeline. Inspectors typically note estimated remaining life; a roof with 2–3 years left is a negotiation item even without an active leak.
Foundation and structure
This section covers visible foundation walls, floor framing, and any accessible crawlspace or basement. Cracks are common; the type matters. Vertical hairline cracks in poured concrete are usually settling. Horizontal cracks or cracks with displacement are structural concerns that warrant a structural engineer’s evaluation.
Electrical
Inspectors check the service panel, visible wiring, outlets, and GFCI protection in wet areas. Double-tapped breakers (two wires on one breaker terminal), missing knockouts, and ungrounded outlets in kitchens and bathrooms are common findings. Older panels from brands with documented safety histories are worth flagging for an electrician’s evaluation.
Plumbing
Inspectors check supply lines, drain lines, water heater age and condition, and visible fixtures. Water heater age matters: most last 8–12 years. A water heater past its expected lifespan is a near-term replacement cost. Polybutylene pipe (gray flexible tubing, common in homes built 1978–1995) is a known failure risk and worth noting for a plumber’s assessment.
HVAC
Inspectors run the system and check filters, visible ductwork, and heat exchanger condition (for furnaces). A cracked heat exchanger is a safety issue, not a maintenance item. Age and service history matter: a 20-year-old furnace that has never been serviced is a replacement candidate regardless of whether it runs on inspection day.
Exterior, interior, attic, and crawlspace
Exterior findings often involve grading (soil sloping toward the foundation), wood-to-soil contact, and deck or porch condition. Interior findings are frequently cosmetic. Attic findings that matter: inadequate insulation, missing ventilation, evidence of past or active roof leaks, and pest activity. Crawlspace findings: moisture, inadequate vapor barrier, wood rot, and pest damage.
Appliances
Inspectors test built-in appliances for basic function. Age and recall status are noted when visible. A dishwasher that does not complete a cycle or a range with a burner that will not light are repair items, not deal-breakers.
A long report does not mean the house is in poor condition; thorough inspectors document everything, including minor items, to avoid liability. When comparing reports across multiple properties, focus on the presence of safety, structural, and water issues rather than raw note counts. A 60-page report with 40 cosmetic items is often a better house than a 25-page report with two structural findings buried in the body.
How to read photos, measurements, and attachments in the report
Photos are not decoration. They are evidence, and reading them well is a skill worth developing before you sit down with the report.
For each photo, check four things:
- Scale and context: Is the photo a close-up or a wide shot? A close-up of a crack without a context shot makes it hard to judge severity. Good inspectors include both.
- Caption or annotation: The caption should tell you what you are looking at and why it matters. An arrow or circle pointing to the defect saves you from guessing.
- Evidence of active damage: Staining with a wet center, active rust streaks, or visible moisture on a thermal image are different from old, dry staining. The distinction matters for negotiation.
- Timestamp: Most digital report platforms embed a timestamp. If the photo was taken during the inspection, it is current evidence. If it looks like a stock image or lacks a timestamp, ask the inspector.
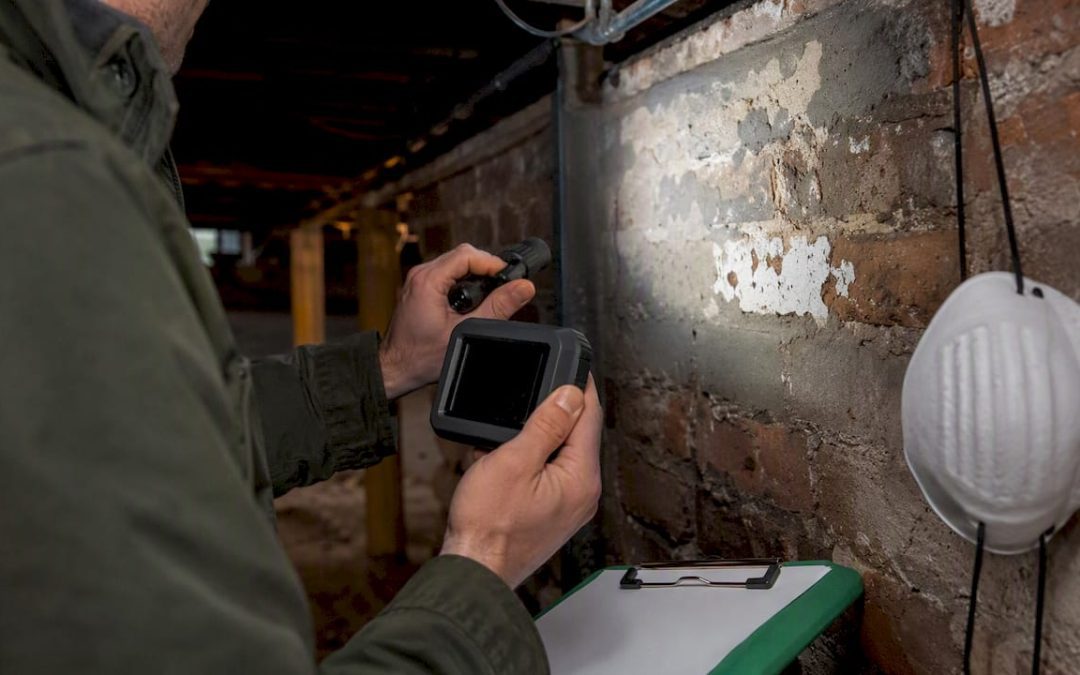
Thermal images appear in reports when the inspector uses an infrared camera. A cold spot on an exterior wall in winter can indicate missing insulation or moisture intrusion. A warm spot near an electrical panel can indicate a loose connection or overloaded circuit. Thermal images are not definitive; they flag anomalies for further investigation. Spectora’s visual report examples show how annotated photos and thermal images appear in a well-structured report, which helps buyers understand what they are looking at.
Save the report as a PDF and pull out the photos for any major finding before you call a contractor. Sending a contractor a photo with the inspector’s annotation gets you a faster, more accurate estimate than a verbal description. Annotated photos and clear comment keys reduce negotiation friction because contractors and agents can evaluate the problem without a site visit.
Pro Tip: Use the photos to ask the inspector targeted questions: “In photo 14, is that staining active or historical?” That is a better question than “Should I be worried about the basement?” Specific questions get specific answers.
What a general home inspection usually does NOT cover
A standard home inspection is a visual, non-invasive assessment of accessible systems and components. Understanding its limits prevents misplaced confidence and missed risks.
Common exclusions from a general inspection:
- Inside wall conditions: Inspectors cannot open walls. Wiring, plumbing, and insulation inside wall cavities are not inspected unless visible through an access point.
- Comprehensive mold testing: An inspector may note visible mold or conditions conducive to mold growth, but lab-confirmed mold testing requires a separate specialist engagement. If the report notes moisture or musty odors, order professional mold testing separately.
- Septic and well systems: These require dedicated testing. A general inspection may note the presence of a septic system but will not evaluate its condition or capacity.
- Invasive structural analysis: Inspectors do not dig, probe, or remove materials. A foundation crack that looks stable may have more movement below grade than the inspector can see.
- Asbestos, lead paint, and radon: These require separate environmental testing. If the home was built before 1978, lead paint and asbestos testing are worth ordering. Radon testing is standard in many U.S. markets and often added at the time of the general inspection.
Inspectors include a limitations section in the report that lists areas not accessed and systems not tested. Read it. A note that the attic was not accessed due to low clearance means you have an uninspected space, not a clean bill of health.
“Further evaluation recommended” is not a hedge or a failure. It means the inspector found something outside their generalist scope and is directing you to the right specialist. Here is the mapping:
- Foundation cracks with displacement or horizontal movement: Structural engineer
- Electrical panel concerns, aluminum wiring, older panels: Licensed electrician
- Polybutylene pipe, sewer odors, slow drains: Licensed plumber; consider a sewer camera inspection
- Wood damage, mud tubes, frass: WDI (wood-destroying insect) or pest inspector
- Elevated radon reading or conditions suggesting radon risk: Radon mitigation contractor
- Moisture readings, musty odors, visible mold: Indoor air quality specialist
How to use the report to negotiate, request repairs, or walk away
The inspection report is a risk-assessment tool, not a punch list. Treat it that way and your negotiation will be sharper and more credible.
Use this decision framework in order:
- Safety issues: Non-negotiable. Request correction or a credit sufficient to correct before closing. If the seller refuses on a genuine safety item, that tells you something about how they will handle everything else.
- Specialist-confirmed major defects: Get the specialist’s written assessment and cost estimate first. Then negotiate based on real numbers, not the inspector’s general note.
- High-cost replacement items near end of life: Roof with 2 years of life, water heater at year 14, HVAC system at year 18. These are legitimate credit requests even if they are functioning on inspection day.
- Cosmetic and routine maintenance items: Handle these yourself after closing. Demanding that a seller fix caulking or repaint a fence weakens your position on the items that actually matter.
A sorting framework that separates findings into safety, structural, water, major mechanical, and routine maintenance gives you a clear picture of where to focus negotiation energy.
Three common outcomes and how to handle each:
Seller agrees to repair: Get it in writing with a licensed contractor requirement and a reinspection clause. “Seller will repair” without those conditions often means a handyman patch job.
Seller offers a credit: Calculate whether the credit covers the actual repair cost. A $500 credit on a $12,000 roof replacement is not a negotiation; it is a distraction. Counter with a real number from a contractor bid.
Buyer requests allowance and reinspection: Useful when the repair scope is unclear. Ask for a credit at closing and schedule a reinspection after the seller’s contractor completes work. This protects you from accepting a repair you cannot verify.
Pro Tip: Keep your repair request to safety items, structural concerns, water intrusion, and one or two high-cost mechanical items. A focused list of four to six items is taken seriously. A list of 25 items signals that you are looking for a reason to exit, and sellers respond accordingly.
How inspectors triage findings and 12 questions to ask yours
Professional inspectors follow a consistent triage logic: document everything, code by severity, flag scope limitations, and recommend specialists when findings exceed generalist scope. This summary-first, severity-coded approach is the standard across InterNACHI-certified and ASHI-certified inspectors. Understanding that logic helps you read the report the way it was written.
Inspector certifications matter for buyer confidence. InterNACHI (International Association of Certified Home Inspectors) and ASHI (American Society of Home Inspectors) both require continuing education and adherence to published standards of practice. A Certified Master Inspector (CMI) designation indicates additional experience and peer review. When evaluating an inspector, check their certification, their report turnaround time, and whether they offer post-report support. You can review inspection company selection criteria to know what to look for before you book.
Here are 12 questions worth asking your inspector after you receive the report:
- Is this finding active or historical?
- Can you point me to the photo that shows it?
- How urgent is this, in your opinion?
- Do you recommend a specialist, and which type?
- Is this a safety issue or a maintenance item?
- What would you do if this were your house?
- Did you have full access to this area, or were there limitations?
- Is this typical for a home of this age?
- What is the likely repair approach?
- Did you see evidence of prior repairs in this area?
- Does this affect the structural integrity of the home?
- Would this affect a mortgage approval in your experience?
Pro Tip: After the call, send the inspector a brief email summarizing what they told you verbally: “You mentioned the crack in the foundation wall appears historical with no active movement. Is that correct?” That email becomes documentation you can use in negotiation if the seller disputes the finding’s severity.
Understanding the role of a home inspector before your inspection day makes these conversations much more productive.
Typical timelines, report delivery, and ballpark repair costs
Most inspectors deliver reports within 24–48 hours of the inspection. Jhunthomeinspections delivers inspection reports within 24 hours, which matters when your inspection contingency window is tight and you need to move quickly to specialist quotes or negotiation.
Reinspection scheduling typically takes 3–5 business days after the seller completes repairs. Specialist reports (structural engineer, electrician, plumber) usually take 5–10 business days depending on local demand. Factor that into your contingency timeline when you are negotiating.
The table below shows illustrative cost ranges for common findings. These are not quotes; actual costs vary by location, home age, and local labor markets.
Variance drivers: urban labor markets run 20–40% higher than rural. Homes built before 1960 often carry code-upgrade requirements that add cost. Always get two to three contractor bids before accepting or countering a seller credit.
A 7-step checklist for after you receive the report
Work through these steps in order. Each one has a timing cue tied to your inspection contingency window.
-
Review the summary page (Immediately upon receipt): Identify any safety or major defect items. Forward the summary to your agent and lender.
-
Sort all findings by severity (Within 2 hours): Use the comment key to categorize every finding as safety, structural, water, major mechanical, or routine maintenance. Ignore cosmetic items for now.
-
Call the inspector with targeted questions (Same day or next morning): Use the 12-question list above. Focus on any finding labeled safety, major, or “further evaluation recommended.” Send a follow-up email summarizing the answers.
-
Get specialist quotes for major items (Within 48–72 hours): Contact a structural engineer, electrician, plumber, or roofing contractor depending on findings. You need real numbers before you negotiate.
-
Agree with your agent on negotiation scope (Within 72 hours): Decide together which items belong in the repair request. Keep it to safety, structural, water, and high-cost mechanical items. Your agent can help you gauge what is reasonable in the current market.
-
Send the repair request or credit request (Before your contingency deadline): Use a written request with specific items, dollar amounts (where you have bids), and a reinspection clause for any agreed repairs. The inspection report summary guide walks through how to structure this.
-
Schedule reinspection or proceed to close (Per contract timeline): If the seller agrees to repairs, schedule a reinspection before closing. If you accept a credit, confirm the amount in writing. Document everything.
A buyer-first approach to reading inspection reports
Reading a home inspection report well is less about technical knowledge than about discipline: the discipline to start with severity, not page count; to call the inspector before you call the seller’s agent; and to keep your repair request focused on what genuinely matters.
Jhunthomeinspections delivers reports within 24 hours and offers both in-person and video walkthroughs, which means buyers in the St. Louis Metro area and Southern Illinois can review findings with the inspector in real time rather than trying to decode a PDF alone. That kind of direct access changes how buyers experience the report. A finding that looks alarming on paper often resolves in a five-minute conversation with the inspector who wrote it.
The buyers who navigate inspections best are the ones who treat the report as a risk-assessment tool, not a weapon or a wish list. Safety and structural issues deserve full attention and firm negotiation. A cracked outlet cover does not.
Jhunthomeinspections makes acting on your report straightforward
Getting a thorough inspection report is one thing. Knowing what to do with it in the next 48 hours is where most buyers lose time and negotiating leverage.

Jhunthomeinspections delivers your full report within 24 hours of the inspection, with annotated photos, severity ratings, and a clear summary page built for fast triage. The proprietary Create Request List™ tool converts your report findings directly into a formatted repair request your agent can send to the seller, cutting out the back-and-forth of manual drafting. For buyers who cannot attend in person, video inspection options let you walk through findings with the inspector live. Serving the St. Louis Metro area and Southern Illinois, Jhunthomeinspections also offers radon testing, mold inspection, sewer camera, and WDI inspections as add-ons so you can order every specialist test from one appointment. Ready to book or want to review what the inspection covers? Visit the inspection services page or check your report options to get started.
Sources
The sources below are the authoritative references used to build this guide. Each one offers something specific for buyers who want to go deeper.
- How to Decode a Home Inspection Report (2026) | Today’s Homeowner
- How to Read a Home Inspection Report — TrustedHome
- Sample Home Inspection Reports – InterNACHI®
- How to Read Your Home Inspection Report – ISN
- How to Read a Home Inspection Report — InspectionTriage
- What Does a Home Inspection Report Look Like? – Spectora
- What Is a Home Inspection Report? — HomeGauge
Recent Comments