
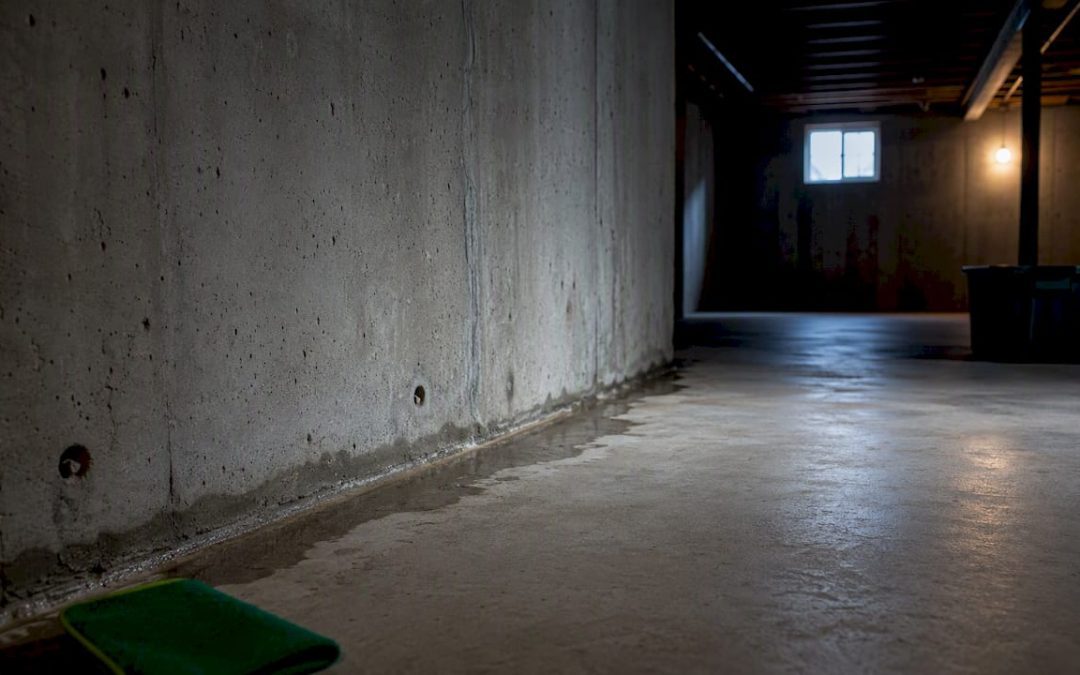
If your basement feels damp, smells musty, or shows water stains after a storm, tape a 12×12 inch sheet of plastic to the wall and check it in 48 hours. Moisture on the room side means condensation; moisture trapped behind the plastic means seepage or capillary wicking through the masonry. Don’t paint, seal, or patch anything until you know which one you’re dealing with. Guessing wrong wastes money and rarely fixes the actual problem.
TL;DR:
- Conduct the plastic-sheet test to distinguish between condensation and seepage, as each requires a different repair approach.
- Use a hygrometer and moisture meters to identify high humidity levels and localized moisture spread, guiding targeted fixes.
- Address surface issues like gutter drainage and grading first, as they are the most common causes of wet basements after rain.
- Keep interior fixes simple and avoid waterproof paint until drainage problems are corrected, since trapping moisture worsens the problem.
- Call a professional immediately for structural cracks, bowing walls, or large mold growth, and always verify repairs are comprehensive and properly documented.
Table of Contents
- What Are the Warning Signs of Basement Moisture Problems?
- How Do You Diagnose the Source of Basement Water Intrusion?
- What Causes Water in the Basement?
- What Are the Best DIY Fixes for a Damp Basement?
- When Does Basement Waterproofing Require a Professional?
- Basement Fix Checklist: Seasonal Prevention Tasks
- What Do Basement Waterproofing Repairs Typically Cost?
- When Should You Call a Professional Inspector?
- Why a Professional Inspection Prevents Costly Misdiagnosis
- Why Diagnosis Beats Guesswork Every Time
- Sources
What Are the Warning Signs of Basement Moisture Problems?
Your basement talks to you before it floods. The trick is knowing which symptom points to which cause, because the fix for one can be useless for another.
A white, powdery crust on concrete or block walls is efflorescence, and it’s one of the clearest signs of trouble. It forms when water dissolves salts inside the masonry and deposits them on the surface as it evaporates. Scrubbing it off does nothing if the moisture migration behind it continues, so it comes right back within weeks.
Other clues tell their own story:
- Tide marks or watermarks low on the wall usually mean past flooding or seepage after heavy rain, not condensation.
- Peeling or bubbling paint often means the wall is trapping moisture that can’t escape through the coating.
- A persistent musty odor points to mold or mildew growing somewhere you can’t see, often behind stored boxes or inside wall cavities.
- Rust stains on metal fixtures, ductwork, or support posts signal chronic humidity, not a one-time event.
- Standing water after rain is the most urgent sign and demands quick action.
Pro Tip: If you see standing water anywhere near an outlet, extension cord, or the sump pump’s electrical connection, shut off power to that circuit at the breaker before you do anything else. Photograph the damage for insurance and contractor records before you clean anything up.
Indoor humidity above 60% is where mold risk climbs sharply, according to EPA guidance. If your basement regularly reads in that range, you’re not just dealing with a cosmetic problem. You’re setting up conditions for a health issue.
How Do You Diagnose the Source of Basement Water Intrusion?
Before you spend a dollar on repairs, you need to know what mechanism is putting water in your basement. Condensation, seepage, capillary wicking, and plumbing leaks all look similar on the surface but need completely different fixes.
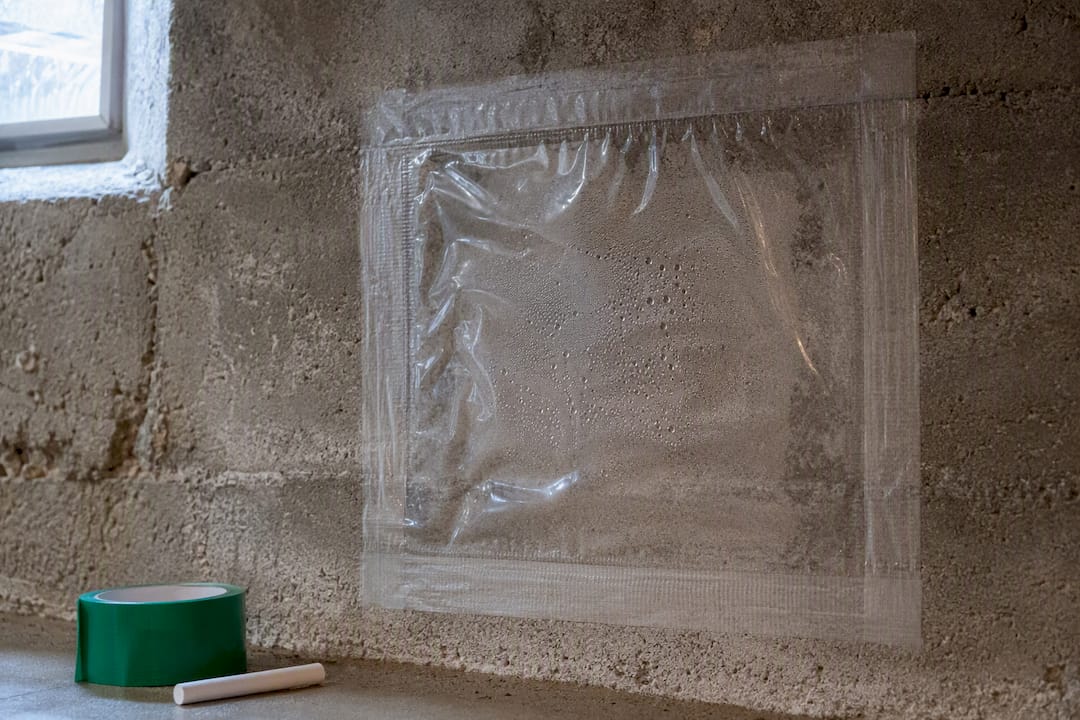
1. Run the plastic-sheet test. Tape a 12×12 inch square of clear plastic or aluminum foil flat against the suspect wall, sealing all four edges completely so no room air gets behind it. Leave it for 24 to 48 hours. If droplets form on the outer, room-facing side of the plastic, you’re looking at condensation. If moisture shows up on the wall side, behind the plastic, you’re dealing with seepage or wicking through the masonry itself. This method is essentially the same principle behind ASTM D4263, the standard test for detecting moisture transmission through concrete.
2. Check relative humidity with a hygrometer. A $15 to $30 digital hygrometer tells you where your basement air actually sits. The EPA considers 30% to 50% relative humidity the ideal range; above 60%, mold risk rises fast. If your basement consistently reads 65% or higher on a humid July afternoon but drops to 45% in dry winter weather, condensation is the likely driver.
3. Scan walls and floors with a pinless moisture meter. These handheld meters (roughly $40 to $150) read moisture content without punching holes in your wall. Walk the perimeter and mark wet zones with tape or chalk. A concentrated wet patch near a single crack suggests a localized leak. Moisture spread evenly across a whole wall suggests capillary wicking or a widespread hydrostatic issue.
4. Watch what happens during and after rain. Water intrusion that shows up within hours of a storm and disappears within a day or two is almost always tied to surface drainage, meaning gutters, downspouts, or grading. Dampness that lingers regardless of weather, especially in summer, points toward condensation or a persistent capillary source.
Use the results together, not in isolation. Here’s how the signals typically line up:
| Test Result | Rain Correlation | Likely Cause |
|---|---|---|
| Moisture on room side of plastic | Present in any weather | Condensation |
| Moisture behind plastic/foil | Worse right after rain | Seepage through crack or cove joint |
| Even dampness, no clear source | Present in any weather | Capillary wicking |
| Localized wet spot near pipe | No correlation with rain | Plumbing leak |
Pro Tip: Photograph every test with a timestamp, including the plastic sheet before removal, the hygrometer reading, and any wet zones you map. If you end up calling a contractor, that documentation lets them start diagnosing instead of repeating tests you already ran, which can shave real time off an estimate visit.
What Causes Water in the Basement?
Every basement moisture problem traces back to one of a handful of mechanisms, and understanding which one you have determines whether a $50 fix works or you need $10,000 worth of drainage work.
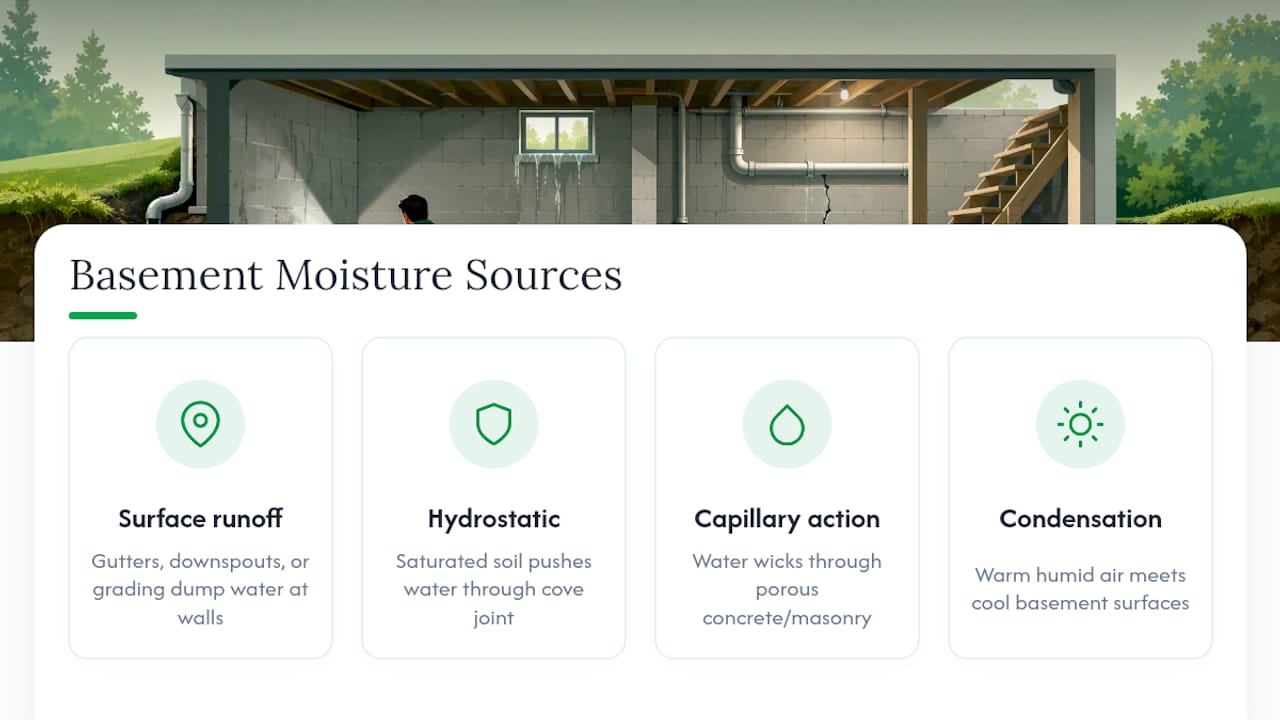
Surface runoff, gutters, and grading cause the majority of “wet basement after rain” complaints. When gutters overflow or downspouts dump water within a few feet of the foundation, that water has nowhere to go but down, right along the wall you’re trying to keep dry. Grading that slopes toward the house instead of away from it makes this worse with every storm.
Hydrostatic pressure at the cove joint is a different animal entirely. The cove joint is the seam where your basement floor meets the foundation wall, and it’s a structurally weak point. When soil around the foundation becomes saturated, the pressure of that water pushes against the wall and floor, forcing moisture through the cove joint and any hairline cracks. Surface patching does nothing here because the pressure keeps finding new paths once the old one is sealed.
Capillary action moves water through porous concrete and masonry itself, no crack required. Research on masonry has measured capillary transport rates of 0.1 to 0.5 millimeters per minute under sustained wet soil conditions, which explains why some basements stay damp even with no visible defect anywhere.
Condensation happens when warm, humid air meets a cool basement surface, exactly like a cold glass of water sweating on a summer porch. This is why condensation tends to spike in July and August and mostly disappears in winter.
Plumbing leaks and appliance failures, including water heaters, washing machine supply lines, and sump pump discharge pipes, round out the interior causes. These are usually the easiest to fix once found, because the source is a fitting or hose rather than the building envelope itself.
What Are the Best DIY Fixes for a Damp Basement?
Once you know your mechanism, work through fixes in order of cost and invasiveness. Most basements improve dramatically before you ever need to hire someone.
1. Clear and extend your gutters and downspouts. Downspouts should discharge water at least 4 to 6 feet from the foundation, and further on flat sites or heavy clay soil where water doesn’t drain quickly. A $20 extension often solves what looked like a serious leak.
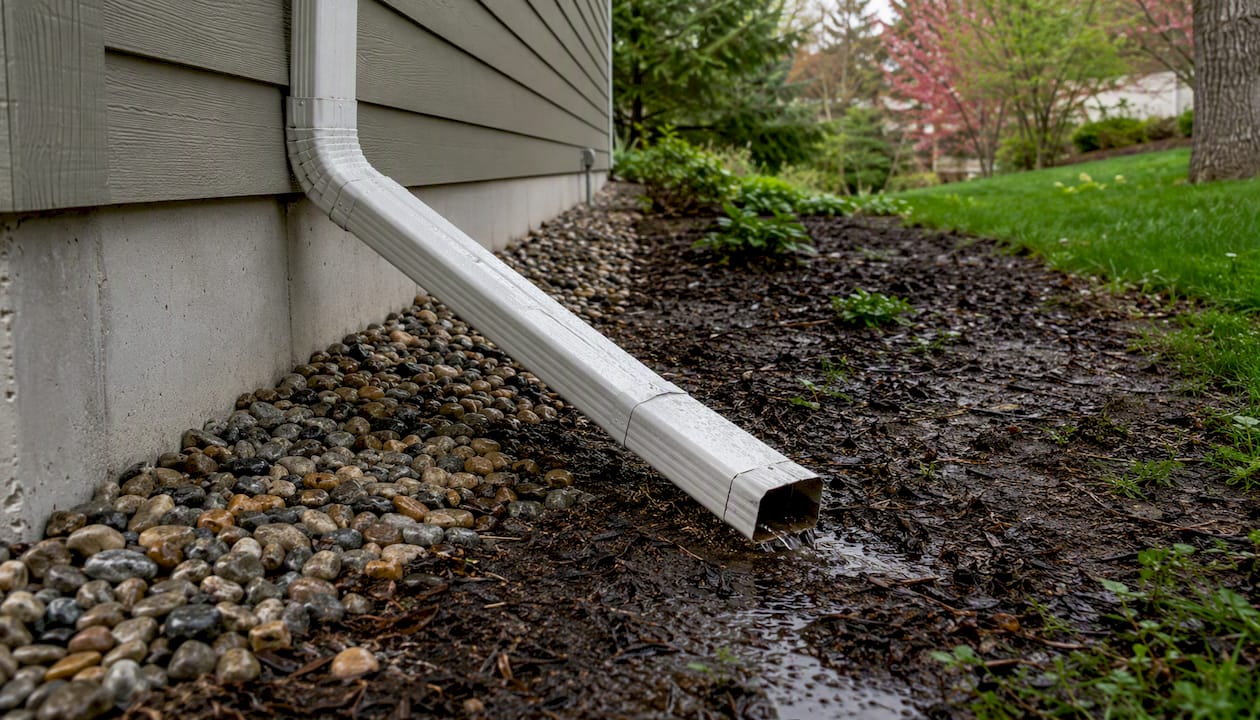
2. Fix the grading around your foundation. Soil should slope away from the house at roughly a 5% grade for the first 6 to 10 feet. If mulch beds or old landscaping have flattened that slope over the years, a few wheelbarrows of soil can redirect a surprising amount of water.
3. Remediate window wells. A window well without gravel fill, a drain, or a cover collects rainwater like a bucket and channels it straight against the foundation. Adding gravel, a drain line, and a clear plastic cover is inexpensive insurance.
4. Seal small cracks and pipe penetrations, but treat this as a stopgap. Hydraulic cement or polyurethane sealant can slow a minor seep temporarily. If hydrostatic pressure caused the crack in the first place, the water will eventually find another route.
5. Bring in a dehumidifier and improve ventilation, but only after you’ve confirmed condensation is the actual problem. Running a dehumidifier against a seepage issue treats the symptom while the real source keeps feeding moisture into your walls.
Pro Tip: Skip the interior waterproofing paint until the drainage issue is actually fixed. Coatings trap moisture inside the wall where it can’t evaporate, which is a documented cause of paint blistering and peeling rather than a real solution.
For a broader pre-repair checklist, Jhunthomeinspections’ DIY pre-inspection checklist walks through what to document before calling anyone.
When Does Basement Waterproofing Require a Professional?
DIY fixes handle surface water and minor condensation. Hydrostatic pressure, structural cracking, and chronic seepage generally need professional-grade drainage systems.
An interior perimeter French drain paired with a sump pump is the standard fix for ongoing seepage at the cove joint. The system cuts a channel along the interior perimeter of the basement floor, collects water before it spreads across the slab, and routes it to a sump basin where a pump ejects it outside. When comparing estimates, verify the drain includes a gravel bed for flow, a dedicated discharge line away from the foundation, and a sump pump with a battery backup. Interior drains manage water that has already breached the wall; they don’t stop it from entering in the first place, which is worth understanding before you assume the job is “done” once it’s installed.
Exterior waterproofing is the more permanent, more expensive answer. It involves excavating around the foundation, applying a membrane directly to the wall, and installing a drain board that channels water down to a footing drain. This is the right call when hydrostatic pressure is severe, when the foundation has multiple failure points, or when interior fixes haven’t held.
Crack injection using epoxy or polyurethane resin can seal structural cracks from the inside, but if a crack is wider than a quarter inch, has shifted, or runs alongside other signs of settlement, bring in a structural engineer before injecting anything.
Excavation and long-standing moisture problems can also surface radon or mold concerns that weren’t part of the original complaint. A qualified inspection catches these before they become a second, unrelated project.
Basement Fix Checklist: Seasonal Prevention Tasks
A little maintenance twice a year prevents most of what turns into an expensive repair.
- Spring: clean gutters, confirm downspouts discharge at least 4 to 6 feet from the foundation, and check for winter frost heave that may have disrupted grading.
- Early summer: test your sump pump by pouring a bucket of water into the basin and confirming it kicks on and drains fully; check the battery backup if you have one.
- Fall: clean gutters again after leaves drop, and inspect window wells for debris buildup before winter.
- Before storm season: verify the sump pump’s battery backup is charged and the pump’s discharge line isn’t frozen, clogged, or disconnected.
- Year-round: keep a hygrometer in the basement and glance at it monthly; a sudden jump above 60% relative humidity is worth investigating right away.
- Every year or two: schedule a professional recheck, especially if you’ve had any repair work done and want to confirm it’s holding.
What Do Basement Waterproofing Repairs Typically Cost?
Repair costs scale directly with how invasive the fix needs to be, and that’s determined entirely by your diagnosis.
Interior work rarely needs a permit, while exterior excavation and grading changes sometimes do, depending on your municipality. The prioritization rule stays simple regardless of budget: diagnose the mechanism first, then choose the least invasive fix that actually addresses it. Skipping straight to exterior excavation when your real problem is a disconnected downspout wastes thousands of dollars you didn’t need to spend.
When Should You Call a Professional Inspector?
Some situations don’t leave room for a wait-and-test approach. Call a professional immediately if you notice cracks that have visibly widened, floors or walls that seem to be bowing or shifting, standing water anywhere near electrical systems, or mold coverage larger than roughly 10 square feet.
A professional inspection typically includes:
- Moisture mapping across walls and floors using meters and thermal imaging where available.
- Sump pump and discharge system evaluation, confirming the pump actually moves water where it should.
- Grading and gutter assessment tied to the specific drainage patterns around your home.
- A written report ranking repairs by urgency and cost, not just a list of everything that’s imperfect.
When comparing contractor bids, ask what components are included (drain tile, gravel bed, discharge routing, warranty length) and get the warranty terms in writing. A detailed inspection report also gives you documentation that supports insurance claims and keeps contractor scopes honest, since you’re working from a written baseline instead of a verbal walkthrough.
Why a Professional Inspection Prevents Costly Misdiagnosis
Most wasted basement spending happens because someone patched a symptom without identifying the mechanism behind it. A trained inspector runs the same diagnostics covered here, but with the calibrated tools and pattern recognition that come from seeing hundreds of basements, which cuts down on the guesswork that leads to a $10,000 fix for a $200 problem.
Jhunthomeinspections built its process around exactly that kind of clarity. Reports come back within 24 hours, so you’re not waiting weeks to plan next steps. The Create Request List™ tool keeps communication between buyers, sellers, and agents organized instead of scattered across texts and emails. For anyone who can’t be on site, video inspection options make it possible to walk through findings remotely. That combination matters most for first-time buyers, veterans, and lower-income households who can least afford to guess wrong on a repair.
Why Diagnosis Beats Guesswork Every Time
The conventional advice on basement moisture treats every damp wall the same way: seal it, coat it, maybe throw a dehumidifier in the corner and hope. That’s backwards. A wall sweating from condensation and a wall seeping under hydrostatic pressure look nearly identical to an untrained eye, and treating one like the other either wastes money or actively makes things worse by trapping moisture that needed to escape.
What gets underestimated is how much the plastic-sheet test alone can save a homeowner. It costs nothing but a piece of foil and two days of patience, yet it eliminates the single biggest mistake in this entire category: spending on the wrong fix. Grading and gutter corrections solve more basements than any waterproofing membrane ever will, and they cost a fraction as much.
If you take one thing from this guide, let it be sequence. Test first. Match the fix to the mechanism. Call a professional when the signs point to structural movement or pressure you can’t diagnose with a hygrometer and a moisture meter. Everything else follows from getting that first step right.
— JOHN
Sources
- Mold and Your Home — U.S. EPA
- Moisture in basements: causes and solutions — University of Minnesota Extension
Recent Comments