
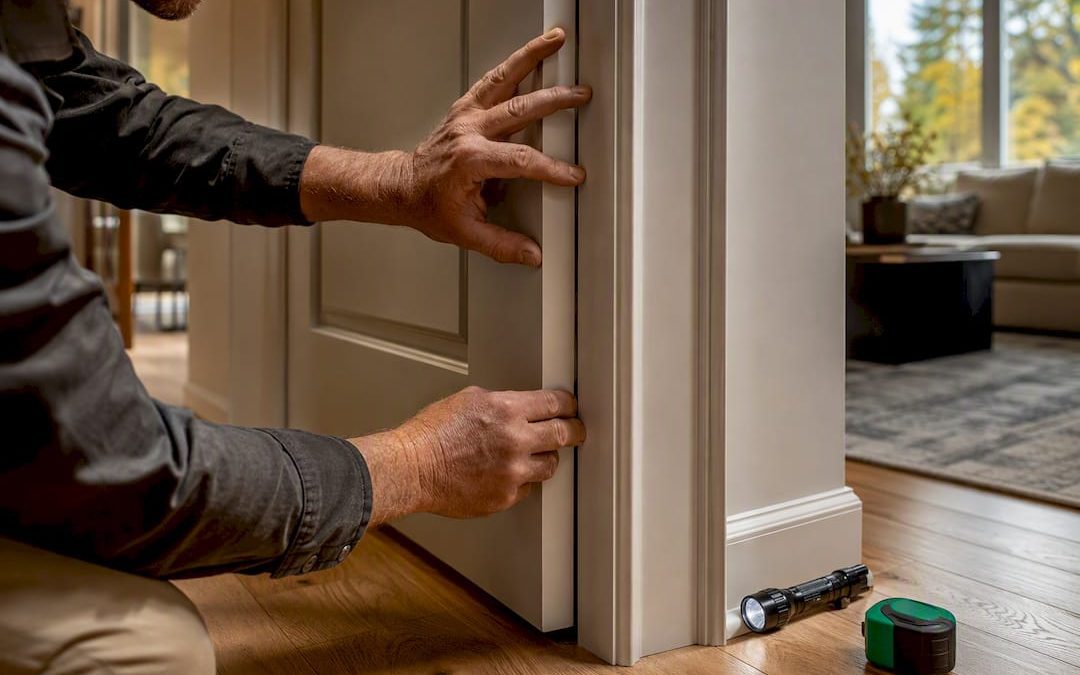
Schedule a professional 11-month inspection now, before your builder’s one-year warranty closes. It’s the single most reliable way to catch workmanship defects while they’re still someone else’s bill to pay. Your next move: call a certified home inspector for a slot in the next few weeks, and pull your warranty paperwork and builder contact information together today.
TL;DR:
- Schedule the inspection between months 9 and 11 to allow time for weather-related settling and to file claims before the warranty expires.
- A professional inspection will identify common issues like drywall cracks, framing shifts, drainage problems, and HVAC performance that often appear near the one-year mark.
- Proper documentation, including photos and a detailed log, is crucial for submitting warranty claims and defending against disputes.
- Engaging a trained inspector ensures thorough system checks and a submission-ready report, saving time and improving claim success chances.
- Prepare your home and paperwork beforehand, and consider attending the inspection to clarify concerns and ensure nothing is overlooked.
Table of Contents
- What Is an 11-Month Warranty Inspection?
- Why the One Year Warranty Inspection Actually Pays Off
- When to Schedule Your Warranty Inspection
- What Gets Checked During the Inspection
- The Defects That Show Up Most at Month 11
- How to Document and Submit a Warranty Claim
- Hiring a Pro vs. Doing It Yourself
- How to Read Your Inspection Report and What Comes Next
- Negotiating With the Builder After the Inspection
- 11 Month Inspection vs. the Builder’s One-Year Walkthrough
- Getting Ready for Inspection Day
- The Bottom Line on Your 11-Month Inspection
- Book Your 11-Month Inspection With Hunt Home Inspection
- Sources
What Is an 11-Month Warranty Inspection?
An 11-month warranty inspection is a full performance check-up on a new home, done near the end of the builder’s one-year warranty period. Unlike the walkthrough you did at closing, which mostly confirms things were installed correctly, this inspection looks at how the house has actually behaved after a full cycle of weather, settling, and daily use. It’s essentially a home inspection guide applied to a house that’s already lived in for a year rather than one still on the market.
This inspection matters most for people who bought new construction, recent buyers of a build that’s less than a year old, and anyone who’s already noticed a hairline crack or a sticky door and wants a professional opinion before the warranty door shuts.
Why the One Year Warranty Inspection Actually Pays Off
The math is simple: a builder fixes warranty-covered defects for free, but the same repair out of pocket after expiration can run into real money. A pre-warranty inspection that catches a roofing flaw or an HVAC problem before the deadline routinely saves homeowners thousands compared to paying for it later.
Findings from a professional inspection tend to sort into three buckets:
- Accepted claims the builder repairs at no cost to you.
- Items flagged for monitoring because they haven’t crossed a repair threshold yet.
- Disputed items that need more documentation or a second opinion.
The typical cost of a warranty inspection runs a few hundred dollars depending on home size and location, a small price against even one major covered repair.
When to Schedule Your Warranty Inspection
Book the inspection somewhere in months 9 through 11 of ownership, not right at the deadline. That window lets the house go through a real range of weather and settling while still leaving enough runway to file claims and get repairs scheduled before coverage ends. Many inspectors and industry guides point to month 11 specifically because it maximizes exposure time without cutting into the deadline.
If you’re already past month 11, don’t panic, but move fast:
- Submit an initial written claim immediately for anything you’ve already noticed, with photos attached.
- Request written acknowledgment from the builder so there’s a paper trail showing you flagged it before expiration.
- Book the professional inspection anyway. It strengthens whatever claim you’ve already filed.
- Ask your inspector for the fastest available scheduling slot if you’re running close to the line.
Before the inspector arrives, gather your closing documents and warranty booklet, confirm the builder’s warranty claims contact and preferred submission method, take your own quick phone photos of anything that’s bothered you over the year, and check that your chosen inspector has an opening within your remaining window. Scheduling early, per MrLocalServices’ guidance, gives both you and the builder enough runway to actually resolve issues rather than just document them.
What Gets Checked During the Inspection
A thorough inspector works room by room and system by system, not just glancing at the obvious stuff.
- Exterior: grading and drainage slope, siding condition, roof surface, flashing, and gutters.
- Structure and foundation: cracks, signs of settlement, and whether doors and windows still align properly.
- Mechanical systems: plumbing leaks and slow drains, electrical outlets and GFCI function, and HVAC performance across a full heating and cooling cycle.
- Interior finishes: drywall cracks, nail pops, window seal integrity, and whether major appliances still run as expected.
Every item gets logged with a photo, its exact location, a severity rating, and a recommended action. That structure is exactly what turns a homeowner’s hunch into something a warranty department has to take seriously. A professional walkthrough with documentation carries far more weight with builders than a self-written list of complaints, largely because it reads as independent and consistent rather than one-sided.
The Defects That Show Up Most at Month 11
Certain problems show up again and again once a house has had a full year to settle and weather.
- Drywall cracks and nail pops from normal settling, often around door frames and ceiling corners.
- Doors and windows that no longer close flush because framing shifted slightly.
- Grading and drainage issues that let water pool near the foundation instead of running away from it.
- Roof flashing or shingle problems that only reveal themselves after a season of rain, wind, or snow.
- Foggy window seals, meaning the gas barrier between panes has failed.
- HVAC systems that struggled once they had to run through both a full summer and a full winter.
- Slow plumbing leaks under sinks and fixtures that have worked loose over months of use.
Most of these appear on the common findings list from SACInspect, and none of them are surprising once you think about what a house goes through in its first full year.
Pro Tip: Walk your house with a flashlight at night once before the inspection. Shadows reveal drywall cracks and gaps around trim that flat daylight often hides.
How to Document and Submit a Warranty Claim
Getting a claim approved comes down to paperwork discipline as much as the defect itself.
- Build a room-by-room log with dates and photos for every issue you find, including the inspector’s findings and anything you spotted yourself.
- Submit the claim in writing to the builder’s warranty contact, and keep proof of delivery, whether that’s certified mail or an email with a read receipt.
- Ask for written acknowledgment of receipt, and note the date. Most builders have a standard response window, often somewhere around 30 days, though it varies by contract.
- If an item worsens or changes before it’s resolved, update your log with new photos and a new date rather than replacing the old entry.
- If the builder disputes whether something existed within the warranty period, that time-stamped log is your strongest evidence.
Sending a written claim with dated photos and keeping proof of delivery creates a documentation trail that most builders expect before they’ll formally acknowledge a warranty request.
If a dispute drags on, keep every piece of correspondence, request a re-inspection if the builder pushes back, and read your warranty contract’s dispute language closely before assuming you’re stuck. A full inspection report with photos and location notes becomes the backbone of that paper trail, and it’s much harder for a builder to wave off than a text message with a blurry photo attached.
Hiring a Pro vs. Doing It Yourself
A trained inspector brings something a homeowner walkthrough can’t: the technical knowledge to spot a marginal HVAC reading or a drainage slope that’s just barely wrong, plus a report format warranty departments are used to seeing.
Hunt Home Inspection, LLC builds each 11-month inspection around exactly that need. Its Create Request List™ tool organizes findings into a clean, submission-ready format, reports typically come back within 24 hours, and clients can choose in-person or video inspections depending on schedule or comfort level.
- Complex systems like HVAC, electrical panels, and plumbing usually need trained eyes.
- Water intrusion, roof damage, or foundation movement deserve a professional opinion, not a guess.
- Straightforward cosmetic checks (light switches, obvious trim gaps) are reasonable to eyeball yourself first.
- Anything you plan to dispute with the builder should have professional documentation behind it.
Expect an appointment to run one to a few hours depending on home size, with a written report, photos, and a punch list of items worth flagging to your builder.
How to Read Your Inspection Report and What Comes Next
A warranty inspection report usually organizes findings by severity: cosmetic issues, functional concerns, and safety-related items. Cosmetic items, like a small nail pop or a minor paint imperfection, rarely justify a warranty claim on their own. Functional and safety items, on the other hand, such as a GFCI outlet that’s not tripping correctly or a drainage slope pushing water toward the foundation, are exactly what warranty coverage exists for.
Read past the severity label to the recommended action column. A good report doesn’t just say “crack in drywall.” It says where the crack is, how wide it measured, whether it appears active (still growing) or stable, and whether it’s likely tied to normal settling or a bigger structural question. That distinction changes how urgently you need to act.
Once you have the report, separate findings into three piles: items to submit as formal warranty claims, items to keep monitoring over the next few months, and items you’ll fix yourself because they fall outside what the warranty covers. For the first pile, match each item to the specific language in your warranty booklet. Builders often draw a line between “workmanship and materials” defects (covered) and normal wear or homeowner-caused damage (not covered), so knowing which category your issue falls into before you submit saves a round of back-and-forth.
Then move fast. Submit claims promptly rather than batching everything for a single big list weeks later. Builders are more responsive to a handful of well-documented issues submitted close to when they were found than to a stack of a dozen items dropped on their desk at the eleventh hour.
Negotiating With the Builder After the Inspection
Builders respond better to specifics than to frustration. When you submit your claim, reference the exact report finding, the page or item number if your inspector numbered them, and the photo that backs it up. Vague language like “the floor feels off” gets a vague response. “The subfloor near the kitchen island deflects noticeably when walked on, photo attached” gets scheduled.
Stay factual and unemotional in writing, even if the back-and-forth gets frustrating. Warranty disputes that turn into arguments tend to slow down, not speed up. If the builder disputes a finding, ask specifically what evidence would change their determination, then provide it rather than repeating your original claim louder.
It helps to know your leverage. Builders generally want good reviews, repeat referral business, and to avoid drawn-out disputes that eat staff time. A calm, well-documented claim signals you’re not going away, which tends to get faster action than an angry phone call.
If a builder denies a claim you believe is valid, ask for the denial in writing with their specific reasoning. That puts them on record and gives you something concrete to escalate against, whether that’s a supervisor, a state consumer protection office, or legal counsel if the dollar amount justifies it. Most disputes never get that far. Clear photos, dated logs, and a professional report resolve the majority of claims without anyone needing to raise their voice.
11 Month Inspection vs. the Builder’s One-Year Walkthrough
These two events sound similar and get confused constantly, but they serve different masters. The builder’s one-year walkthrough is run by the builder, on the builder’s timeline, looking for whatever the builder’s own checklist covers. It’s not necessarily wrong, but it’s not independent either.
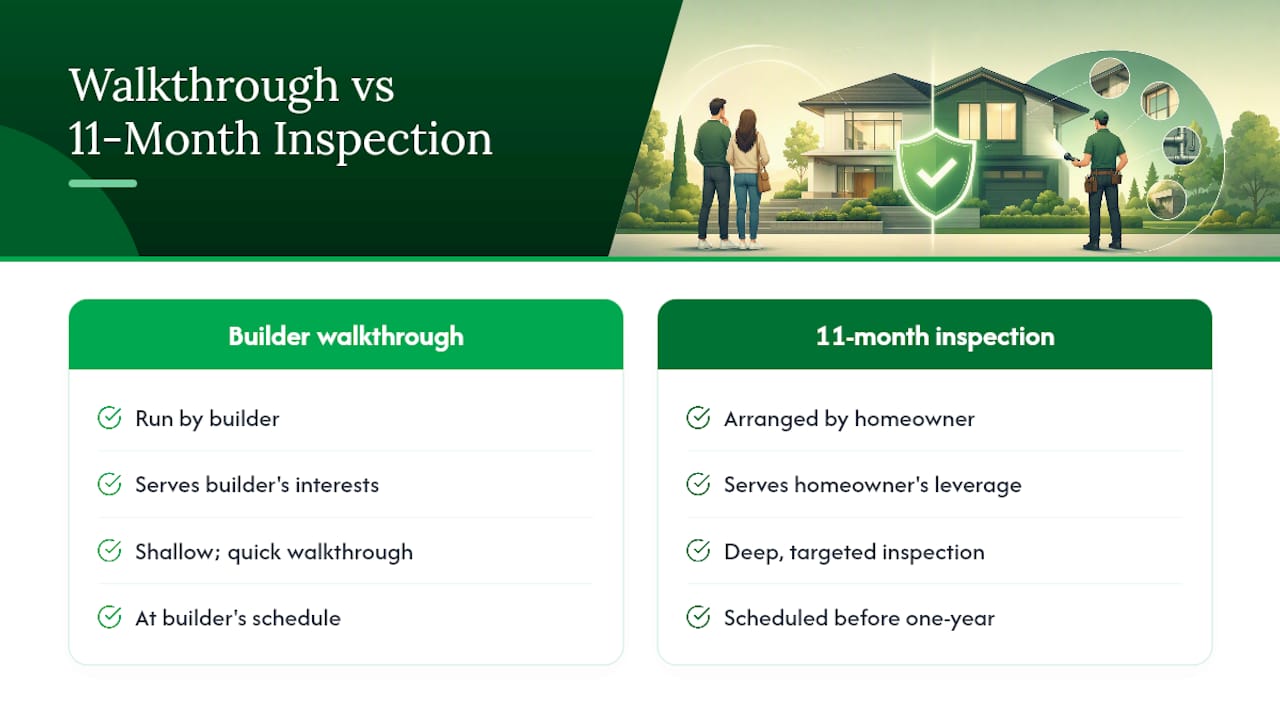
An 11-month inspection, arranged by you and performed by a third-party inspector, has no incentive to minimize findings. It exists purely to document the house’s actual condition, which is exactly the leverage you want going into any warranty conversation. Many homeowners schedule their own inspection a few weeks before the builder’s official walkthrough specifically so they walk into that meeting with independent documentation already in hand rather than reacting to whatever the builder’s rep points out.
The other practical difference is depth. A builder’s walkthrough often moves quickly and touches the obvious stuff. A dedicated inspection digs into grading, HVAC performance across seasons, and structural details that a fifteen-minute walkthrough simply doesn’t have time for.
Getting Ready for Inspection Day
A little prep work makes the inspection faster and the resulting report more useful. Pull together your closing paperwork, the builder’s warranty booklet, and any prior correspondence about issues you’ve already raised. Confirm your builder’s specific warranty claims contact, since large builders sometimes route this through a separate department from sales or construction.
Walk through the house yourself a day or two beforehand and jot down anything that’s bugged you over the past year, even small things like a squeaky floor or a door that sticks in humid weather. Small notes jog your memory when the inspector asks questions, and they help make sure nothing gets missed.
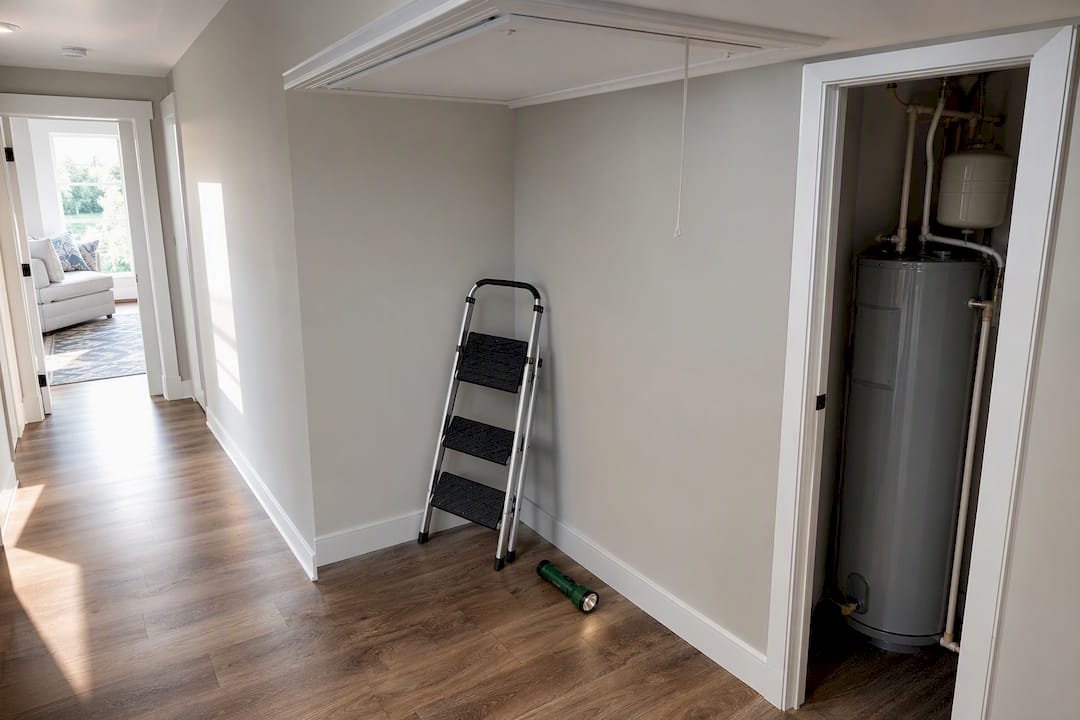
Clear access to key areas: attic hatch, electrical panel, water heater closet, and crawlspace if you have one. Inspectors move faster and see more when they’re not working around stacked boxes. If you’re doing a video inspection, test your Wi-Fi signal in those same areas beforehand so the walkthrough doesn’t stall on a weak connection.
Finally, decide ahead of time whether you’re attending in person. Being there lets you ask questions in real time and point out anything you’ve already flagged, which often makes the final report sharper and more specific to your concerns.
The Bottom Line on Your 11-Month Inspection
Getting this inspection done isn’t complicated, it’s just easy to let slide until the deadline sneaks up. Book the inspector, document what you find with dates and photos, and submit the claim in writing before the warranty closes. Those three steps cover almost everything that actually matters here.
— JOHN
Book Your 11-Month Inspection With Hunt Home Inspection
A professional home inspection service gives homeowners something a lot of warranty deadlines don’t allow for: a fast, documented, submission-ready report instead of a rushed self-checklist. Reports typically come back promptly, findings are organized through tools so nothing gets lost in translation with your builder, and you can choose in-person or video inspection depending on your schedule.

Add-ons like radon testing, sewer camera inspections, or mold checks can be scheduled alongside your warranty inspection if you’ve noticed anything that warrants a closer look. When you call to book, ask about video inspection availability and confirm expected report turnaround so you know exactly where you stand before your warranty window closes. Visit the inspection services page to check availability and schedule your 11-month inspection now, while you still have time to file a claim.
Sources
For more on scheduling windows and typical findings, see BrickKicker’s timing guide, MortgageResearch’s cost breakdown, and MrLocalServices’ full walkthrough guide. Review your own report format on Hunt Home Inspection’s report page before your appointment.
- Should You Get an 11-Month Warranty Inspection? Pros and Cons — MortgageResearch
- 1-Year Builders Warranty — SACInspect
Recent Comments