
A complete commercial inspection checklist covers site conditions, structural systems, roofing, MEP (mechanical, electrical, plumbing), fire and life safety, ADA compliance, and environmental risk. It serves buyers, owners, and facility managers who need a defensible record before closing or budgeting capital work. Start by pulling permits and maintenance logs, then schedule a qualified inspector with at least two weeks’ lead time.
TL;DR:
- A commercial inspection covers site conditions, structural integrity, roofing systems, MEP, fire safety, ADA compliance, and environmental risks, requiring thorough documentation and photographs.
- Early preparation, including requesting records and defining scope, is essential to avoid delays; scheduling at least two weeks in advance and confirming an informed on-site contact improves efficiency.
- Foundation cracks, roof ponding, and defective MEP systems are critical issues that can influence deal terms; specialty consultants should assess large or complex problems before closing.
- Environmental testing, such as for asbestos, radon, or soil contamination, is not included in a standard inspection and must be ordered separately if red flags arise during walk-through.
- The inspection report should follow a structured format with an executive summary, detailed findings, photos, and a CAPEX table; sampling of units and specialty systems depends on property size and complexity.
Table of Contents
- What A Commercial Inspection Checklist Includes At A Glance
- Preparing For The Inspection: Documents, Scheduling, And Scope
- Site And Exterior: What The Ground Tells You
- What Structural Checks Reveal About A Building’s Condition
- Roof Systems: Where Deferred Maintenance Gets Expensive
- MEP Systems: HVAC, Electrical, And Plumbing Checklist
- Fire, Life Safety, And Accessibility: The Compliance Layer
- Elevators And Specialty Systems Worth A Second Look
- Environmental Risk: Knowing When To Order Testing
- How To Structure The Report And Set Sampling Rules
- Turning Findings Into Action: A Triage Framework
- Hunt Home Inspection, LLC: Commercial Inspection Services Built On This Checklist
- Three Rules Every Inspector Should Follow
- Book A Commercial Inspection Built On This Exact Checklist
- Standards And Guidance Worth Bookmarking
- Sources
- FAQ
What A Commercial Inspection Checklist Includes At A Glance
A systems-based checklist groups items so nothing gets missed during a walk-through that often lasts only a few hours. Every category below gets a deeper look later in this guide, but this snapshot is the version to keep on a clipboard or tablet.
- Site and grounds: pavement condition, drainage, grading, ADA parking counts and routes, lighting, fencing
- Structure and envelope: foundation cracking, wall cladding, window seals, water staining inside
- Roof and drainage: membrane type and age, ponding water, flashing, gutters, roof-mounted equipment
- MEP systems: HVAC unit inventory and service history, electrical panel capacity, plumbing leaks and water heater condition
- Fire and life safety: sprinkler tags, alarm test dates, fire pump condition, egress signage
- Vertical transportation: elevator inspection tags and service contracts
- Environmental risk: underground storage tanks, asbestos, radon, mold indicators
Anything flagged as unclear from a visual pass, like a suspicious roof penetration or an undocumented tank, belongs in a request for maintenance records or a specialist follow-up rather than a guess on the report.
Preparing For The Inspection: Documents, Scheduling, And Scope
Deals stall more often from poor preparation than from bad findings. Getting the paperwork and access lined up before the inspector shows up saves a second site visit and a second invoice.
- Request records early: as-built drawings, HVAC and roof maintenance logs, permit history, and the certificate of occupancy.
- Schedule with lead time: aim for at least two weeks’ notice, which gives the inspection team time to review documents against the site plan, per ComSOP’s inspection guidance.
- Confirm an informed on-site contact: someone with real tenure, ideally six months or more, who can answer questions about past repairs on the spot.
- Define the scope in writing: a standard walk-through is visual and non-invasive; if you suspect deeper problems, add a Phase I Environmental Site Assessment, a structural engineer’s review, or an elevator consultant’s report before the inspection date, not after.
Pro Tip: Send the document request list to the seller’s agent the same day you book the inspection. Sellers who get 48 hours’ notice tend to produce partial files; the ones who get two weeks tend to produce everything.
Site And Exterior: What The Ground Tells You
Exterior problems are often the cheapest to spot and the easiest for buyers to overlook because they don’t look dramatic. A cracked parking lot doesn’t scream “capital expense” the way a collapsed roof does, but repaving 40,000 square feet of asphalt can run into six figures.
- Look for alligator cracking, potholes, and standing water on drive lanes, which usually signal base failure rather than surface wear.
- Count ADA-accessible parking spaces against the required ratio for the lot size, and check that accessible routes connect to the building entrance without curb obstructions.
- Check grading around the foundation; ground that slopes toward the building instead of away from it pushes water where you don’t want it.
- Inspect site lighting, perimeter fencing, retaining walls, and any trees or shrubs planted close enough to the foundation to cause root intrusion.
Routine maintenance items, like restriping a lot or trimming landscaping, stay on the owner’s punch list. Base failure under pavement or a retaining wall that’s visibly leaning becomes a capital project that belongs in negotiation.
What Structural Checks Reveal About A Building’s Condition
Foundation and framing problems are the findings that change deal terms, so this section of any inspection deserves the most patience. A horizontal crack wider than a quarter inch reads differently than vertical hairline cracking, and an inspector who can’t tell the difference isn’t doing the job.
- Diagonal or stair-step cracking in masonry often points to settlement, while vertical hairline cracks are frequently cosmetic.
- Deflection in floor joists or beams, visible as sagging or bounce underfoot, deserves a closer look and possibly a structural engineer.
- Cladding and flashing failures show up as water staining on interior walls near window and door openings.
- Window and door operation problems, sticking, gaps, or fogged glass, often trace back to settling or failed seals rather than the window itself.
When cracking patterns or moisture evidence suggest more than surface damage, recommend a structural engineer before closing rather than after. Destructive testing, like opening a wall cavity, falls outside a standard visual inspection under ASHI’s Standards of Practice unless it’s specifically contracted.
Roof Systems: Where Deferred Maintenance Gets Expensive
Roofs cause more surprise capital expenses than almost any other system, mainly because damage hides until water finds its way inside. Identify the membrane type (TPO, EPDM, modified bitumen, or built-up) and its approximate age, since that alone tells you how many years of service life remain.
- Check for ponding water, which accelerates membrane breakdown even on roofs rated for it.
- Inspect seams, flashings, and every roof penetration where pipes, vents, or equipment mounts pass through the membrane.
- Look at gutters, downspouts, scuppers, and roof curbs for debris buildup or separation.
- Ask for repair history and any remaining manufacturer warranty documents.
If ponding or seam failure covers a large portion of the roof, bring in a roofing consultant for a full assessment rather than estimating repair cost from the ground.
MEP Systems: HVAC, Electrical, And Plumbing Checklist
MEP systems account for the biggest share of ongoing maintenance cost, and electrical issues in particular show up more often than almost any other deficiency category in commercial inspection findings. A thorough checklist treats these three systems as separate investigations, not one quick glance at the mechanical room.
- HVAC: build a unit inventory with age, tonnage, and filter type for each piece of equipment, and request service contracts or a building automation system printout if one exists.
- Electrical: confirm service capacity against current building load, check the main disconnect, and look for proper panel labeling and clearance around equipment.
- Plumbing: trace the water service entry point, check drainage flow, inspect the water heater and any booster pumps, and note any visible leaks or corrosion at fittings.
Pro Tip: If the property has cast iron or clay drain lines older than 40 years, request a sewer camera inspection before closing. A cracked lateral line rarely shows any symptom above ground until it backs up.
Fire, Life Safety, And Accessibility: The Compliance Layer
Life-safety and accessibility findings carry weight beyond dollars because they affect insurance rates and, in some cases, occupancy permits. This is the category where a checklist has to be exhaustive rather than representative.
- Verify sprinkler system type and confirm the inspection tag date is current, along with fire pump and fire department connection (FDC) condition.
- Check fire alarm panel testing records and confirm extinguishers carry current inspection tags.
- Walk every egress route for clear signage, working emergency lighting, and door hardware that meets fire-rating requirements for the corridor.
- Spot-check basic ADA items: accessible entrance routes, restroom clearances, and signage height.
A full ADA compliance survey goes beyond what a general inspection covers. If the property serves the public, a specialist ADA consultant should review the findings separately, especially for older buildings that predate current accessibility code.
Elevators And Specialty Systems Worth A Second Look
Some systems need a certified vendor’s sign-off rather than a general inspector’s visual check. Confirm the elevator’s current inspection tag, note the last major service or modernization date, and request the maintenance contract.
- Kitchen hood suppression systems in any food-service tenant space need current testing documentation.
- Underground storage tanks, even decommissioned ones, need documentation confirming proper closure.
- Any system requiring a certified vendor report belongs in the due diligence package as a separate attachment, not folded into the general inspector’s findings.
Environmental Risk: Knowing When To Order Testing
Environmental findings tend to be invisible until someone specifically tests for them, which is exactly why visible cues matter so much during the walk-through. A Phase I Environmental Site Assessment gets triggered by things like stained soil, nearby underground storage tanks, or a documented history of industrial use on the parcel.
- Order asbestos testing on any building constructed before 1980, particularly around pipe insulation, floor tile, and ceiling materials.
- Test for radon in below-grade or ground-floor occupied spaces, and test for lead paint in any structure built before 1978.
- Document visible mold, water staining, or musty odors with photos and location notes, even when the cause isn’t obvious yet.
- If Phase I findings raise red flags, Phase II testing (soil borings, groundwater sampling) becomes the next step, and remediation costs from that phase can be significant enough to reshape the deal.
How To Structure The Report And Set Sampling Rules
A useful inspection report follows a predictable shape: an executive summary up top, detailed findings organized system by system, photo documentation paired with captions, and a CAPEX table estimating remaining useful life for major components, following the format the MBA’s Property Inspection Reference Guide recommends for lender review.
- Executive summary: top findings, overall condition rating, urgent flags
- Detailed findings: organized by the same system categories used during the walk-through
- Photo evidence: at least one image per deficiency with a location and date caption
- CAPEX table: item, estimated remaining life, and projected replacement cost
For multifamily or mixed-use properties, Freddie Mac’s sampling guidance calls for inspecting enough residential units to represent every unit type in the building, while commercial units within the property typically get inspected at or near 100 percent. Cost and duration both scale with size and complexity; a straightforward retail building might take a few hours, while a mixed-use property with multiple specialty systems can stretch across a full day or more, especially once structural or environmental specialists join the scope. For a general sense of what a mid-size commercial property runs, the cost breakdown for a 10,000 square foot building gives a useful benchmark before specialist add-ons.
Turning Findings Into Action: A Triage Framework
Not every finding deserves the same urgency, and treating a cracked sidewalk the same as a failed fire pump wastes everyone’s negotiating leverage.
- Life-safety issues first: anything tied to fire suppression, egress, or structural integrity gets flagged for immediate remediation, before closing if possible.
- Mission-critical systems next: HVAC failures, electrical capacity limits, or roof leaks affecting operations go into a near-term repair scope, often within 30 to 90 days.
- Capital planning last: items with remaining useful life, like an aging roof membrane or parking lot due for resurfacing in a few years, go into a longer-term capital expense plan rather than an immediate demand.
Use the cost estimates from step two and three to support a price reduction, a seller-funded repair, or an escrow holdback, depending on how the deal is structured.
Hunt Home Inspection, LLC: Commercial Inspection Services Built On This Checklist
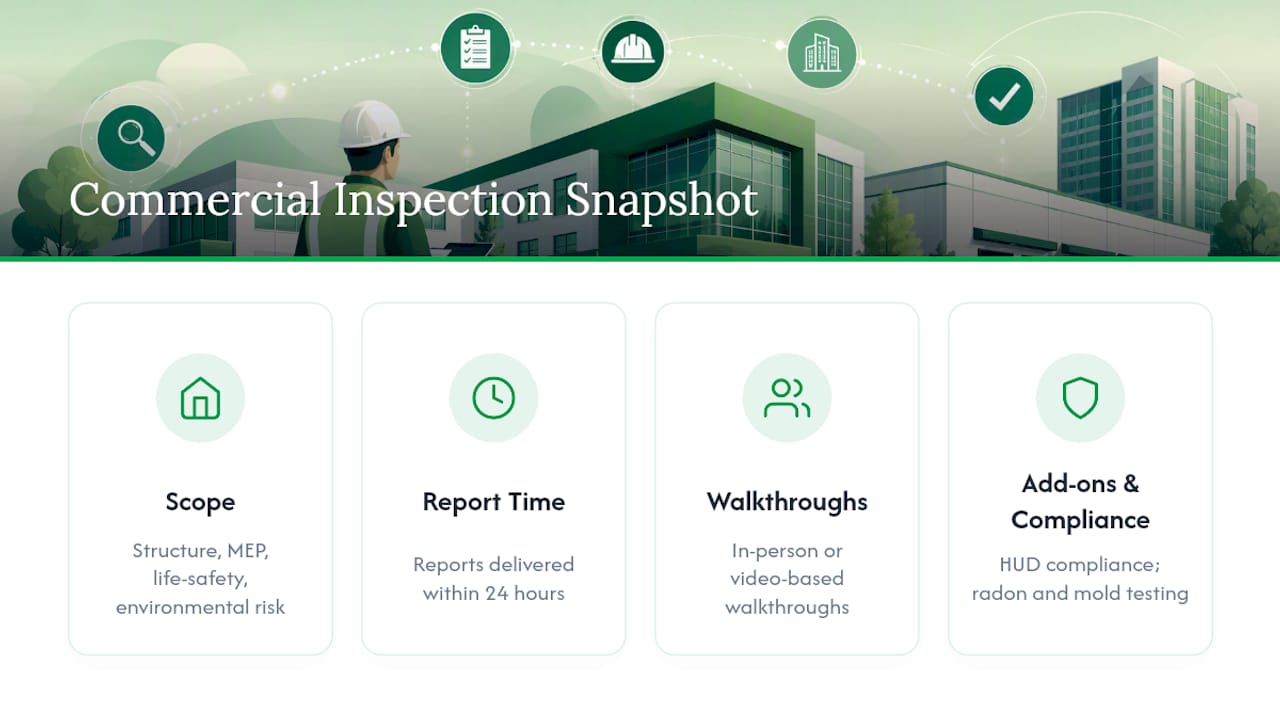
Jhunthomeinspections applies this same systems-based approach on every commercial inspection, covering structure, MEP, life safety, and environmental risk with reports delivered within 24 hours. Buyers and property managers can choose in-person or video-based walkthroughs, and the firm’s Create Request List™ tool keeps communication between buyers and agents organized from findings straight through to closing. HUD compliance certification work and environmental add-ons like radon and mold testing round out the scope for properties that need it.
Three Rules Every Inspector Should Follow
Schedule early, verify every record against what you see on-site, and photograph everything, even items that seem minor. One closing nearly slipped a week because a missing HVAC service log surfaced only during final walk-through. Two weeks’ lead time would have caught it first.
— JOHN
Book A Commercial Inspection Built On This Exact Checklist
Jhunthomeinspections runs commercial inspections against the same systems checklist covered in this guide, and turns the full report around in 24 hours instead of the week some firms take. That speed matters most when a closing date is already on the calendar and a delayed report becomes a delayed deal.
The commercial inspection service covers site, structural, roof, MEP, fire safety, and environmental checks in one visit, with add-ons like radon, mold, and sewer camera inspections available where the property calls for them. Buyers and facility managers who also need HUD compliance certification can bundle that into the same engagement. The company offers evening and weekend scheduling and provides service discounts for veterans and first-time buyers. Browse the full inspection services list and schedule a date that works before your closing deadline gets tighter.
Standards And Guidance Worth Bookmarking
- ComSOP defines the scope, walk-through procedure, and report structure inspectors follow for commercial property inspections.
- ASHI’s Standards of Practice clarify what a visual-only inspection does and doesn’t include.
- For due diligence document sequencing, SzopaLabs’ due diligence guide walks through a structured document review order worth comparing against your own checklist.
Sources
- ComSOP 2022 — CCPIA
- Freddie updates multifamily guide — Inside Mortgage Finance
- Property Inspection Reference Guide — MBA
- ASHI Standards of Practice 2026
FAQ
What Does A Commercial Inspection Checklist Cover?
A complete checklist covers site conditions, structural systems, the roof, MEP systems, fire and life safety, ADA accessibility, and environmental risk factors like asbestos or underground tanks. Each category should be documented with photos and tied to a report structure that follows MBA reporting guidance.
How Long Does A Commercial Building Inspection Take?
Duration depends heavily on size and complexity, ranging from a few hours for a simple retail space to a full day or more for a mixed-use property with specialty systems. Adding a structural engineer, environmental consultant, or elevator report extends both time and cost.
How Many Units Get Inspected In A Multifamily Property?
Lender guidance from Freddie Mac requires inspecting enough residential units to represent every unit type in the building, while commercial units within the same property typically need close to 100 percent inspection coverage. The consultant documents the sampling rationale in the final report.
Does A Standard Inspection Include Environmental Testing?
No. A standard visual inspection flags visible cues, like stained soil or suspected asbestos materials, but formal testing for radon, lead, asbestos, or soil contamination requires a separate specialist engagement. Buyers who spot red flags during the walk-through should order Phase I or Phase II environmental testing before closing.
What Does A Commercial Inspection Cost?
Cost varies by square footage and how many specialist add-ons are involved, with a mid-size building often falling in the range shown on Jhunthomeinspections’ commercial inspection cost page. Current pricing for specific service packages is listed on the inspection services page.
Recent Comments