
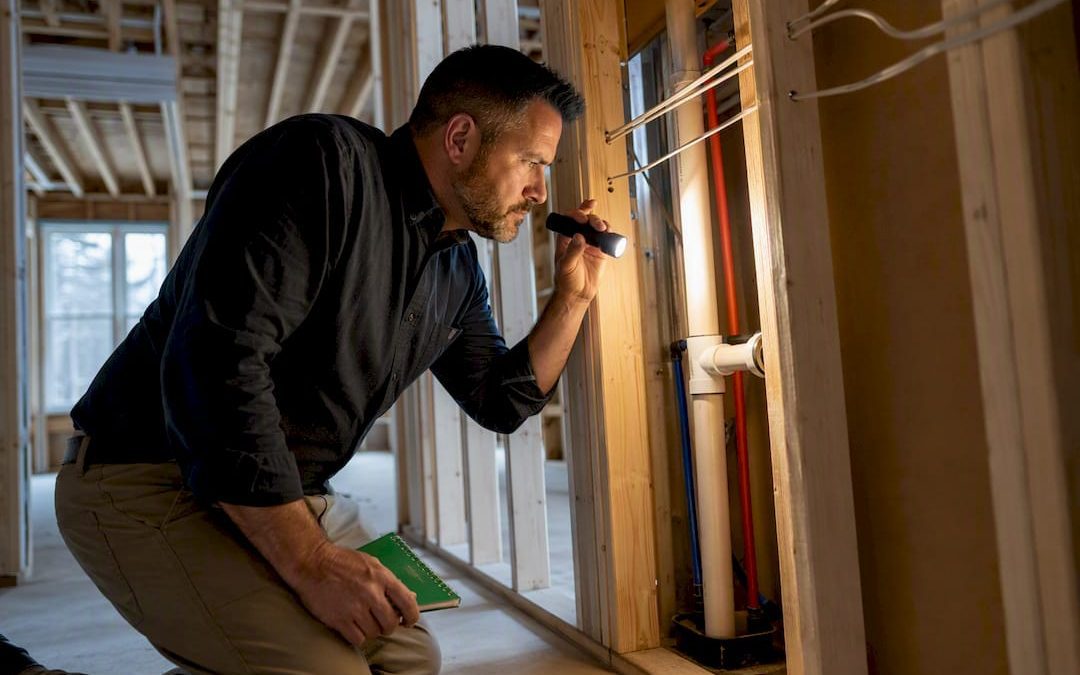
Get independent phase inspections done before you close: pre-pour (foundation), pre-drywall (framing), and a final pre-closing walkthrough. Add an 11-month warranty check after move-in if your builder’s warranty allows it. Municipal permits confirm code compliance, not workmanship, so book a private inspector the day your contract is signed and get access windows on the calendar early.
TL;DR:
- Private phase inspections should be scheduled early, ideally the week after signing the contract, because pre-pour and pre-drywall windows are short and critical.
- Key issues to verify include proper site grading, accurate footing dimensions, correct rebar placement, and vapor barrier integrity before concrete is poured.
- During the pre-drywall phase, check for proper framing connections, electrical grounding, HVAC duct support, and plumbing pressure tests, as these are fully exposed at this stage.
- The final walkthrough should include a full system test for electrical, plumbing, HVAC, and appliances, with special attention to drainage, insulation, and exterior grading to prevent long-term damages.
- An 11-month warranty inspection is advisable to catch settlement cracks, drainage issues, or seasonal problems before the builder’s one-year warranty expires.
Table of Contents
- What Is a New Construction Inspection Checklist, and Why Does It Need Three Phases?
- Your Phase-by-Phase Inspection Checklist
- Final Walkthrough Checklist by Room and System
- Scheduling, Access, and Cost: What to Expect
- Red Flags That Should Delay Closing
- How Hunt Home Inspection Approaches New Construction
- The Minimum Inspection Package Worth Paying For
- Book a New Construction Inspection Before You Close
- Sources
- FAQ
What Is a New Construction Inspection Checklist, and Why Does It Need Three Phases?
A new construction inspection checklist is a set of items an independent inspector, or you, verify at specific build stages, not just at the final walkthrough. City inspectors check code minimums: is the wiring gauge legal, is the foundation depth adequate. They don’t evaluate whether the framer measured twice or the plumber pressure tested the lines correctly. That gap is exactly what private phase inspections exist to close, and it’s why buyers who skip them often discover workmanship problems only after drywall, siding, or landscaping hides the evidence.
Phase inspections generally break into three windows, with a fourth added after you move in:
- Pre-pour (foundation): happens before concrete goes down, when footings, rebar spacing, and vapor barrier placement are still visible and correctable.
- Pre-drywall (framing): occurs after rough electrical, plumbing, and HVAC are installed but before drywall seals the walls. Rocket Mortgage calls this the highest-value single phase, since it’s the only time these systems are fully exposed.
- Final (pre-closing): a full functional test of the finished home, from outlets to appliances to grading.
- 11-month warranty check: scheduled near the end of most one-year builder warranties, timed to catch settlement cracking or drainage issues that only show up after a full season of weather.
For FHA-financed builds, lenders may formally require staged inspections at footing, framing, and final, documented on HUD forms by an ICC inspector or local authority. That requirement covers loan compliance, though. Your own workmanship inspection is a separate, additional step even when the lender’s paperwork is satisfied.
Your Phase-by-Phase Inspection Checklist
Each phase has a narrow window and a distinct set of things worth checking. Miss the window, and the evidence disappears under concrete, drywall, or siding.
- Pre-pour checklist. Confirm site grading slopes away from the future foundation. Photograph footing depth and width against the engineered plans. Check rebar spacing and tie placement. Verify vapor barrier coverage under the slab, with no tears or gaps. Confirm trenching for utilities is compacted properly before backfill.
- Pre-drywall checklist. Look at framing connectors and hurricane ties where required. Check fireblocking at floor and ceiling penetrations. Ask for a rough plumbing pressure test and watch the gauge yourself if possible. Trace electrical routing and confirm grounding at the panel. Verify HVAC ducts are supported, sealed, and sized correctly for the room they serve. Check window and door openings for proper flashing and weather-resistant barrier integration.
- Final checklist. Test every outlet, especially GFCI outlets in kitchens, bathrooms, and garages. Run every appliance through a full cycle. Open and close every door and window to check operation and weatherstripping. Check the attic for insulation depth and ventilation. Confirm grading and downspout discharge direct water away from the foundation.
- 11-month checklist. Look for new settlement cracks in drywall or the slab. Run the HVAC system through a full heating and cooling cycle and note performance. Check drainage patterns after the home has been through at least one full season of rain or snow.
Pro Tip: Request pre-pour access at least a week ahead. Once concrete is poured, footing depth and rebar placement become nearly impossible to verify, and that’s the one phase you can never redo.
Final Walkthrough Checklist by Room and System
The final walkthrough, often called the blue-tape walkthrough because buyers mark defects with painter’s tape, is where most problems surface if the earlier phases were skipped. Industry checklists compiled from inspector guidance consistently flag HVAC, drainage, insulation, and electrical issues as the most common new-build defects, which is exactly why a system-by-system pass matters more than a quick walk-through.
Exterior and grading
- Ground slopes away from the foundation on all sides.
- Downspouts discharge at least several feet from the house, not against the foundation wall.
- Kickout flashing is present where roof lines meet siding.
- Exterior sealant beads are continuous around windows and doors, with no gaps.
Roof and attic
- No missing, cracked, or improperly nailed shingles.
- Attic insulation meets the depth called for in the plans, with no compressed or missing sections.
- Roof penetrations for vents and flues are sealed and properly flashed.
Structure
- Floors are level; a marble or ball bearing shouldn’t roll on its own.
- Doors and windows open, close, and latch without sticking or dragging.
- Visible framing connectors and hardware match code requirements where accessible.
Electrical
- Panel is labeled clearly and breakers are accessible.
- GFCI and AFCI protection is installed where required.
- Every outlet and switch functions on the first test.
Plumbing
- Fixtures run at full pressure and drains clear quickly.
- Water heater installation includes a properly routed temperature and pressure relief (TPR) valve.
- Shutoff valves are accessible under sinks and at the main.
HVAC
- Thermostats and zones respond correctly.
- Duct connections are sealed at the joints, not just taped.
- Refrigerant lines are insulated along their full visible run.
Appliances and finishes
- Every appliance runs a full cycle without error codes or leaks.
- Cabinet doors and drawers align and close flush.
- Paint, caulk lines, and trim seams are clean, with no visible gaps. If you’re evaluating interior doors as part of the finish check, door quality also affects energy efficiency over the life of the home.
Scheduling, Access, and Cost: What to Expect
Contact an independent inspector the same week you sign the purchase contract. Booking early matters because pre-pour and pre-drywall have short windows, and builders move fast between phases.
Getting on-site access usually means one of two things: written permission from the builder’s superintendent, or inspection access language built into your purchase contract itself. Agents can help negotiate the latter if the builder is hesitant.
Costs vary by scope. A standalone final inspection typically runs $300 to $600, with each additional phase inspection adding roughly $150 to $400. Bundled packages covering all three phases often cost less per visit than booking them separately. Larger homes, finished basements, and add-ons like radon or sewer camera testing push costs higher.
When you find issues, document them clearly and hand your inspector’s report to the builder with:
- A photo of each item.
- The specific location (room, wall, fixture).
- A recommended timeline for correction, tied to your closing date where possible.
Pro Tip: Ask your inspector for a step-by-step scheduling guide before your first phase inspection. Knowing the sequence in advance keeps you from missing the pre-pour window entirely.
Red Flags That Should Delay Closing
Some findings are cosmetic. Others are the kind of thing you insist gets fixed before you sign anything. Watch closely for:
- Foundation cracks wider than a hairline, especially ones that run diagonally.
- Grading that slopes toward the house instead of away from it.
- Drain lines that appear disconnected or improperly vented into the attic.
- Missing or compressed insulation in the attic or exterior walls.
- Exposed or improperly grounded electrical connections.
Document every finding with a distance shot for context, a close-up of the defect, and something for scale, like a tape measure or a coin. Note the date and location on each photo.
Inspectors typically phrase findings as either a functional deficiency or a quality-of-workmanship deficiency, and that distinction matters. Precise language helps the builder route the issue to the right subcontractor instead of losing it in general correspondence.
For anything severe, your options escalate in order:
- Request re-inspection after the builder claims the fix is complete.
- Negotiate an escrow holdback that releases funds only after verified repairs.
- Delay closing, as a last resort, if the defect affects safety or structural integrity.
How Hunt Home Inspection Approaches New Construction
Some inspection providers offer both in-person and video inspection options to accommodate clients who cannot attend every phase. Reports may be provided promptly after the visit to help meet closing deadlines.
- A tool is often provided to organize your punch list into a single shareable document your agent and builder can both reference, instead of scattered texts and photos.
- Common add-ons for new builds can include radon testing, sewer camera inspection, and mold inspection, especially when a lot backs up to older infrastructure or sits on ground with a history of radon in the region.
- Phase inspection packages can sometimes be bundled to match the pre-pour, pre-drywall, and final schedule outlined above.
The Minimum Inspection Package Worth Paying For
If cost forces a choice, final plus pre-drywall covers the two highest-value windows: the moment systems are exposed and the moment everything gets tested for real. Add pre-pour only if you’re involved from the ground up, and schedule an 11-month check whenever the warranty allows it, since seasonal issues rarely show up on move-in day. Keep the tone collaborative with your builder. Most want the punch list resolved as much as you do; a clear, photo-backed report gets you there faster than an adversarial one.
— JOHN
Book a New Construction Inspection Before You Close
Some home inspection services offer phase inspections built around this kind of checklist, covering pre-pour, pre-drywall, final, and an 11-month warranty check to simplify scheduling.
Evening appointments are available if your work schedule doesn’t leave room for daytime access, and video inspections cover you when you can’t make it to the site in person. Reports come back within 24 hours, and pay-at-close options line up with how real estate transactions actually move. Add-ons like radon, sewer camera, and mold testing are available where the lot or location calls for them. Visit the inspection services page to see current packages and book your pre-drywall or final inspection before your builder’s schedule fills up.
Sources
- Chase: new construction inspection phases and timing
- Redfin: Do you need a home inspection on a new build?
- Rocket Mortgage: new construction phase inspection guide
FAQ
What Should You Look for in a New Build Inspection?
Focus on foundation integrity before the pour, exposed systems before drywall goes up, and full functional testing at the final walkthrough, covering electrical, plumbing, HVAC, and grading.
What Is an Inspection Checklist in Construction?
It’s a phase-specific list of items an inspector verifies at set build stages, pre-pour, pre-drywall, and final, rather than a single end-of-project review.
What Is the Biggest Red Flag in a New Home Inspection?
Grading that slopes toward the foundation instead of away from it ranks among the most serious findings, since it drives long-term water damage that’s expensive to fix after landscaping is finished.
Are Inspections Done on New Construction Homes?
Yes. Municipal inspectors check code compliance at each build stage, but independent phase inspections are a separate, buyer-initiated step that catches workmanship issues code checks don’t cover.
When Should You Schedule Your First Phase Inspection?
Contact an inspector the same week you sign the purchase contract, since the pre-pour window closes as soon as concrete is scheduled.
Recent Comments