
If you’re a low-income buyer being pressured to waive your home inspection, the short answer is: don’t, unless you have a specific low-risk situation and a concrete backup plan. The inspection waiver risks for low-income buyers are disproportionately severe because a $400 inspection can prevent a $40,000 surprise. Three things you can do right now:
- Request an informational inspection before submitting your offer. You hire the inspector, you get the report, and you make no repair demands. Your offer stays clean.
- Ask for a seller credit in lieu of repairs. A $500 credit at closing covers the inspection cost and gives you cash for minor fixes.
- Look for a pay-at-close option so you’re not out of pocket before you own the home.
HUD classifies certain property defects as life-threatening exigent health and safety (EHS) deficiencies requiring immediate correction. Without an inspection, you may not know they exist until you’re already living with them. The National Association of Realtors has tracked the pressure buyers face in competitive markets, and advocacy reporting confirms that waiver pressure falls hardest on buyers with the fewest financial reserves.
Key Takeaways
Waiving a home inspection is the single highest-risk financial decision a low-income buyer can make, and an informational inspection at $300–$500 is almost always the better path.
| Point | Details |
|---|---|
| Don’t waive without reserves | If you lack a $15,000–$20,000 emergency fund, a hidden defect can destabilize your finances entirely. |
| Informational inspection is the best compromise | At $300–$500, it keeps your offer clean while giving you documented evidence of the home’s condition. |
| Negotiate credits, not repairs | Seller credits at closing are cleaner for sellers and give you cash to handle repairs on your own timeline. |
| Post-closing checklist matters | If you already waived, hire an inspector immediately and document every defect with date-stamped photos. |
Table of Contents
- Why so many buyers skip inspections, especially low-income ones
- The real risks of buying a home without an inspection
- How waiving inspections can affect your mortgage and insurance
- Lower-cost ways to protect yourself when you can’t include a full contingency
- Negotiation tactics that keep your offer competitive without leaving you exposed
- When waiving an inspection can be reasonable
- What to do right after closing if you already waived the inspection
- Jhunthomeinspections’ perspective on protecting low-income buyers
- The conventional advice on inspection waivers gets one thing badly wrong
- Sources
Why so many buyers skip inspections, especially low-income ones
The market creates real pressure. When a home gets six offers in a weekend, sellers pick the cleanest one. An inspection contingency signals to a seller that the deal might unravel over a leaky faucet. So buyers drop it.
For low-income buyers, the pressure is compounded by personal constraints:
- Thin cash reserves after the down payment. After stretching to cover a down payment and closing costs, paying $300–$500 upfront for an inspector feels impossible.
- Fear of losing earnest money. Without an inspection contingency, backing out means forfeiting your deposit. That fear keeps buyers locked in even when red flags appear.
- Time pressure. Sellers want fast closes. A 10-day inspection window can cost you the house.
- Competing with cash buyers. Cash offers close faster and carry no financing contingencies. Buyers using FHA or VA loans already feel disadvantaged and drop inspection contingencies to compensate.
Industry estimates suggest that roughly 19–30% of buyers waived inspection contingencies in recent competitive-market years. Common buyer rationales include purchasing new construction under a builder’s warranty, receiving a recent seller-provided inspection report, or simply believing the house “looks fine.”
The problem is that “looks fine” is exactly what serious defects are designed to do.
The real risks of buying a home without an inspection
These aren’t hypothetical. Here’s what you’re actually exposed to, ranked by how likely and how costly each is for a buyer with limited reserves.
-
Safety hazards: electrical, mold, and structural failures. Faulty wiring causes house fires. Mold causes respiratory illness. A compromised foundation can make a home uninhabitable. These are the defects that don’t just cost money — they cost lives. HUD’s OIG audit findings classify life-threatening EHS deficiencies as requiring immediate resolution, and a buyer who waives inspection has no documented evidence these conditions exist.
-
Major repair costs: roof, foundation, HVAC. A roof replacement runs $8,000–$20,000. Foundation repair can reach $30,000 or more. HVAC replacement averages $5,000–$12,000. These are not costs a buyer with a $2,000 emergency fund can absorb.
-
Hidden systems: plumbing and electrical service panels. Outdated knob-and-tube wiring or galvanized pipes are invisible to a walkthrough but show up immediately on an inspector’s report. Replacing a service panel runs $1,500–$4,000. Repiping a house can cost $8,000–$15,000.
-
Pests and wood-destroying organisms. Termite damage is often invisible until structural members fail. Treatment and repair combined can run $3,000–$10,000 depending on extent.
-
Environmental hazards: lead paint and asbestos. Homes built before 1978 may contain lead paint. Asbestos shows up in insulation, floor tiles, and pipe wrap in pre-1980 construction. Remediation costs vary widely but can exceed $10,000 for significant abatement.
-
Resale and equity loss. A home with undisclosed defects is worth less than you paid. If you need to sell in five years and the foundation issue surfaces during the buyer’s inspection, you’re negotiating from a hole.
One reported case illustrates the stakes clearly: a first-time buyer who waived an inspection faced roughly $22,000 in post-closing repair costs and had no practical legal path to recover them. Without an inspection report, pursuing a concealment claim against the seller is costly, evidence-dependent, and rarely successful. The inspection report is your paper trail. Without it, you’re arguing from memory.
Pro Tip: If you spot any visible red flags during a showing — water stains on ceilings, soft spots in floors, a musty smell in the basement — treat those as signals that the risk of waiving is higher than average for that specific property.
ProPublica’s investigation found that HUD’s inspection system has missed serious violations in public housing, with properties passing inspections despite documented problems. That finding matters here: even government-inspected housing can harbor hidden defects. An independent buyer inspection is the only check that works specifically for you.
How waiving inspections can affect your mortgage and insurance
Most buyers assume the lender’s appraisal covers the same ground as an inspection. It doesn’t. An appraisal determines market value. An inspection determines physical condition. As Opendoor explains, lenders and insurers may still require professional condition verification even when buyers waive inspection contingencies, because the appraisal simply doesn’t go that deep.
Here’s what can go wrong on the insurance side:
- Conditional coverage. Your insurer may issue a policy but require specific repairs within 30–90 days. Miss the deadline, and coverage lapses.
- Premium increases. An older roof or outdated electrical panel can trigger a surcharge or a refusal to cover certain perils.
- Outright denial. Some insurers won’t write a policy on a home with a knob-and-tube wiring system or a roof past its rated life. No insurance means no mortgage.
- Post-closing cancellation. If an insurer sends an inspector and finds conditions they weren’t told about, they can cancel the policy. That puts your mortgage in default.
The downstream effect on your loan is real. Most mortgage agreements require active homeowner’s insurance. A lapsed or cancelled policy triggers a lender-placed insurance policy, which costs significantly more and covers less.
Action checklist before waiving:
- Call your insurer before making an offer. Ask specifically what conditions would trigger a denial or surcharge.
- Ask the seller for any recent inspection reports, repair receipts, or insurance claims history.
- Document every disclosure the seller makes in writing.
- If you can’t get a full inspection, get a contractor to walk the property and provide a written estimate. That document gives your insurer and lender something to work with.
For more on how skipping an inspection can jeopardize financing, the consequences are worth understanding before you sign anything.
Lower-cost ways to protect yourself when you can’t include a full contingency
You don’t have to choose between winning the offer and knowing what you’re buying. Several options sit between “full inspection contingency” and “no inspection at all.”
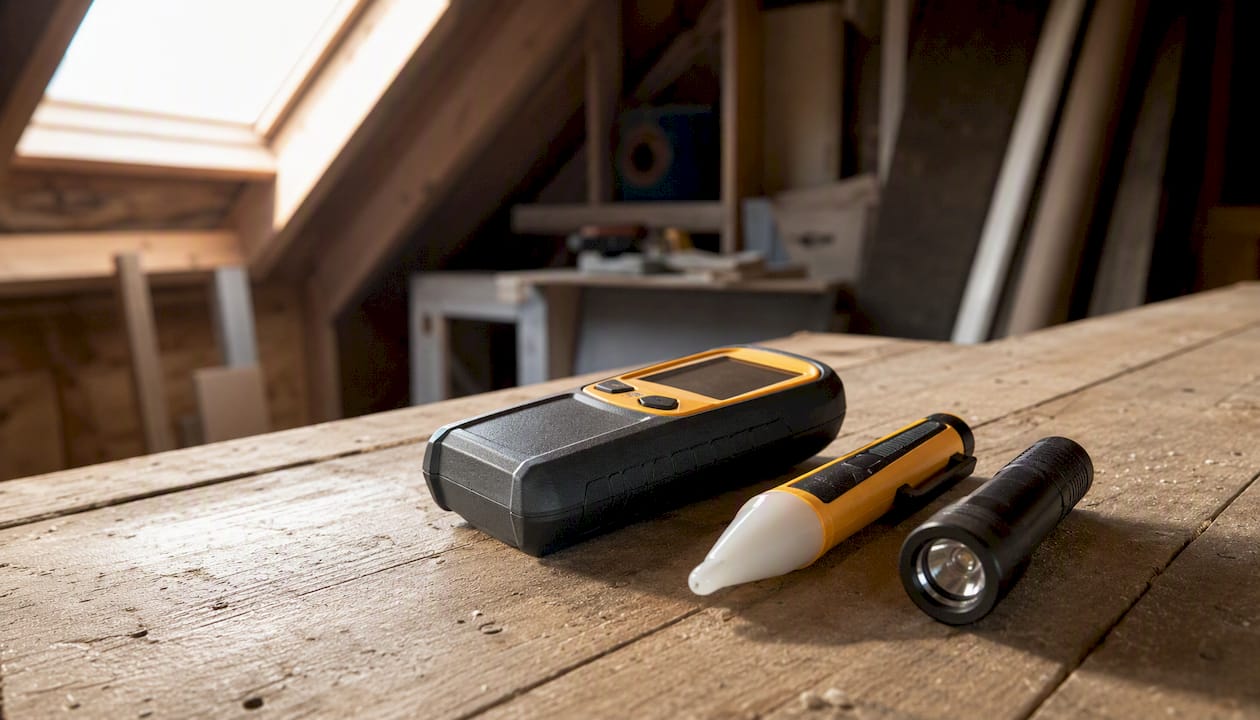
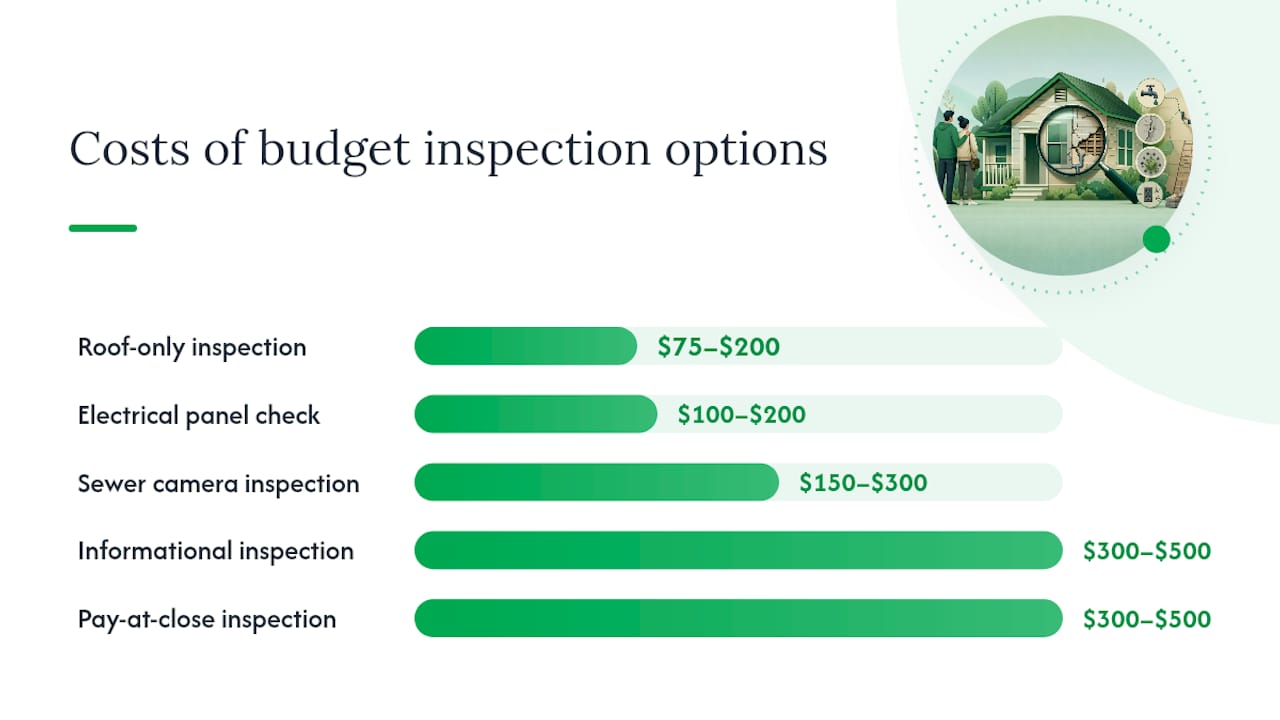
Informational inspection ($300–$500). You hire an inspector before submitting your offer. The report is for your eyes only. You make no repair demands. Your offer is technically clean. Realtor.com’s guidance identifies this as a practical compromise in competitive markets. The tradeoff is that you pay for inspections on homes you may not win, but even one inspection that reveals a serious defect pays for itself many times over.
Limited-scope inspections. If a full inspection isn’t feasible, target the highest-risk systems:
- Sewer camera lateral inspection: $150–$300. Sewer line replacement costs $3,000–$25,000. The math is obvious.
- Roof-only inspection: $75–$200. Useful for older homes where the roof is the biggest visible unknown.
- Electrical panel check: often included in a full inspection but can be done as a standalone by a licensed electrician for $100–$200.
Pay-at-close options. Some inspectors allow you to defer payment until closing, which removes the upfront cash barrier entirely. Jhunthomeinspections offers this option specifically for buyers with limited cash flow. A 24-hour report turnaround also means you’re not slowing down the transaction.
Seller credit negotiation. Instead of asking for repairs, ask for a credit at closing. A $3,000 credit is cleaner for the seller (no contractor coordination) and gives you cash to handle repairs on your timeline.
Home warranty. A home warranty covers mechanical system failures after closing. It’s not a substitute for an inspection — it won’t cover pre-existing conditions — but it reduces the financial exposure on HVAC, appliances, and plumbing for the first year.
| Option | Approximate Cost | What It Covers | Key Tradeoff |
|---|---|---|---|
| Informational inspection | Moderate cost | Full property condition | Paid before offer; no repair leverage |
| Sewer camera inspection | $150–$300 | Lateral sewer line | Single system only |
| Roof-only inspection | $75–$200 | Roof condition and life | Single system only |
| Electrical panel check | $100–$200 | Service panel and wiring | Single system only |
| Pay-at-close inspection | $300–$500 | Full property condition | Deferred payment; no upfront cash needed |
| Seller credit | Negotiated | Buyer-directed repairs | Seller must agree |
Pro Tip: When booking an inspector, ask specifically for a 24-hour report turnaround and request that the report flag any life-safety items separately at the top. That section alone tells you whether you can proceed or need to walk.
For buyers watching every dollar, budget inspection options can make the difference between going in blind and going in informed.
Negotiation tactics that keep your offer competitive without leaving you exposed
The goal is to give the seller what they actually want — speed and certainty — while preserving your ability to exit if the house is a disaster.
Clauses that protect you without killing the deal:
- Inspection-for-information clause. You conduct an inspection but agree in writing not to request repairs. The seller gets a clean offer. You get your eyes on the property. You retain the right to walk away only if findings exceed a defined threshold (e.g., any single repair estimated above $10,000).
- Life-safety-only contingency. The inspection contingency applies only to EHS-level defects: structural failure, active mold, faulty electrical, gas leaks. Minor cosmetic issues don’t trigger it. Sellers find this far less threatening than a standard contingency.
- Shortened inspection window. Offer a 5-day inspection window instead of 10. You’re signaling speed and seriousness without giving up the right entirely.
- Earnest money protection language. Specify in the contract that earnest money is refundable only if inspection findings meet the defined threshold. This protects you from forfeiture on legitimate exits.
Tactics for tight inventory:
- Offer a small non-refundable earnest money deposit upfront (say, $500) to show commitment, with the remainder refundable if inspection findings trigger the exit clause.
- Propose a faster close date. A 21-day close with a 5-day inspection window is often more attractive to sellers than a 30-day close with no inspection.
- Offer to share the inspection report with the seller. This builds goodwill and signals transparency.
- Ask the seller’s agent what the seller values most. Speed? Certainty? Fewer contingencies? Tailor your protective language to address their actual concern.
A short script for buyer agents: “My client is prepared to move quickly and is not asking for repairs. We’d like a 5-day inspection window limited to life-safety findings only. This gives your seller certainty on timeline and eliminates the back-and-forth on minor items.”
That framing positions the inspection as a formality rather than a threat.
When waiving an inspection can be reasonable
There are situations where the risk profile is genuinely lower. Knowing them helps you make a real decision rather than a panicked one.
New construction with a transferable builder’s warranty. A home built in the last 12 months under a licensed builder’s warranty has a different risk profile than a 1960s ranch. That said: verify the warranty transfers to you, get the terms in writing, and still consider a new-construction inspection. Builders make mistakes.
Very recent seller-provided professional inspection. If the seller had a pre-listing inspection done within the last 90 days by a licensed inspector, request the full report and all repair receipts. Read it carefully. If the inspector is licensed and the report is comprehensive, your risk is lower — but you’re still relying on an inspector hired by the seller.
Condo where the HOA covers building systems. If the HOA is responsible for the roof, exterior walls, plumbing, and HVAC, your inspection scope narrows to the interior unit only. A limited-scope inspection covering the unit’s electrical, appliances, and any owner-responsibility systems is often sufficient.
Investor or house-flipper transactions with documented renovation history. If you’re buying a recently renovated property and the seller can provide permits, contractor invoices, and inspection sign-offs for the work, the risk profile is lower. Verify permits were pulled and closed.
Required precautions for every scenario above:
- Verify warranty transfer in writing before closing.
- Request all seller-provided reports, permits, and receipts.
- Conduct targeted checks on any system the seller or HOA is NOT responsible for.
- Review HOA financials for deferred maintenance reserves.
Emergency reserve guidance: For homes under 10 years old, a reserve of $5,000–$10,000 covers most surprises. For homes 20–40 years old, $15,000–$20,000 is more realistic. For homes over 40 years old, budget $20,000 or more. If you don’t have that reserve, the risk of waiving is higher regardless of the scenario.
Pro Tip: Before signing any waiver, run this quick check: How old is the roof? When was the electrical panel last updated? Are there any open permits on the property? Three questions, five minutes, and you’ll know whether you’re in a low-risk or high-risk situation.
What to do right after closing if you already waived the inspection
You closed without an inspection. Here’s how to limit the damage from this point forward.
- Hire an inspector immediately for a post-closing inspection. It won’t give you legal leverage the way a pre-purchase inspection would, but it tells you what you’re dealing with and helps you prioritize repairs before a small problem becomes a large one.
- Order specialist checks if you find red flags. A sewer camera inspection, an electrical panel assessment, or a roof inspection by a licensed roofer can confirm or rule out the highest-cost risks quickly.
- Photograph and document everything. Date-stamped photos of every defect you find create a record. If you later pursue a concealment claim, that documentation is your starting point.
- Contact your insurer immediately. Confirm your coverage is active and ask whether any conditions require repair within a deadline. Get the answer in writing.
- Get contractor estimates in writing. A documented estimate from a licensed contractor (check their certificate of insurance before hiring) gives you a basis for negotiating with the seller, your insurer, or a court.
- Approach the seller for goodwill repairs or a credit. Without an inspection report, you have no contractual leverage. But sellers sometimes negotiate post-closing when presented with documented evidence of a serious defect they knew about.
- Consult an attorney for large damages. Pursuing a concealment claim is possible but expensive and evidence-dependent. As Mortgage Daily’s reporting makes clear, without an inspection report, these cases are hard to win. An attorney can tell you quickly whether your specific situation has merit.
Low-cost resources if you’re in financial distress post-closing:
- HUD-approved housing counselors (free, find one at hud.gov)
- Local housing nonprofits and community development organizations
- Community legal aid for buyers who can’t afford private attorneys
- State attorney general consumer protection offices for concealment or fraud claims
Jhunthomeinspections’ perspective on protecting low-income buyers
Hunt Home Inspection advises against waiving inspections for financially vulnerable buyers because the math is unambiguous: a $400 inspection is the cheapest insurance you can buy on a $200,000 asset. The buyers who can least afford a surprise repair are the ones most harmed by skipping the one step that would have caught it.
For buyers with constrained budgets, Jhunthomeinspections offers several options designed specifically to reduce barriers:
- Informational inspections with no repair-demand requirement, so your offer stays competitive
- Pay-at-close payment option so you’re not out of pocket before you own the home
- Video inspections for buyers who can’t be present in person
- 24-hour report delivery so the inspection doesn’t slow your transaction
- Create Request List™ support to help you and your agent communicate findings efficiently without back-and-forth delays
The firm serves the St. Louis Metro area and Southern Illinois, and draws on authoritative sources including HUD, NAR, and ProPublica’s investigative reporting to inform its inspection standards. [Author credentials, case studies, and proprietary metrics will appear in the published version.]
If you’re a first-time buyer, a low-income buyer, or a veteran navigating a competitive market, the inspection services page covers the full range of available options. For buyers specifically watching costs, the pay-at-close option removes the upfront barrier entirely. Booking takes minutes, and the report is in your hands within 24 hours.
The conventional advice on inspection waivers gets one thing badly wrong
Most consumer articles frame the inspection waiver question as a competitive strategy problem: how do you win the house without giving up too much protection? That framing assumes you have options. For a low-income buyer, the real question is different: what happens to your financial life if you’re wrong?
The conventional advice says “try to keep the contingency if you can.” That’s technically correct and practically useless. It doesn’t tell you what to do when the seller has four other offers and yours is the weakest. It doesn’t tell you how to get an inspection done when you’re $400 short. And it doesn’t explain that the financing and insurance consequences of waiving can compound the original problem in ways most buyers never anticipate.
What actually matters, and what most pieces miss, is the insurance angle. Buyers focus on the seller negotiation. They don’t think about what happens when their insurer sends an inspector six months after closing and finds a roof that should have been disclosed. The policy gets cancelled. The lender gets notified. Suddenly a $400 inspection decision has become a mortgage crisis.
The role of a professional inspector in safe housing isn’t just about finding defects. It’s about creating a documented record that protects you across every subsequent transaction: insurance underwriting, resale, refinancing, and legal claims. That record is worth far more than the cost of the inspection.
For low-income buyers, the mitigation hierarchy should be: informational inspection first, limited-scope inspection second, seller credit third, and home warranty as a supplement, never a substitute. The pay-at-close option removes the cash barrier that stops most buyers from getting any inspection at all. Use it.
The buyers who get hurt worst aren’t the ones who made a bad decision. They’re the ones who didn’t know they had better options.
Sources
- Appraisal vs. home inspection: what’s the difference
- Why Waiving the Home Inspection Cost This First-Time Buyer $22,000 in Hidden Repairs | Mortgage Daily
- HUD OIG report on REAC inspections and EHS deficiencies
- Will the new ‘Right to Inspection’ laws lead to meaningful change? | Working RE Home Inspector
Recent Comments