
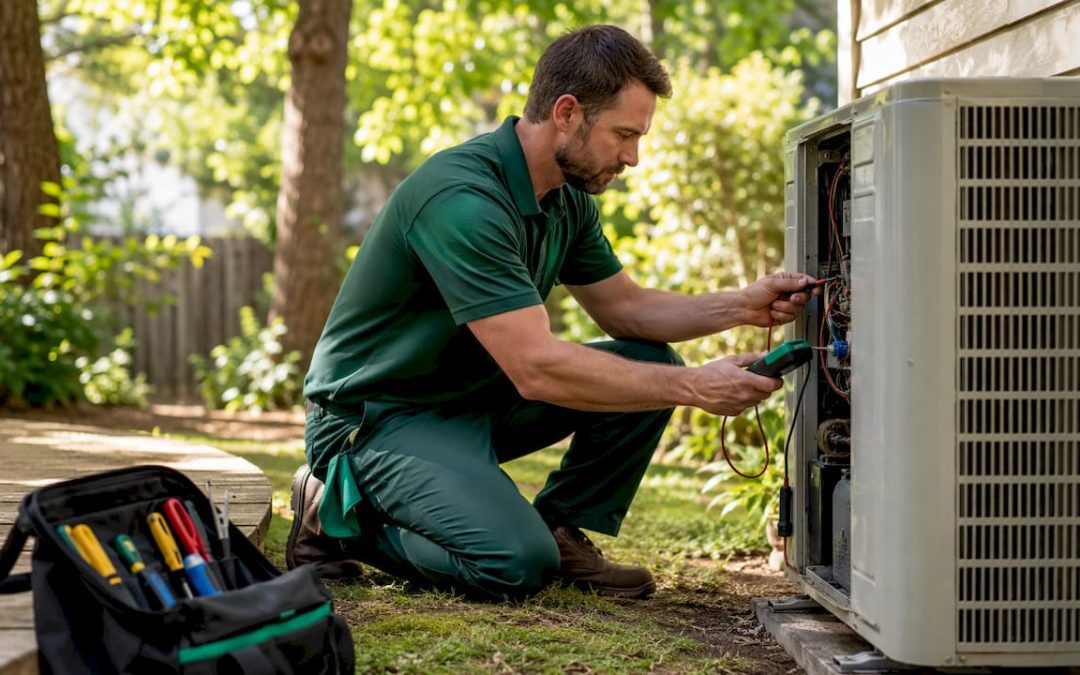
An HVAC inspection is a professional, documented evaluation of your home’s heating, ventilation, and air conditioning systems to assess safety, performance, and compliance with manufacturer warranty requirements. It is not a tune-up or maintenance visit. A technician performing an inspection diagnoses and documents the condition of your equipment; they are not cleaning coils, replacing filters, or lubricating parts. That distinction matters when you are buying a home or trying to understand why your energy bills keep climbing.
Three things to know right away:
- Inspections are diagnostic, not service calls. Per industry guidance, inspections document condition; maintenance actively services the system.
- A general home inspection is not a substitute. For a deep mechanical and capacity assessment, schedule a specialist HVAC inspection separately, especially during a home purchase.
- Credentials matter. Look for a technician holding a NATE certification or a state HVAC license, and expect a written report aligned with ASHRAE commissioning standards.
Hunt Home Inspection, LLC serves homeowners and buyers across the St. Louis Metro area and Southern Illinois with exactly this kind of documented, professional evaluation.
Table of Contents
- What does an HVAC inspection cover, component by component?
- What happens step by step during an HVAC inspection visit?
- Why should you get an HVAC inspection?
- How often should you schedule an HVAC inspection?
- How much does an HVAC inspection cost, and how long does it take?
- What an HVAC inspection will not do
- What can you check yourself, and what requires a professional?
- How to prepare for your HVAC inspection
- How to read and use your written inspection report
- Safety red flags that need immediate action
- What the research says about inspections reducing costs and risk
- Key Takeaways
- Why I recommend a specialist HVAC inspection every time
- Jhunthomeinspections covers the St. Louis Metro area with same-day scheduling
- Useful sources and further reading
What does an HVAC inspection cover, component by component?
A thorough HVAC inspection checklist covers every major component of both the indoor and outdoor systems. Technicians evaluate air filters, blowers, ductwork, thermostats, refrigerant levels, burner and coil condition, electrical connections, and safety controls, then deliver a written report on completion. Here is what each item means for you:
Heating system and furnace
- Burner condition and ignition sequence
- Heat exchanger integrity (cracks here allow combustion gases into living spaces)
- Flue and venting connections for blockages or improper termination
Cooling system
- AC compressor and condenser coil condition
- Evaporator coil for dirt buildup or freeze damage
- Refrigerant lines and charge level (low refrigerant forces the compressor to overwork)
Air distribution
- Blower motor operation and belt condition
- Air filter size and loading
- Ductwork for leaks, disconnections, and insulation gaps
- Supply and return vents for obstruction
Controls and electrical
- Thermostat calibration and response
- Electrical connections, breakers, and disconnect switches
- Safety controls and limit switches
Drainage
- Condensate drain and drip pan for algae buildup, cracks, or overflow risk
Critical safety items the technician flags immediately
The HVAC inspection checklist always includes a short list of conditions that require urgent attention:
- Cracked heat exchanger (carbon monoxide risk)
- Active gas leak or gas odor
- Blocked or improperly pitched flue or venting
- Unsafe electrical conditions (exposed wiring, overloaded breakers)
- CO detector absence or failure near fuel-burning equipment
A well-maintained HVAC system can last 15–20 years, but systems older than about 10 years face a sharply higher risk of major failure during peak seasons when inspections are skipped.
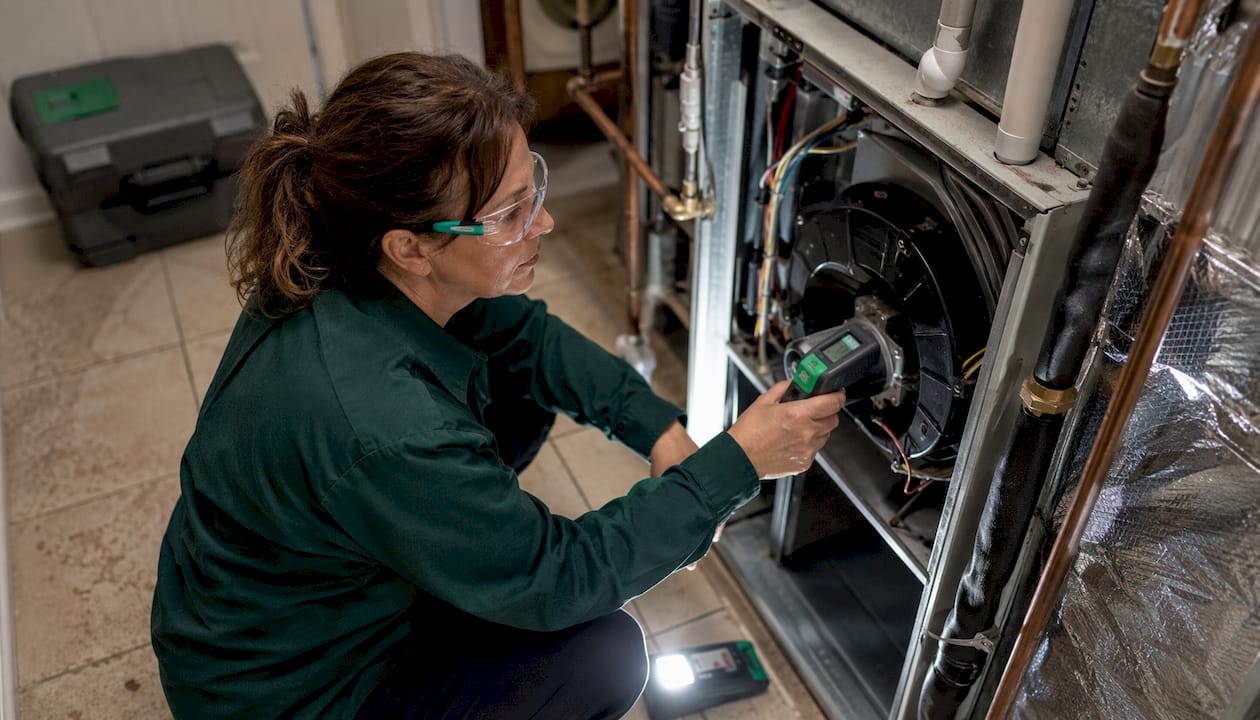
What happens step by step during an HVAC inspection visit?
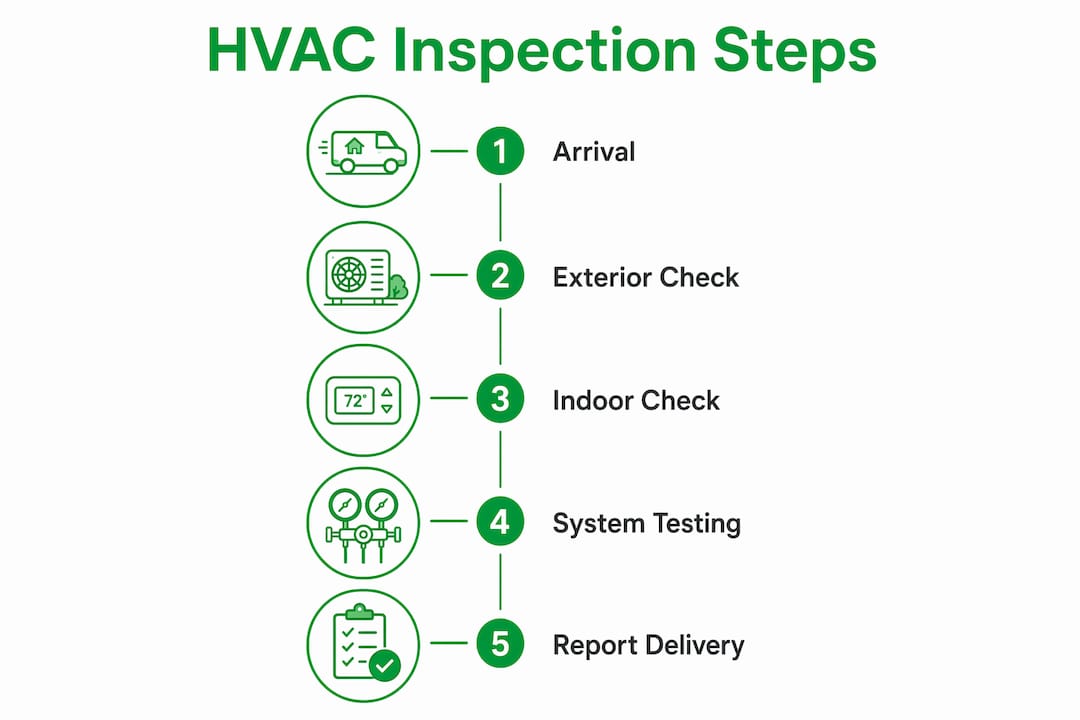
Standard inspection workflows follow discrete phases, from pre-check through documentation, commonly referencing ASHRAE guidance and local mechanical codes for scope. Here is the typical sequence:
- Arrival and scope confirmation (several minutes). The technician introduces themselves, confirms what systems are included, and asks about any known issues. You should be present if possible.
- Exterior visual check (several minutes). The outdoor condenser unit, refrigerant lines, electrical disconnect, and flue or exhaust terminations are examined for physical damage, clearance, and code compliance.
- Indoor visual check (several minutes). The furnace, air handler, filter, ductwork access points, and condensate drain are inspected visually before anything is powered on.
- Operational testing (around half an hour). The technician cycles the system through heating and cooling modes, checks thermostat response, measures airflow, and verifies safety controls activate correctly.
- Safety testing (several minutes). This includes carbon monoxide spot checks near the heat exchanger and flue, gas pressure verification where applicable, and confirmation that all safety shutoffs function.
- Documentation and wrap-up (several minutes). Findings are photographed and noted. The technician walks you through the major items before leaving.
| Phase | Approximate time |
|---|---|
| Arrival and scope | 5–10 min |
| Exterior visual | 10–15 min |
| Indoor visual | 10–15 min |
| Operational testing | 20 min |
| Safety testing | 10–15 min |
| Documentation and wrap-up | 10–15 min |
| Total visit | 1–2 hours |
A single-system home typically takes about an hour to an hour and a half. Homes with multiple systems, attic or crawlspace equipment, or older units can require longer visits.

Why should you get an HVAC inspection?
The importance of HVAC inspections comes down to three things: lower costs, safety, and documentation you can actually use.
- Energy savings. Clogged filters, dirty coils, and restricted airflow force your system to run longer to reach the set temperature. Inspections identify these inefficiencies before they show up as a spike on your utility bill.
- Safety. Trained technicians spot carbon monoxide buildup, gas leaks, and electrical hazards that are not obvious to the average homeowner. These are not theoretical risks; a cracked heat exchanger can vent CO into your living space without any visible sign.
- Negotiation leverage for buyers. A documented inspection report with photos and severity ratings gives buyers concrete evidence to request repairs or a price reduction before closing. Sellers cannot easily dismiss a written, dated finding from a credentialed technician.
- Warranty compliance. Many manufacturers require documented maintenance and inspection records to honor warranty claims. Without that paper trail, a $4,000 compressor replacement may come entirely out of pocket.
- Extended equipment life. Catching a failing capacitor or a refrigerant leak early costs far less than replacing a compressor that burned out because the problem went unaddressed.
Pro Tip: Schedule your inspection in early spring (before cooling season) or early fall (before heating season). Technician availability is highest then, appointment slots are easier to get, and any repairs can be completed before you actually need the system running at full capacity.
How often should you schedule an HVAC inspection?
For most central HVAC systems, once a year is the standard recommendation. Households with older equipment (10-plus years), heavy seasonal usage, or anyone with respiratory health concerns should consider twice a year, splitting the visits between spring and fall.
Schedule sooner if you notice any of these:
- Unusual odors (burning, musty, or sulfur-like smells)
- Visible soot around registers or the furnace cabinet
- The system short-cycles (turns on and off rapidly)
- A sudden, unexplained jump in your energy bill
- Visible water pooling near the indoor unit
- A carbon monoxide alarm activation
- New occupants moving into a home with an unknown service history
For buyers and sellers specifically: always schedule a specialist HVAC inspection during the buyer’s contingency period. A general home inspection covers the system visually, but it does not substitute for a specialist’s mechanical and capacity analysis. If you are selling, a pre-listing HVAC inspection removes a common buyer objection before it becomes a negotiating chip.
Major storms, renovations that disturb ductwork, or any work near the outdoor unit are also good triggers for a follow-up inspection.
How much does an HVAC inspection cost, and how long does it take?
Consumer data from Angi suggests that HVAC inspection costs vary widely depending on home size, system type, and accessibility. Most single-system residential inspections cost a few hundred dollars on average.
| Factor | Effect on cost |
|---|---|
| Number of systems | Each additional system adds to the total |
| Equipment location (attic, crawlspace) | Harder access increases time and cost |
| System type (heat pump vs. split AC vs. packaged) | Heat pumps have more components to test |
| Add-on testing (CO, gas pressure) | Adds modest cost; often worth it |
| Report deliverables (photos, video walk-through) | Photo-rich reports may carry a small premium |
Duration runs 1–3 hours for most residential properties. If you are on a tighter budget, lower-cost inspection options can still provide meaningful documentation without sacrificing the written report. What you should never trade away is the written report itself — a verbal summary has no value in a negotiation or a warranty claim.
What an HVAC inspection will not do
Home inspectors follow InterNACHI non-invasive standards: they perform visual and operational checks, not destructive testing or full system teardowns. Understanding the limits prevents unpleasant surprises.
What a standard inspection excludes unless specifically contracted:
- Full duct blaster or duct leakage testing
- Refrigerant recovery, recharge, or repair
- Combustion analysis beyond a CO spot check
- HVAC system balancing or airflow measurement by room
- Internal inspection of heat exchanger chambers (visual only from the exterior)
- Evaluation of underground or concealed fuel supply lines
The inspection documents condition on the day of the visit. It is not a prediction of future failures, and it does not come with a repair estimate unless the inspector also holds a contractor license and offers that service separately.
Always request a written scope and exclusions list before the inspection begins. That document protects you if a dispute arises about what was or was not evaluated.
What can you check yourself, and what requires a professional?
There are real tasks you can handle before the technician arrives. Doing them makes the inspection faster and gives the technician a cleaner baseline to work from.
Safe DIY checks before the visit:
- Replace or inspect the air filter and note its size and condition
- Clear debris (leaves, grass clippings) from around the outdoor unit
- Verify thermostat settings and replace batteries if the display is dim
- Check all supply and return vents for furniture or rug blockages
- Note any unusual noises, smells, or visible water stains near equipment
- Photograph the unit’s data plate (model, serial, tonnage) and any visible damage
A word on safety: Never attempt to open electrical panels, tighten wiring connections, or inspect gas lines yourself. Refrigerant handling requires EPA Section 608 certification. Heat exchanger inspection for cracks requires combustion analysis tools a homeowner does not have. These are not tasks where “good enough” is acceptable — a missed crack or a loose high-voltage connection can be fatal.
The technician brings tools and credentials you cannot replicate: refrigerant leak detectors, combustion analyzers, electrical testers rated for live circuits, and the training to interpret what they find against code and manufacturer specs. A DIY pre-inspection checklist helps you prepare, but it does not replace the professional visit.
How to prepare for your HVAC inspection
Getting ready takes less than an hour and meaningfully improves what the technician can accomplish.
Homeowner and buyer preparation checklist:
- Clear a 3-foot path to the indoor air handler, furnace, and electrical panel
- Remove any storage blocking the outdoor condenser unit
- Locate and have ready: previous service records, installation manuals, and any warranty paperwork
- Write down known issues (odd sounds, rooms that won’t cool, recent repairs) and share them at arrival
- Secure pets away from equipment areas
- Prepare a short list of questions for the technician
Pro Tip: Photograph the data plate on each unit (model number, serial number, refrigerant type, tonnage) and email those photos to the inspector when you schedule. It lets them research known issues for your specific equipment before they arrive, which can shorten the visit and sharpen their findings.
For buyers using a video inspection option, confirm ahead of time that the seller or listing agent will provide access and that all systems are powered on before the technician arrives. Jhunthomeinspections offers both in-person and video inspection options, which is particularly useful when you cannot be physically present at the property.
How to read and use your written inspection report
A complete HVAC inspection report should include photographed findings, severity classification, recommended next steps, and a clear scope and limits statement describing what was and was not inspected. Here is what a well-structured report contains:
- Executive summary: a brief overview of overall system condition
- Photographed findings: each defect or concern shown visually with a caption
- Severity classification: typically Safety Issue, Major Defect, or Repair Recommendation
- Urgency estimate: immediate action required vs. monitor vs. plan for replacement
- Recommended next steps: which trade to call (HVAC contractor, electrician, plumber) and why
- Scope and limits statement: what was inspected, what was excluded, and why
If you are a buyer:
- Use safety issues and major defects to request repairs or a price reduction before closing
- Request a re-inspection after the seller completes repairs to confirm the work was done
- Get independent contractor quotes for any major items before waiving your contingency
If you are a homeowner:
- Schedule service for the highest-severity items first
- Retain the report with your home maintenance records — manufacturers and insurers may ask for it
- Use the report as a baseline for your next annual inspection
Jhunthomeinspections delivers reports within 24 hours and includes the Create Request List™ tool, which lets buyers and their agents convert findings directly into a repair request without manually reformatting the report.
Safety red flags that need immediate action
Some findings cannot wait for a scheduled repair appointment. Trained technicians watch for conditions that pose an immediate risk to occupants, and you should know what to do if you encounter them before the inspection.
Red flags requiring immediate action:
- Carbon monoxide alarm activation anywhere in the home
- Strong gas odor (rotten egg smell) near the furnace, water heater, or gas lines
- Visible flames outside the burner chamber or soot deposits on the furnace cabinet
- Sparking, burning smell, or scorch marks on electrical components
- Severe water leak contacting electrical wiring or panels
What to do:
- Shut down the HVAC system at the thermostat if it is safe to reach
- Open windows and doors to ventilate
- Evacuate immediately if CO is suspected — do not re-enter until emergency services clear the building
- Call your gas utility’s emergency line (not a general service number) for any gas odor
- Call a licensed HVAC professional for follow-up once the immediate hazard is resolved
Inspectors are trained to identify CO buildup, gas leaks, and electrical hazards that homeowners routinely miss. Documented findings from a professional inspection may also be required by your insurer or to support a warranty claim, so keep the report and all associated photos.
For a broader look at how inspectors approach safety across all home systems, the role of the inspector in safe housing covers the full scope.
What the research says about inspections reducing costs and risk
The evidence for regular HVAC inspections is straightforward, and it comes from multiple directions.
- Energy efficiency: Regular inspections are recommended as proactive investments that lower utility bills by catching clogged filters and restricted airflow before they force the system to run harder than necessary.
- Safety detection: Technicians identify CO buildup, gas leaks, and electrical hazards that homeowners typically cannot detect without specialized equipment. These are not edge cases; they are among the most common findings in older residential systems.
- Warranty protection: Documented professional maintenance and inspection records are frequently required by manufacturers to preserve warranty protections. Homeowners who skip inspections often discover this only after a major component fails.
Treating an HVAC inspection as a proactive investment rather than a reactive expense is the single most consistent recommendation across industry guidance. A small annual cost to document system condition is almost always less than one emergency repair call, and far less than a premature full-system replacement.
The InterNACHI training standards reinforce the scope distinction: home inspectors perform non-invasive visual and operational checks and do not substitute for a specialist HVAC contractor’s deeper mechanical assessment. Both serve a purpose. For insurance documentation, the connection between home maintenance records and coverage is another reason to keep inspection reports on file.
Key Takeaways
An HVAC inspection is a non-invasive, documented condition assessment that covers safety, efficiency, and warranty compliance — and it is distinct from a maintenance or tune-up visit.
| Point | Details |
|---|---|
| Inspection vs. maintenance | Inspections diagnose and document; maintenance actively services the system. Never confuse the two. |
| Cost and duration | National average runs near $300, with a range of $70–$500; most visits take 1–2 hours. |
| Safety is the top priority | Cracked heat exchangers, CO risk, gas leaks, and unsafe electrical conditions require immediate action. |
| Report is a working document | Use severity-classified, photo-rich findings for buyer negotiations, warranty claims, and future service planning. |
| Jhunthomeinspections | Delivers written reports within 24 hours with the Create Request List™ tool for the St. Louis Metro area and Southern Illinois. |
Why I recommend a specialist HVAC inspection every time
Most homeowners treat an HVAC inspection as something to check off a list — usually right before closing on a house. That framing undersells what the report actually gives you. A documented, photo-rich condition assessment from a credentialed technician is one of the few pieces of paper that carries real weight in three separate conversations: with the seller during negotiation, with the manufacturer if a warranty claim comes up, and with your insurer if a system failure causes property damage.
The gap I see most often is buyers who rely on a general home inspection and assume the HVAC section is thorough enough. It usually is not. A general inspector follows InterNACHI standards, which are intentionally non-invasive and do not require combustion analysis, refrigerant testing, or heat exchanger probing. Those are exactly the tests that catch the expensive problems. Scheduling a specialist inspection during the contingency period costs a few hundred dollars. Discovering a cracked heat exchanger after closing costs several thousand.
For homeowners who are not in a transaction, the same logic applies. Annual inspections are not a luxury. They are the mechanism by which small problems stay small.
At Jhunthomeinspections, we support first-time buyers, veterans, and low-income families through this process with clear reports, same-day scheduling when possible, and a 24-hour report turnaround. The Create Request List™ tool turns findings into a repair request your agent can send directly to the seller. That is not a minor convenience — it saves real time in a transaction where every day counts.
Jhunthomeinspections covers the St. Louis Metro area with same-day scheduling
When you need a documented HVAC evaluation you can actually use, Hunt Home Inspection, LLC brings the full picture: buyer’s inspections, maintenance inspections, re-inspections, and a menu of add-ons including radon, mold, sewer camera, termite, and environmental testing. Every report is delivered within 24 hours and includes the Create Request List™ so buyers and agents can act on findings immediately.

For buyers who cannot be on-site, the video inspection option provides a full documented walkthrough without requiring your physical presence. Qualifying transactions can also use the pay-at-close option, which aligns the inspection cost with your closing timeline. Veterans can find specific guidance on inspection steps tied to VA benefits at the VA benefit inspection page.
Ready to schedule? View the full list of inspection services and book your appointment for the St. Louis Metro area or Southern Illinois.
Useful sources and further reading
- NIST HVAC Functional Inspection and Testing Guide — federal-level commissioning procedures and inspection checklists for HVAC systems
- ENERGY STAR HVAC Functional Testing Checklist — credentialed testing protocols aligned with ANSI/ACCA standards
- ENERGY STAR Heating and Cooling Maintenance Checklist — practical seasonal maintenance reference
- CDC: Carbon Monoxide FAQs — authoritative guidance on CO risks and prevention
- InterNACHI HVAC Inspection Study Guide — residential HVAC inspection standards and scope definitions
- Angi HVAC Inspection Checklist — consumer-facing checklist and cost data
- Florida PACE: Importance of Regular HVAC Inspections — efficiency, safety, and warranty documentation rationale
- Hunt Home Inspection Inspection Services — service types, scheduling, and report delivery for the St. Louis Metro area and Southern Illinois
- Hunt Home Inspection: Your Report — report format, photos, and the Create Request List™ tool
- Inspection Company Selection Criteria for Homebuyers — how to evaluate and choose an inspector
Recent Comments